7 Copying
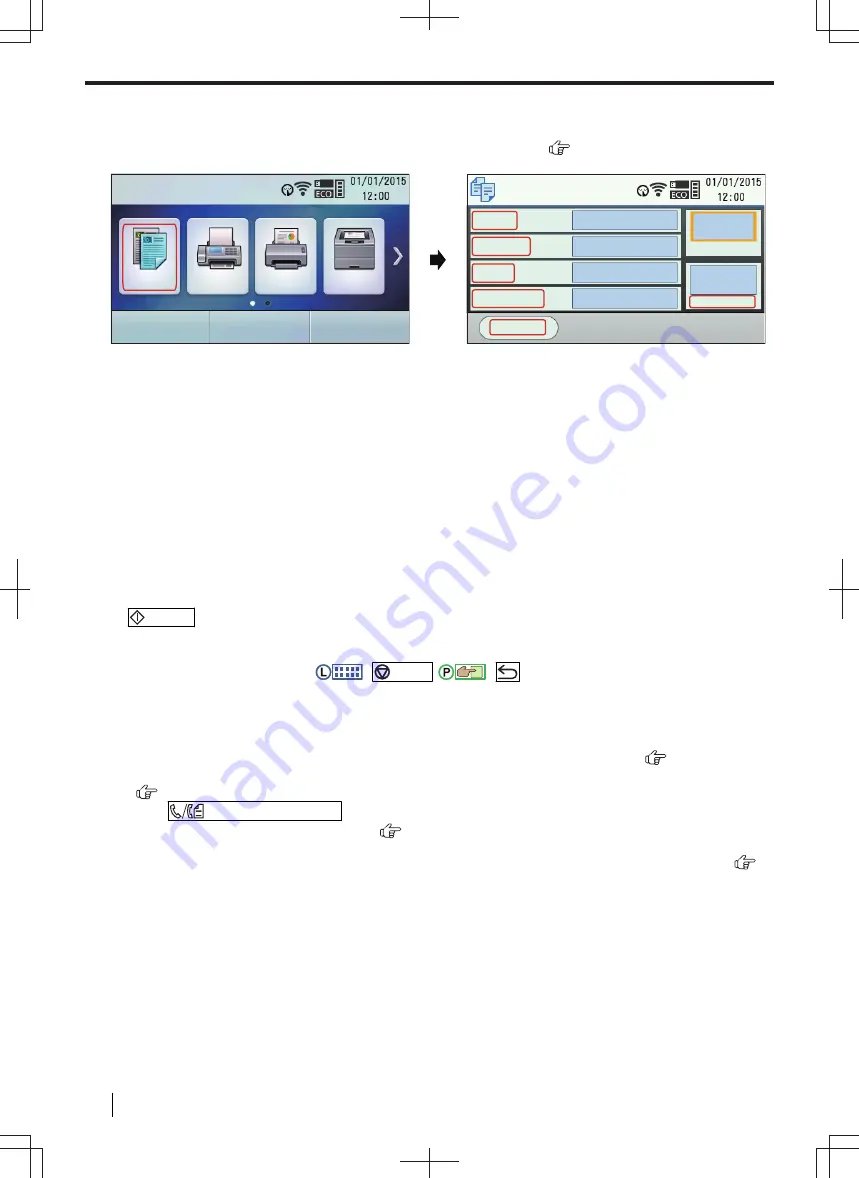
7.1 Touch panel screen transition for copying
COPY
FAX
SCAN
QUICK JOB
Quality
Copy Size
Duplex
Page Layout
Settings
3: Text/Photo
A4>#1:A4-R
Off
Off
100%
01
Zoom
Copy Number
7.2 Making a copy
7.2.1 Basic procedures for making a copy
1.
Make sure that the unit is set to the copy mode.
2.
Set the original.
3.
If necessary, change the copy size (original document size and recording paper size), resolution and
contrast according to the type of document.
• To select the copy size, see page 87.
• To select the contrast, see page 87.
• To select the resolution, see page 87.
4.
If necessary, enter the number of copies (up to 99).
5.
/START
Note
• After you finish copying, press
:
/STOP
/
:
to reset the settings you set in steps 3
• When mode restriction (feature #154) is activated, enter the department code when copying. If the
department code does not match, or the department code restricts the copy mode, copying will be
cancelled.
• You can change the default operation mode (feature #463) (2-line LCD models only). (
)
• You can change the time before returning to the default operation mode or home screen (feature #464).
(
)
• If the
/FAX AUTO ANSWER
light is ON, the unit can receive faxes automatically even when in the
copy mode (fax supported models only). (
)
When using the documents of same width but of different lengths (automatic document feeder only) (
)
Important
•
Make sure that recording paper sizes corresponding to the sizes of the originals are set for the
input trays beforehand (feature #380, #381, #382, and #389).
Set the original document sizes to be the same sizes as the originals in step 3 on "7.2.1 Basic procedures for
making a copy". For example, select
"
A4+A5-R
"
when the original sizes are A4 and A5-R.
Note
• This feature is not available for the following features.
– Zoom copy (page 89)
– Quick ID copy feature (page 92)
– Image repeat feature (page 93)
7 Copying
86
Operating Instructions


