8 Fax
8.1 Availability of the fax feature
Important
•
The fax feature may not be available for your unit. See “
List of available features and
equipment” on page 11 whether your unit has the feature.
8.2 Preparation for sending a fax
We recommend programming the following so that they appear on the top of each page sent.
– Date and time (feature #101)
– Your logo (feature #102)
– Fax number (feature #103)
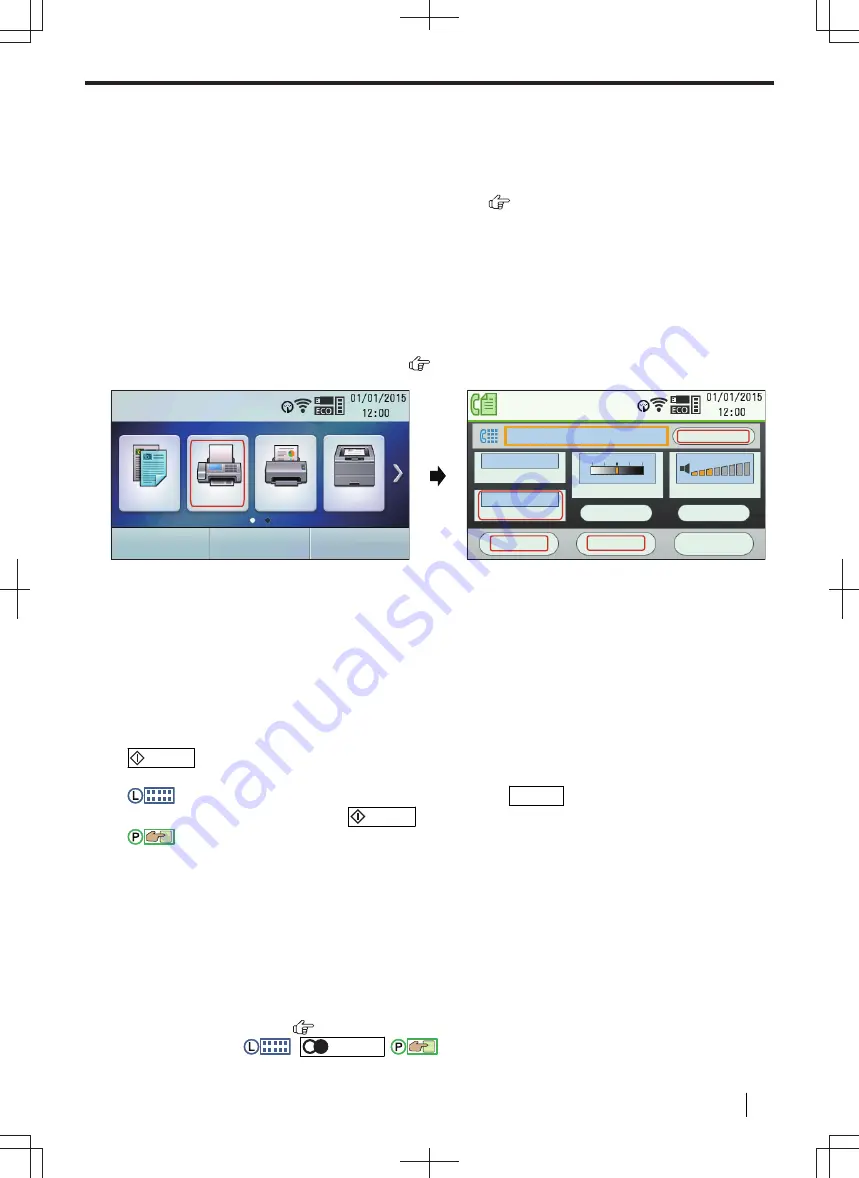
8.3 Touch panel screens for fax
COPY
FAX
SCAN
QUICK JOB
Address Book
Standard
Resolution
Contrast
Ringer Volume
Off
Duplex
Pause
Flash
Settings
Email FAX
Monitor
8.4 Basic procedure for sending a fax
Important
•
Set the unit to the fax mode.
1.
Set the original.
2.
If necessary, change the resolution, contrast and duplex setting according to the type of document.
3.
Dial the fax number or select the destination from stored items.
4.
/START
When using the scanner glass,
scan the 1st page.
:
To scan the next page, place the document and press
OK/SET
. Repeat this until all the
documents are scanned, then press
/START
.
:
To scan the next page, place the document and press
"
Scan
"
. Repeat this until all the documents
are scanned, then press
"
Send
"
.
Note
• To change the contrast/resolution/duplex setting, see the following.
– "To select the contrast" (page 106)
– "To select the resolution" (page 106)
– "To select the duplex setting" (page 106)
• If the line is busy or if there is no answer, the unit will automatically redial the number 2 or more times in the
following functions.
– Sending a fax
– Broadcast transmission (
)
– Redialling using
:
/REDIAL
/
:
"
Redial
"
*1
For broadcast transmission, the line will be skipped and redialled later.
8 Fax
Operating Instructions
105


