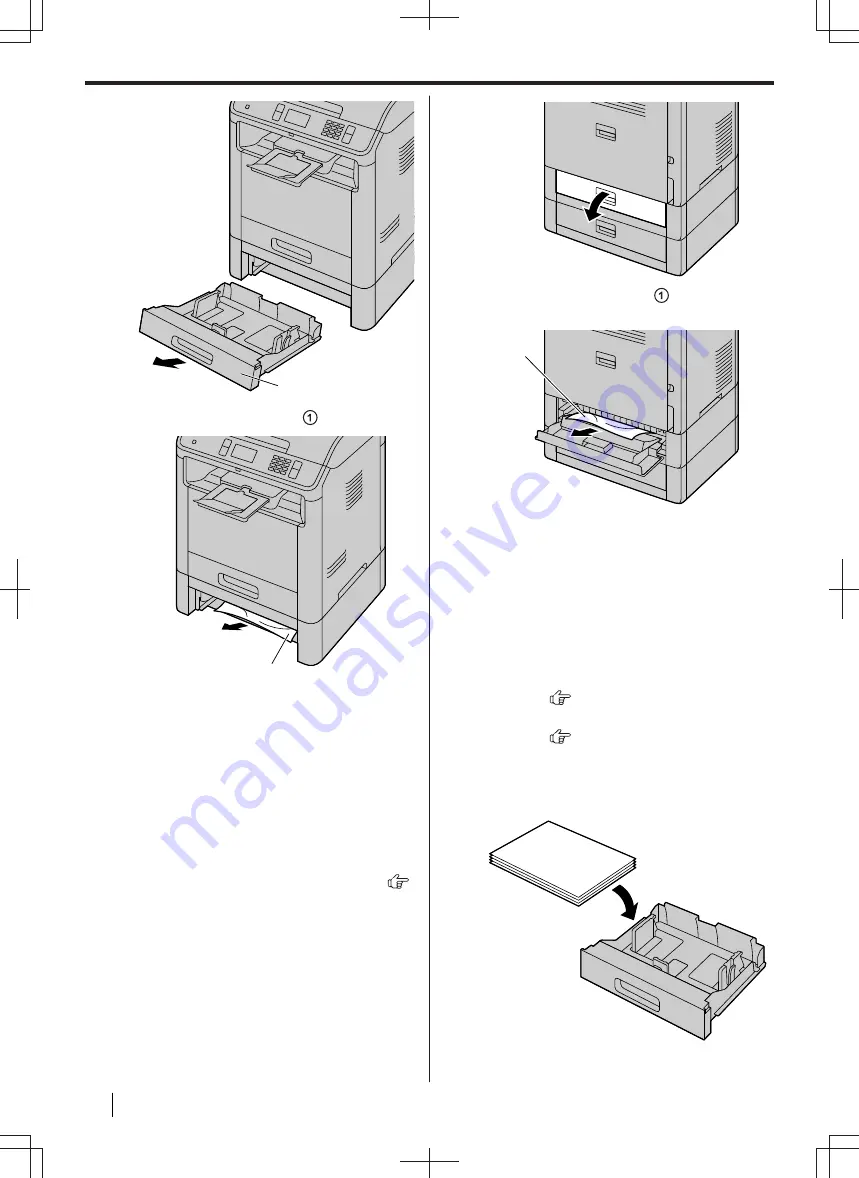
A
2.
Remove the jammed paper ( ) carefully.
A
If the message indicating the paper jam is still
displayed, continue to Step 3 (page 172).
3.
Insert the input tray into the unit.
Note
• If there is any recording paper remaining in
the unit, remove it from the inside of the
unit.
Step 3: When the recording paper has jammed
inside the rear cover of the lower input tray 1
(Lower input tray 2 supported models only) (
):
1.
Open the rear cover of the lower input tray 1.
2.
Remove the jammed paper ( ) carefully by
pulling it toward you.
A
3.
Close the rear cover of the lower input tray 1.
12.1.4 When the recording paper in the
paper input tray is not fed into the unit
properly
The display will show the following:
–
"
CHECK PICK UP INPUT TRAY #1
"
(standard
input tray)
–
"
CHECK PICK UP INPUT TRAY #3
"
(lower
input tray 1) (
)
–
"
CHECK PICK UP INPUT TRAY #4
"
(lower
input tray 2) (
)
1.
Pull the input tray indicated on the display
completely out.
2.
Re-load the recording paper.
3.
Insert the input tray into the unit.
12.1.4 When the recording paper in the paper input tray is not fed into the unit properly
172
Operating Instructions


