background image

Chapter 5: Optional Equipment Installation

Figure 5-4. External Tooling Location, Outer Link (bottom)

5.3 Installing the Solenoid Valve Kit

This procedure describes how to install the Solenoid Valve Kit (part number 02853-000) on a
standard robot.

NOTE:

If you are installing the Solenoid Valve Kit on a robot with the IP65

option or the Cleanroom option, special considerations must be made. Refer to
Robot Solenoid Option Consideration for IP65 Robots on page 163 and Robot
Solenoid Option Consideration for Cleanroom Robots on page 168 
for more
information.

Before beginning this procedure, have the following items available.

l

Hex drives

l

Cable ties

l

Diagonal wire cutters

l

Solenoid Valve Kit

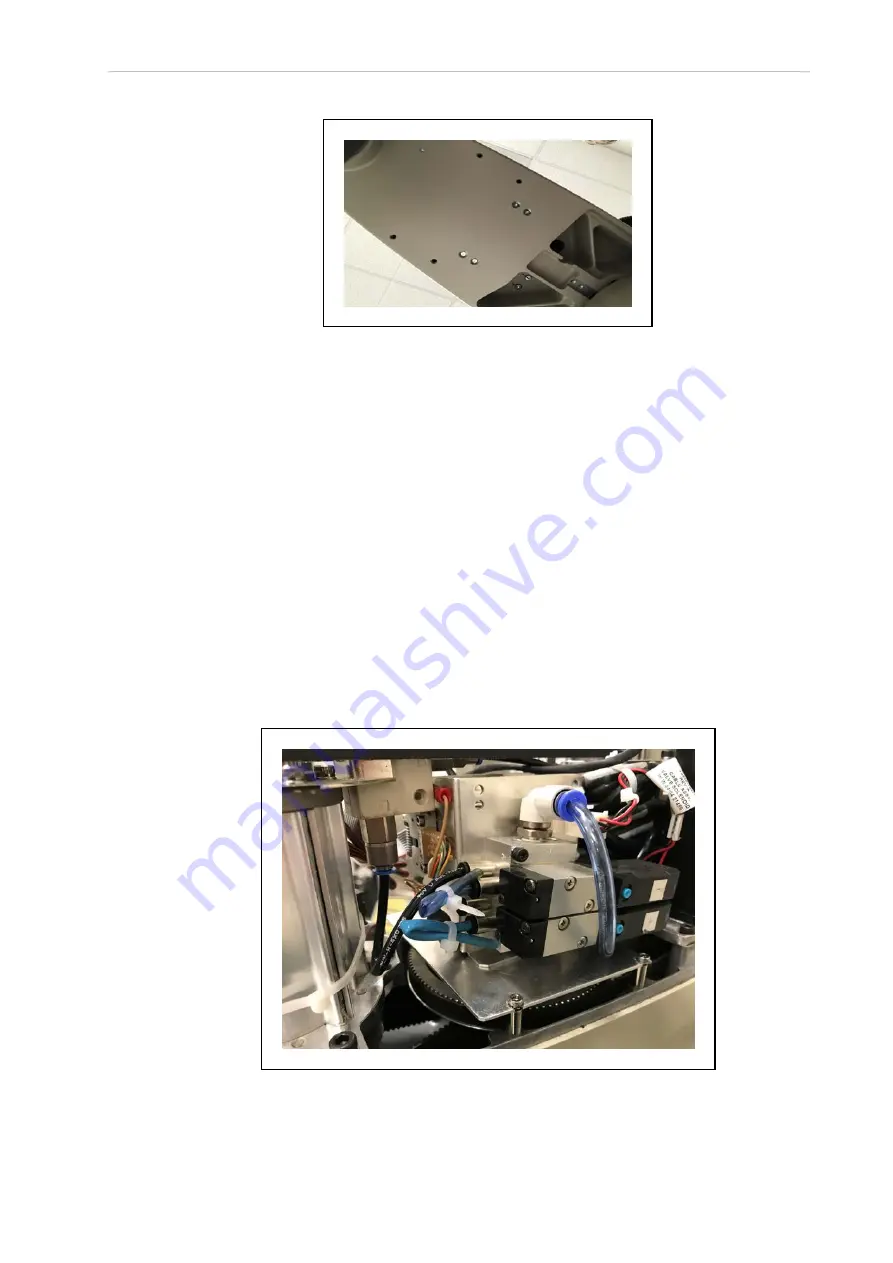
Figure 5-5. Solenoid Valve Kit Assembly Installed

24402-000 Rev B

eCobra 600 and 800 Robots with EtherCAT

89

Summary of Contents for eCobra 600

Page 1: ...eCobra 600 and 800 Robot with EtherCAT User s Manual I653 E 02...

Page 2: ...y Technologies Inc assumes no responsibility for any errors or omissions in the documentation Copyright OMRON Robotics and Safety Technologies Inc by OMRON Corporation All rights reserved Sysmac and S...

Page 3: ...l 29 Camera Bracket Kit 31 Adjustable Hardstops 32 Optional Cables 33 Chapter 2 Safety 37 2 1 Dangers Warnings and Cautions 37 Alert Levels 37 Alert Icons 37 Special Information 38 2 2 Safety Precauti...

Page 4: ...g the EtherCAT Node ID 58 Setting the EtherCAT Node ID Using Hardware Switches 59 Chapter 4 System Cable Installation 61 4 1 Basic System Cable Layout 61 List of Cables and Parts 62 Cable Installation...

Page 5: ...bot States 101 6 3 EtherCAT Communications Description 102 System Behavior with EtherCAT Communication Errors 103 6 4 Brakes 103 Brake Release Button 103 Remote Brake Release Feature 104 6 5 Robot Con...

Page 6: ...ter 9 IP65 Option Considerations 153 9 1 IP65 Option Classification 153 9 2 User Requirements to Meet IP65 Rating 153 Sealing the Tool Flange 154 Pressurizing the Robot 154 9 3 Cable Seal Assembly 156...

Page 7: ...tatus Codes 171 11 1 Robot Display Panel 171 11 2 Status Codes Table 171 Appendix 177 A 1 Unpacking and Inspecting the Equipment 177 Before Unpacking 177 After Unpacking 177 Inspecting the Equipment 1...

Page 8: ...8 eCobra 600 and 800 Robots with EtherCAT 24402 000 Rev B Revision History Revision Code Release Date Details A July 2020 Original release B August 2020 Minor corrections and updates...

Page 9: ...Application Controller Operation Manual Cat No W621 Describes the operating procedures of the IPC Application Controller eV 3 User s Manual Cat No I651 Provides a description of the eV programming la...

Page 10: ...ng personnel who must also have knowledge of com mon programming practices and robotic control methods l Personnel in charge of introducing FA systems l Personnel in charge of designing FA systems l P...

Page 11: ......

Page 12: ...T Teaching pendant T20 with built in EtherCAT communications Slave Terminal Vision sensor OMRON robot Robot Integrated CPU Unit NJ501 R I O control external devices 1S series Servo Drives G5 series Se...

Page 13: ...s with EtherCAT If there are differences based on type or options this manual will provide details in the associated sections Robot Amplifier and Controller The robot s amplifier and controller is int...

Page 14: ...sses these commands to execute robots motions and other functions The iCS ECAT contains the robot interface panel which provides connections for power sup ply peripheral devices such as the front pane...

Page 15: ...ortex A9 ARM Processors 1 GB SDRAM l 8 GB MicroSD card l Low EMI for use with noise sensitive equipment l No external fan l 8 kHz servo rate to deliver low positional errors and high performance path...

Page 16: ...owing table lists the varying features and functionality that are available with different system configurations Feature eCobra Standard eCobra Pro Vision Support Yes Yes Robot position latching No Ye...

Page 17: ...link Robot Connections This section describes the various external and internal ports and connectors that are available on the standard eCobra robot NOTE Some connections may differ on robots with the...

Page 18: ...he robot to another set of matching con nectors on the top of the outer link as shown below Additional Information Refer to Technical Specifications on page 131 for more information Figure 1 7 Pneumat...

Page 19: ...electrical pass through IO Blox Connector The IO Blox connector on Joint 1 provides an interface to add IO Blox expansion I O modules to a robot NOTE Refer to Connecting Digital I O to the System on p...

Page 20: ...ided below Additional Information An optional Solenoid Valve Kit part number 02853 000 is available for use with the internal solenoid connector Refer to Robot Options on page 25 and Technical Specifi...

Page 21: ...more inform ation Figure 1 11 OP3 4 Connector Location Table 1 4 OP3 4 Connector Pinout Pin Description Pin Location 1 Output 3003 24 VDC 2 0 VDC 3 Output 3004 24 VDC 4 0 VDC End of Arm Break away Se...

Page 22: ...g to immediately turn OFF high power when the circuit becomes open The end of arm break away sensor connector location and pin details are provided below Additional Information Refer to End of Arm Bre...

Page 23: ...are located near the EOAPWR connector If they are removed the cal ibration data will be lost and the robot must be factory recalibrated which requires special software and tools Figure 1 13 EOAPWR Con...

Page 24: ...a Front Panel Use the information below to understand all connection points for the iCS ECAT robot interface panel Figure 1 14 iCS ECAT Robot Interface Panel Item Meaning A AC Power Supply Connector...

Page 25: ...ncoders eCobra Pro only and IO Blox external I O This requires the XBELTIO Adapter cable Refer to Basic System Cable Layout on page 61 for more information XBELTIO J XIO Connector Used for user I O si...

Page 26: ...ove the plugs The following image shows an installed Solenoid Valve Kit Additional Information Refer to Solenoid Valve Kit Installation Procedure on page 90 for more information Figure 1 15 Solenoid V...

Page 27: ...and up to 4 additional IO Blox units for a total of 8 units to the eCobra Pro Additional Information Refer to IO Blox Connections on page 68 and the IO Blox User s Guide 04638 000 for more information...

Page 28: ...information about operating a robot with the T20 pendant IMPORTANT The T20 pendant can only communicate with the robot it is dir ectly connected to Figure 1 18 T20 Pendant IPC Application Controller...

Page 29: ...ith the requirements of IEC 60204 1 and ISO 13849 IMPORTANT If the Front Panel high power ON OFF lamp part number 27400 29006 fails you might incorrectly assume that High Power is OFF and the robot is...

Page 30: ...safely work near the robotl Manual mode initiates hardware and software limits to robot speed at no more than 250 mm sec There is no high speed motion available in Manual mode WARNING PERSONAL INJURY...

Page 31: ...s use NOTE If enabled you must press the Front Panel button while it is blinking default time out is 10 seconds If the button stops blinking you must enable power again F Emergency Stop Switch A dual...

Page 32: ...er to Installing the Camera Bracket Kit on page 93 for more information Adjustable Hardstops Optional adjustable hardstops are available to modify the robot s work envelope by installing physical stop...

Page 33: ...e optional XBELT IO Adapter cable splits the XBELTIO port on the robot interface panel into a belt encoder branch and an IO Blox branch and an RS 232 branch NOTE You can use the FORCE EXPIO connector...

Page 34: ...o the system without using an IO Blox unit IMPORTANT This cable is not compatible with the XIO Ter mination Block Additional Information Refer to XIO Breakout Cable Pinout on page 34 for more informat...

Page 35: ...1 2 Orange 14 Input 2 2 Orange Black 15 Input 3 2 Gray 16 Input 4 2 Gray Black 17 Input 5 2 Violet 18 Input 6 2 Violet White 19 Output 1 Pink 20 Output 2 Pink Black 21 Output 3 Light Blue 22 Output 4...

Page 36: ......

Page 37: ...ntially hazardous situation which if not avoided will result in minor or moderate injury and might result in serious injury fatal ity or significant property damage CAUTION Identifies a potentially ha...

Page 38: ...OPERTY DAMAGE These robots can cause serious injury or fatality or damage to itself and other equipment if the following safety precautions are not observed l If you install operate teach program or m...

Page 39: ...contact with the robot during operation 2 4 Robot Behavior This section provides important information about the devices used to limit robot movements Hardstops If the robot runs into one of its hards...

Page 40: ...izing or non ionizing radiation l In hazardous environments with explosive gas or oil mist l In medical or life saving applications l In residential applications l Without performing a risk assessment...

Page 41: ...cal Equipment WEEE All electrical and elec tronic products should be disposed of separately from the municipal waste system via des ignated collection facilities For information about disposal of your...

Page 42: ......

Page 43: ...ol flange Install the Tool Flange on page 46 3 Installing the Front Panel Installing the Front Panel on page 47 4 Install user supplied safety equip ment Installing User Supplied Safety Equipment on p...

Page 44: ...as locating points for dowel pins in the mounting surface Using locating pins allows you to remove and reinstall the robot in the same position IMPORTANT Excessive vibration or mounting flexure degrad...

Page 45: ...and position it directly over the mounting surface WARNING Always use at least two people when lifting the robot Do not attempt to extend robot inner or outer links until you have firmly secured the r...

Page 46: ...eriodic maintenance 3 3 Install the Tool Flange This section provides information to install the tool flange The tool flange which you mount on the robot s quill is the attachment point for all extern...

Page 47: ...r to tighten one of the socket head screws part of the way then tighten the other one the same amount Alternate between the two screws so there is even pres sure on both The torque specification for e...

Page 48: ...ront Panel Schematic Use the following diagram to understand all Front Panel electrical connections DANGER PERSONAL INJURY RISK If you supply your own Front Panel E Stop its design must comply with th...

Page 49: ...the robot Depending on the design of the workcell you can use safety gates light curtains emergency stop devices and other safety equipment to create a safe environment WARNING Installing commissioni...

Page 50: ...4 17 Line E Stop same as pins 3 16 N C contacts Shorted if NOT Used 5 18 Muted safety gate CH 1 causes E Stop in Automatic mode only N C contacts Shorted if NOT Used 6 19 Muted Safety Gate CH 2 same...

Page 51: ...on off momentary push button User supplies momentary push button to enable High Power to system Non voltage Free Contacts 5 13 System Supplied 5 VDC and GND for High Power On Off Switch Lamp User sup...

Page 52: ...ant E Stop Push button CH 2 3 11 Pendant Enable CH 1 Hold to run 4 12 Pendant Enable CH 2 Hold to run 13 Serial GND Logic GND 7 Pendant TXD eV to Pendant TXD 8 Pendant RXD eV to Pendant RXD 14 No conn...

Page 53: ...XUSR 18 XSYSTEM 44 XUSR 19 ES1 ES2 SR1 SR2 AM2 AM1 XSYSTEM 14 XUSR 5 XSYSTEM 30 XUSR 6 XSYSTEM 33 XFP 13 XSYSTEM 3 XFP 5 XSYSTEM 31 XFP 6 XSYSTEM 34 XFP 14 XSYSTEM 5 XFP 4 XFP 3 XSYSTEM 19 XFP 12 XSY...

Page 54: ...connectors This means the controller system can duplicate E Stop functionality from a remote location using voltage free contacts Refer to Figure 3 7 The XUSR connector provides external two channel...

Page 55: ...onnected to the input of another controller the Line E Stop input is the point to connect the other controller s output contacts See Figure 3 7 for more information IMPORTANT Do not use the Line E Sto...

Page 56: ...ies with the Front Panel Manual Automatic mode contacts Both the Front Panel and the user contacts need to be closed to allow Automatic mode WARNING PERSONAL INJURY RISK Do not connect user supplied M...

Page 57: ...her control equipment or from a location other than the Front Panel requires a custom splitter cable In this situation place a second momentary contact for high power ON OFF in parallel with the Front...

Page 58: ...could cause unpredictable behavior from the robot system 3 6 Setting the EtherCAT Node ID The EtherCAT Node ID address can be set with two methods Use Hardware Switches on the Robot Use the hardware...

Page 59: ...hysical switches that can be used for setting the EtherCAT node ID address as described in the figure below The switch settings are checked when robot 24 VDC power is applied IMPORTANT Turn OFF AC and...

Page 60: ...ion Rotary Switch x1 Sets bits 3 to 0 of the EtherCAT node ID The default setting for this switch is 0 EtherCAT Node ID Address Example Use the following example to understand how to set the EtherCAT...

Page 61: ...nt neutral DANGER ELECTROCUTION RISK Only a skilled and instructed person must install AC power Clause 5 2 4 of the ISO 10218 1 requires that the person installing the system must use fail safe lockou...

Page 62: ...s with EtherCAT 24402 000 Rev B Figure 4 1 Typical System Cable Connections List of Cables and Parts The following table identifies and provides details about cables and parts illustrated in Basic Sys...

Page 63: ...peripherals ser vos vision systems etc X D NJ series Robot Integrated CPU NJ501 RXXX X E Ethernet IP cable X F Network switch X G User supplied PC X H Ethernet IP cable 1 X I Ethernet RJ45 Port X J Et...

Page 64: ...ation Steps Use the following procedure to install all necessary system cables Refer to Basic System Cable Layout on page 61 for references to item letters Additional Information Refer to iCS ECAT Rob...

Page 65: ...es to their respect ive devices Additional Information Ethernet EtherCAT network con nections may differ Contact your local OMRON support for more information B C D E F G H J K L XBELT IO Belt Encoder...

Page 66: ...ter Cable Connector 09443 000 X X DB15 Female G Belt Encoder 1 Connector M12 Female 8 pin H Belt Encoder 2 Connector M12 Female 8 pin Pinouts for XBELT IO Adapter NOTE In the following figures the cal...

Page 67: ...rstand the different digital I O connection methods Table 4 2 Digital I O Connection Options Connection I O Capacity Additional Information XIO Connector on the robot interface panel 12 inputs 8 outpu...

Page 68: ...ovides information about digital I O signal configuration NOTE The eCobra Standard can only support a maximum of 4 daisy chained IO Blox devices IO Blox Connections When installing more than one IO Bl...

Page 69: ...ctor on the robot interface panel F FORCE EXPIO Connector on XBELTIO cable G IO Blox to Robot cable 3 m part number 04677 030 H IO Blox Group 2 eCobra Pro only maximum 4 IO Blox units XIO Termination...

Page 70: ...robot signals and external signals in the ranges below NOTE Each IOBlox group has a maximum of 4 IOBlox units daisy chained for a range of 32 signals 4 units x 8 inputs outputs Default Input Signal A...

Page 71: ...Blox 8 1185 to 1192 3 XIO XIO N A Inputs on the iCS ECAT 1193 to 1204 EXPIO IOBlox Group 1 OFF OFF Inputs on IOBlox 1 1225 to 1232 ON OFF Inputs on IOBlox 2 1233 to 1240 OFF ON Inputs on IOBlox 3 1241...

Page 72: ...iCS ECAT 1385 to 1396 EXPIO IOBlox Group 1 OFF OFF Inputs on IOBlox 1 1417 to 1424 ON OFF Inputs on IOBlox 2 1425 to 1432 OFF ON Inputs on IOBlox 3 1433 to 1440 ON ON Inputs on IOBlox 4 1441 to 1448...

Page 73: ...nputs on IOBlox 3 1625 to 1632 ON ON Inputs on IOBlox 4 1633 to 1640 XBELTIO IOBlox Group 2 OFF OFF Inputs on IOBlox 5 1641 to 1648 ON OFF Inputs on IOBlox 6 1649 to 1656 OFF ON Inputs on IOBlox 7 165...

Page 74: ...Outputs on IOBlox 2 41 to 48 OFF ON Outputs on IOBlox 3 49 to 56 ON ON Outputs on IOBlox 4 57 to 64 XBELTIO IOBlox Group 2 OFF OFF Outputs on IOBlox 5 65 to 72 ON OFF Outputs on IOBlox 6 73 to 80 OFF...

Page 75: ...IOBlox 2 329 to 336 OFF ON Outputs on IOBlox 3 337 to 344 ON ON Outputs on IOBlox 4 345 to 352 XBELTIO IOBlox Group 2 OFF OFF Outputs on IOBlox 5 353 to 360 ON OFF Outputs on IOBlox 6 361 to 368 OFF O...

Page 76: ...ON Outputs on IOBlox 4 633 to 640 XBELTIO IOBlox Group 2 OFF OFF Outputs on IOBlox 5 641 to 648 ON OFF Outputs on IOBlox 6 649 to 656 OFF ON Outputs on IOBlox 7 657 to 664 ON ON Outputs on IOBlox 8 6...

Page 77: ...Input 5 1 1 1101 9 Input 6 1 1 1102 10 GND 11 24 VDC 12 Common 2 2 13 Input 1 2 2 1103 14 Input 2 2 2 1104 15 Input 3 2 2 1105 16 Input 4 2 2 1106 17 Input 5 2 2 1107 18 Input 6 2 2 1108 19 Output 1...

Page 78: ...draws power from the primary 24 VDC input to the robot through a self resetting polyfuse The outputs are accessed through direct connection to the XIO connector Optionally use the XIO Termination Blo...

Page 79: ...nel 3 Crimp the pins to the wires using a crimping tool 4 Insert the pins into the connector Confirm that the 24 VDC and 24 VDC return wires are in the correct terminals in the plug Connecting the 24...

Page 80: ...Saber 18 A 2 pin Connector G Ground screw on robot interface panel NOTE To comply with standards DC power should be supplied over a shiel ded cable with the shield connected to frame ground at both en...

Page 81: ...for the installation and operation of the robot system DANGER ELECTROCUTION RISK ISO 10218 1 Clause 5 2 4 mandates that during installation you must provide a fail safe lockout to prevent unauthorize...

Page 82: ...AC Power Installation with Single Phase Supply Key Meaning A Robot 1 200 240 VAC B User supplied AC power cable C F1 10A D NOTE F1 is user supplied and must be slow blow E L Line F N Neutral G E Earth...

Page 83: ...Use the following procedure to make the 200 240 VAC power supply cable Before you begin you will need 3 wire 0 8 mm2 18 AWG cable long enough to reach from the AC power source to the robot 1 Locate th...

Page 84: ...Specifications on page 145 for more information IMPORTANT Do not apply AC power until all installation steps are complete and verified and all safety measures are in place 1 With the AC supply OFF co...

Page 85: ...The Joint 3 quill and the tool flange are not grounded to protective earth If hazardous voltages are present at any user supplied robot mounted equipment or tooling you must install a ground connectio...

Page 86: ......

Page 87: ...other end of arm tooling An installed end effector is shown in the figure below as an example Figure 5 1 Suction Cup End effector Installed You can attach end effectors to the tool flange using four...

Page 88: ...cation main tenance Consider this when mounting any external equipment to the outer link cover Refer to Maintenance on page 111 for more information Additional Information Refer to Robot Physical Dime...

Page 89: ...bot with the IP65 option or the Cleanroom option special considerations must be made Refer to Robot Solenoid Option Consideration for IP65 Robots on page 163 and Robot Solenoid Option Consideration fo...

Page 90: ...er two screws on an eCobra 600 three screws on an 800 Remove two screws on top and remove the cover Retain the screws for reassembly For IP65 and Cleanroom versions refer to Outer Link Cover Removal P...

Page 91: ...he air intake coupling of the solenoid manifold Make sure to push the air line in all the way and secure it in place by the intake coupling Confirm by gently pulling the air line NOTE If you are insta...

Page 92: ...he cable strap plate by removing two screws and split washers See the fol lowing figure This allows the harness to move when you lift the J1 cover in the next step Retain the screws for re assembly Fi...

Page 93: ...obot chassis to the closed position and tighten the securing screw 20 Reinstall the outer link cover and tighten the screws to 1 6 N m Testing Solenoid Valve Kit Installation Use the following procedu...

Page 94: ...bracket The camera brackets are not required unless you are mount ing more than one camera 3 Mount the camera channel to the camera brackets or camera plate with M4 x 12 mm screws 4 Mount the camera...

Page 95: ...allation Procedure 1 Remove the plug from desired threaded hole Position 1 or 2 on each side of the robot 2 Install the adjustable hardstop into the threaded hole using an 8 mm hex wrench Tighten to a...

Page 96: ...op plates in different locations depending on how much you need to limit the Joint 2 range of motion The positions are spaced 30 apart Figure 5 14 Joint 2 Hardstop Kit Tools Required l Torque wrench l...

Page 97: ...n 2 A Figure 5 16 Screw Locations for Joint 2 Adjustable Hardstops as seen from below Item Meaning Item Meaning A Joint 2 Left Hardstop Plate installed in 81 position D Joint 2 Negative direction B Jo...

Page 98: ...2 NOTE The two hardstop sides do not have to be in the same position so the workspace does not have to be symmetrical 3 Slide the fixed hardstop device into the slot on the underside of the outer lin...

Page 99: ...nstalled and in a state where it is safe to turn ON power to the robot System Cable Checks Make the following checks to verify proper system cable installation IMPORTANT Inspect all cables and connect...

Page 100: ...below to troubleshoot the system Table 6 1 Safety Utilities in Sysmac Studio Utility Description E Stop Configuration Utility This utility sets the E Stop hardware delay to factory specification E St...

Page 101: ...t is amber to meet UL standards Figure 6 2 Robot Status LED and Display Panel General Robot States The table below provides general information about the robot state when observing the status LED and...

Page 102: ...mmunication states LED Color Status Description RUN Green Lit EtherCAT communications are in progress Flashing EtherCAT communications are established and in one of the following states l Only message...

Page 103: ...ases when high power is ON When high power is turned OFF the brake engages and holds Joint 3 in position Brake Release Button If you want to manually position Joint 3 on the Z Axis without turning ON...

Page 104: ...ontrol Modes The robot can operate in several different control modes The selection and function of these modes are described in this section Manual Mode Manual mode is typically used during functions...

Page 105: ...ip switch on the robot inter face panel to the OP position left as shown in the figure below IMPORTANT The position of the dip switch is checked during power up only Changing this switch position whil...

Page 106: ...nd instructed Refer to the Robot Safety Guide Cat No I590 for more information IMPORTANT High power can only be enabled when safety circuits are sat isfied Enabling the robot high power for the first...

Page 107: ...n page 48 for more information about connecting external devices to the high power enable signal on the XFP connector Figure 6 6 High Power Button on Front Panel Request High Power with a Connected PC...

Page 108: ...ase the blinking Robot Power button to enable high power to the robot NOTE The factory default high power timeout is 10 seconds after which the high power transition is terminated If this happens you...

Page 109: ...ystem Operation l User programming with the POWER system switch keyword l External signal state control through the XUSR connector on the XSYSTEM cable 24402 000 Rev B eCobra 600 and 800 Robots with E...

Page 110: ......

Page 111: ...nting bolts 6 months Refer to Checking Robot Mounting Bolts and Cover Plates on page 112 Check Safety Labels 1 week Refer to Checking Safety and Warning Labels on page 112 Check for signs of oil aroun...

Page 112: ...abels This section lists the various safety and warning labels and their placement on the robot Use this information to perform periodic checks NOTE Labels that provide instructions for lifting or ins...

Page 113: ...suddenly because of gravity when the brake release is pressed This applies to the quill and tool flange The part number for this label is 18272 000 Figure 7 3 Brake Release Gravity Label Lifting Point...

Page 114: ...t Label Checking for Oil Leaks The eCobra robots use oil in the gearboxes for lubrication Periodically inspect the robot for any signs of oil in areas immediately outside of the gearboxes Check the lo...

Page 115: ...the sides and top of the cover WARNING After removing the outer cover you will see the label shown in OP3 4 Connector on page 20 Do not remove the J3 ENC or J4 ENC encoder cables from their sockets or...

Page 116: ...tton and move Joint 3 to the bottom of its travel Remove any existing grease with a clean lint free soft cloth 7 Apply a small bead of grease to any grooves of the ball screw that are now exposed 8 Mo...

Page 117: ...ill Grease Locations Lower Quill Grease Locations Joint 3 Ball Screw Lubrication Points A A Figure 7 6 Lubricating Joint 3 Quill Replacing the Encoder Battery Pack Every 2 to 4 years or if the robot s...

Page 118: ...han half the time then you can increase the replacement interval to a maximum of 4 years NOTE Dispose of the battery according to all local and national environmental regulations regarding electronic...

Page 119: ...ions are correct 9 After the new battery pack is connected disconnect and remove the original battery pack NOTE Dispose of the battery pack in accordance with all local and national environmental regu...

Page 120: ...ity to make sure that you observe the following l Lockout tagout power to the robot and related equipment l Make sure that the robot cannot be energized during maintenance as mandated by Clause 5 2 4...

Page 121: ...e flange 3 Use a 2 5 mm hex wrench to loosen the setscrew Note the vertical spline groove that is in line with the setscrew You must reinstall the flange in the same position 4 Use a socket driver to...

Page 122: ...need to be restored if replacing the iCS ECAT Amplifier Chassis with a new unit 2 Disconnect all cables and wires from the robot interface panel 3 Using a 5 mm hex wrench carefully unscrew the chassi...

Page 123: ...a MicroSD Card from an iCS ECAT on page 125 for more information 6 Disconnect the amplifier cable from the white amplifier connector located on the chassis bracket callout A in the following figure Fi...

Page 124: ...sembly later Figure 7 12 Removing Ground Screw Wire on iCS ECAT Amplifier Chassis with 5 mm Hex Wrench 9 Tag the chassis with the any fault diagnosis faults or errors and robot serial number informati...

Page 125: ...11 Switch ON the 24 VDC input supply to the chassis 12 After the robot has completed booting check the robot for proper operation Remove and Replace a MicroSD Card The robot requires a MicroSD card to...

Page 126: ...more information Change Front Panel High Power ON Lamp The system s circuitry detects the potentially dangerous condition of a faulty high power indic ator lamp on the Front Panel If this lamp is bur...

Page 127: ...ance Disconnect them as you pull the front cover away from the body NOTE Separate the cover from the body slowly to avoid damaging the two wires that go between the LED and the PC board inside the bod...

Page 128: ...emoving Robot Power Lamp twisted center lamp The lamp body is now free and you can remove the old lamp Figure 7 17 High Power Lamp Removed 7 Re install the lamp body by pushing it straight into the la...

Page 129: ...y that the LED light wires do not get crimped as you reinstall the cover CAUTION PROPERTY DAMAGE RISK Make sure the connector lugs are properly aligned with the receptacle before attempting to seat th...

Page 130: ......

Page 131: ...l Dimension Drawings This section provides physical dimensions for the eCobra 600 and 800 robots and their oper ating envelope 934 888 387 342 177 0 600 325 0 234 46 37 417 183 200 A B Figure 8 1 eCob...

Page 132: ...24402 000 Rev B A B 417 183 200 918 894 398 342 184 0 46 37 800 425 0 234 Figure 8 2 eCobra 800 robot Top and Side Dimensions units in mm where A is the required clear ance to open iCS ECAT chassis an...

Page 133: ...s 2X M4x0 7 6H 10 03 10 2X M4x0 7 6H 6 10 45 3 0 2X 54 10 A Figure 8 3 A Dimensions of the Camera Bracket Mounting Pattern units in mm 457 mm to base for eCobra 600 and 800 24402 000 Rev B eCobra 600...

Page 134: ...05 4X M4x0 7 6H 8 60 105 4X M4x0 7 6H 6 Figure 8 4 External Tooling on Top of Robot Arm Inner link top outer link bottom eCobra units in mm 76 eCobra 600 135 eCobra 800 4X M4x0 7 6H 90 8 34 Figure 8 5...

Page 135: ...8 6 eCobra 600 Robot Working Envelope Key Meaning Key Meaning A Maximum intrusion contact radius 647mm C Minimum radial reach 162 6mm B Maximum radial reach func tional area 600mm D Cartesian limits...

Page 136: ...ion contact radius 847 3mm C Minimum radial reach 163 6mm B Maximum radial reach func tional area 800mm D Cartesian limits 300mm 8 2 General Robot Specifications The following table provides general r...

Page 137: ...tia Joint 4 450 kg cm maximum Joint 4 450 kg cm maximum Downward Push Force Burst no load 343 N maximum 298 N maximum Lateral Side Push Force Burst 178 N maximum 133 N maximum Adept Cycle1 Time sustai...

Page 138: ...taken into account when designing and applying safeguarding devices The graphs show the time elapsed and distances traveled between the initiation of a stop sig nal and the cessation of all robot mot...

Page 139: ...0 Figure 8 9 Stopping Time in Seconds versus Speed for eCobra 600 Joint 1 0 20 40 60 80 100 120 140 0 20 40 60 80 100 120 Stopping Distance deg Speed J2 Stopping Distance Cobra600 Payload 33 Payload 6...

Page 140: ...Time Cobra600 Payload 33 Payload 66 Payload 100 Figure 8 11 Stopping Time in seconds versus Speed for eCobra 600 Joint 2 0 20 40 60 80 100 120 140 0 20 40 60 80 100 120 Stopping Distance mm Speed J3...

Page 141: ...100 Figure 8 13 Stopping Time in Seconds versus Speed for eCobra 600 Joint 3 eCobra 800 0 20 40 60 0 20 40 60 80 100 120 Stopping Distance deg Speed J1 Stopping Distance Cobra800 Payload 33 Payload 66...

Page 142: ...Cobra800 Payload 33 Payload 66 Payload 100 Figure 8 15 Stopping Time in Seconds versus Speed for eCobra 800 Joint 1 0 20 40 60 80 100 120 140 0 20 40 60 80 100 120 Stopping Distance deg Speed J2 Stop...

Page 143: ...0 Figure 8 17 Stopping Time in Seconds versus Speed for eCobra 800 Joint 2 0 20 40 60 80 100 120 140 0 20 40 60 80 100 120 Stopping Distance mm Speed J3 Stopping Distance Cobra800 Payload 33 Payload 6...

Page 144: ...of the failed component If you want to measure stopping distances and time in a real cell with a real robot and with real tools and loads contact your local OMRON support Hardstop and Softstop Limits...

Page 145: ...0 5A 0 32 W 85 C Output maximum leakage cur rent 25 A ON response time 125 sec max 80 sec typical typical OFF response time 60 sec max 28 sec typical typical Output voltage at inductive load turnoff I...

Page 146: ...3 VDC ON state voltage range 10 to 30 VDC Typical threshold voltage Vin 8 VDC Operational current range 0 to 7 5 mA OFF state current range 0 to 0 5 mA ON state current range 2 5 to 7 5 mA Typical thr...

Page 147: ...ertified installation or compliance with IEC 61131 2 IEC 61131 2 requires that the installation must ensure that Category II overvoltages i e line spikes not directly due to lightning strikes are not...

Page 148: ...standard robots NOTE Some connection specifications may differ on robots with the IP65 or Cleanroom options Refer to IP65 Option Considerations on page 153 and Clean room Option Considerations on pag...

Page 149: ...male with screw terminals Rated at 10 A 250 VAC Qualtek part number 709 00 00 Digi Key part number Q217 ND Power Consumption Specifications Robot power consumption specifications are provided in the t...

Page 150: ...ange Dimensions for eCobra Robots Key Meaning Key Meaning A Flange edge see callout D for profile and dimensions C Tool Flange Ground B Dowel pin hole D Flange rim dimensions from callout A 8 8 Front...

Page 151: ...e factory supplied Front Panel E Stop is in accordance with the requirements of IEC 60204 1 and ISO 13849 8 9 EtherCAT Communications Specifications EtherCAT communications specifications are provided...

Page 152: ...tion Baseband Baud rate 100 Mbits s Topology1 Line daisy chain and branching Transmission media Twisted pair cable of category 5 or higher Recommended cable straight double shielded cable with aluminu...

Page 153: ...e Protection of the equipment inside the robot shell against harmful effects due to the ingress of water Water projected in jets against the robot enclosure from any direction shall have no harmful ef...

Page 154: ...ssure reinforces the sealing properties of the gaskets and seals provided in the IP65 robot The tool flange for the IP65 robot has an additional protective shield on the outer edge that is not present...

Page 155: ...the following table Table 9 1 Compressed Air Specifications Required Air Pressure Required Air Flow Minimum 3 bar 10 44 PSI 10 57 liters per minute 2 cubic feet per minute CAUTION PROPERTY DAMAGE RIS...

Page 156: ...ot dur ing the robot installation process The cable seal assembly ships separately from the robot Use the figure below to identify the cable seal assembly parts Figure 9 4 Figure 9 4 Cable Seal Parts...

Page 157: ...a Tilt the flange away from the robot as you install it Figure 9 5 b Then pull up on the flange and push it toward the robot c Finally push down on the flange to secure it against the housing See Figu...

Page 158: ...lled Figure 9 8 Splash Guard Installed 8 Install the splash guard using two M6 x 20 screws two M6 lock washers and two M6 flat washers See Figure 9 8 Dimension Drawing for Cable Seal Assembly The foll...

Page 159: ...cover 1 Remove all powerr and any air supply from the robot 2 Thoroughly clean the outer link exterior to remove any dust or particles that might fall inside the robot when you remove the cover Refer...

Page 160: ...more than that the internal clamp nut could come loose 7 When all 8 screws are loose but not removed lift the cover up and slide it back along the cable track and out of the way Protect the cover wit...

Page 161: ...wn to make the seal NOTE As you lower the cover down onto the outer link push the 8 side screws all the way in so the clamp nuts will slide into the correct pos ition 5 Reinstall the two screws and ny...

Page 162: ...nectors you must provide a seal at the connection to prevent moisture from entering the robot NOTE The user electrical connector DB 25 and the IO Blox connector DB 9 require a gel seal gasket to maint...

Page 163: ...ngs you use must maintain an adequate seal in the cover to prevent moisture from entering the outer link CAUTION PROPERTY DAMAGE RISK Failure to prevent water intrusion through improperly sealed exter...

Page 164: ...move the upper bellows clamp remove two M3 screws and pull the clamp apart 5 Slide the old bellows down off of the quill 6 Install a new bellows by sliding it up onto the quill 7 Re install the upper...

Page 165: ...ption Considerations Key Meaning Key Meaning A Upper Bellows Clamp E Bellows Seam B Bellows F Bellows Clamp C Lower Bellows Clamp G Bellows D Bellows Clamp 24402 000 Rev B eCobra 600 and 800 Robots wi...

Page 166: ......

Page 167: ...wo stage vacuum system to evacuate the arm This vacuum system incorporates a compressed air vacuum generator mounted in the base of the robot to provide a high vacuum in the outer link and bellows are...

Page 168: ...ad pipe fitting at the back of the robot flow regulator not supplied Quill inside dia meter Your end effector must plug the quill s inside diameter to develop sufficient vacuum in the outer link 10 3...

Page 169: ...used on the Cleanroom robots Cleanroom Bellows Replacement Use the following procedure to replace the bellows The part number for the bellows is 04625 000 IMPORTANT Check the bellows periodically for...

Page 170: ...170 eCobra 600 and 800 Robots with EtherCAT 24402 000 Rev B Figure 10 3 Cleanroom Bellows Replacement Key Meaning A Upper Bellows Clamp Ring B Bellows C Lower Bellows Clamp Ring D User Tool Flange...

Page 171: ...igit Status Display These messages use the following numbering scheme l Informational Messages Numbers 0 to 49 provide information l Warning Messages Numbers 50 to 299 list warning messages about abno...

Page 172: ...rol system If the error persists contact your local OMRON support BA None N A The encoder backup bat tery is low Replace the encoder backup battery D Duty cycle exceeded Mtr 1021 The indicated motor h...

Page 173: ...unction of any cool ing fans H Motor over heating Mtr 1016 The motor encoder tem perature sensor indicates an overtemperature Reduce robot speed acceleration and or deceleration motions or intro duce...

Page 174: ...act your local OMRON support P3 Power system failure Code 3 1115 The regenerative energy dump circuit has exceeded its max short term dump rating Contact your local OMRON support P4 Power system failu...

Page 175: ...act your local OMRON sup port S5 Safety System Fault Code 5 1109 The power system was improperly unlocked by software during a power sequence in manual mode Contact your local OMRON support S6 Safety...

Page 176: ...it SRV_DIRECT SRV_ STAT Contact your local OMRON support TR Safety System Not Commissioned 648 The Teach Restrict has not been commissioned and verified Commission and verify the Teach Restrict V Hard...

Page 177: ...ove it from its container If any damage is evident your local OMRON support Retain all containers and packaging materials These items may be necessary if there is any apparent damage or relocation bec...

Page 178: ...excessive shock and vibration Use a forklift or pallet jack to transport the packaged equipment in an upright position Always keep the ISO double arrows on the sides of the crate oriented up CAUTION...

Page 179: ...AFETY TECHNOLOGIES INC 4225 Hacienda Drive Pleasanton CA 94588 U S A Tel 1 925 245 3400 Fax 1 925 960 0590 Regional Headquarters OMRON EUROPE B V Wegalaan 67 69 2132 JD Hoofddorp The Netherlands Tel 3...

Reviews: