Setup Menu
88
Access from the Controller:
From the
press the “SETUP” button. Press the “DOWN” arrow button repeatedly until the "Analog
Out Menu" selection is highlighted and then press the “ENTER” button. Press the "DOWN" button until the
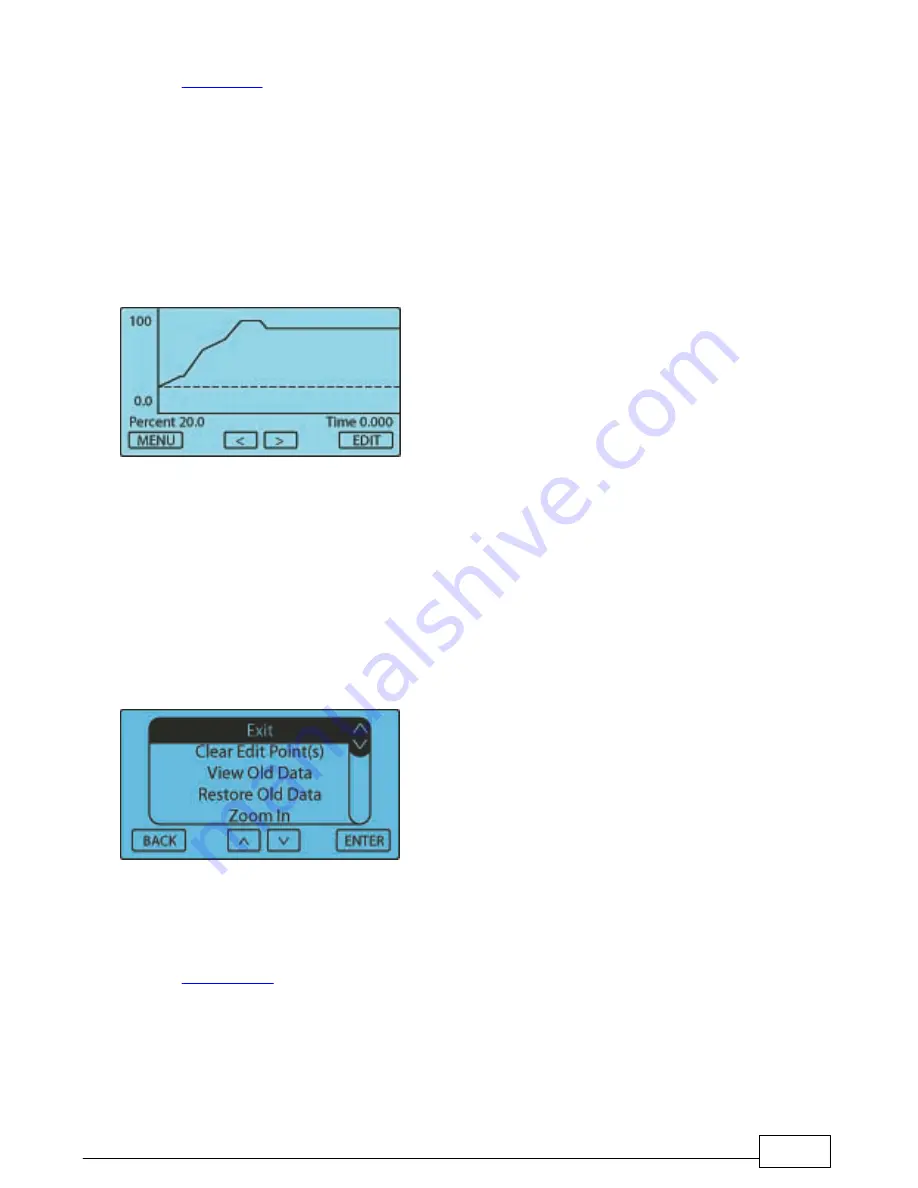
"Analog Out Graph Setup" is highlighted and then press the "ENTER" button. Use the “LEFT” and “RIGHT” arrow
buttons to move through the Analog Out settings. To Edit and/or change the Analog Out settings move the cursor
to the position to Edit and press the “EDIT” button. The editing cursor will appear at the position selected. Using
the “UP” and “DOWN” arrow buttons adjust the new setting. Press the “ENTER” button to accept the new setting.
Use the “LEFT” and “RIGHT” arrow buttons to move to the next set point. Each cursor position represents One
pulse of the Nitrous/Fuel Solenoid. Press the “EDIT” button and adjust the Analog Out voltage as outlined above.
Press “ENTER” to accept the new setting.
NOTE
—When the two set points are more than one pulse apart the Analog Out voltage will be automatically
filled in between the set points.
There are several selections available when you press the “MENU” button. Below is the list of available options
along with their respective functions.
Exit:
This selection exits the Graph Editor
Clear Data Points:
This selection will clear any edit points that are set in the Graph Screen. This does
NOT change any Percentage setting (only the cursor is removed).
View Old Data:
This selection will display the Progressive Ramp that is stored in memory.
Restore Old Data:
This selection will restore the Progressive Ramp settings if any editing has been done,
but not saved.
Zoom In:
This selection will zoom the X-axis in.
Zoom Out:
This selection will zoom the X-axis out.
Press the “MENU” button to Exit and/or Save the new setting(s). From the Menu select Exit and press
“ENTER”. You will then be prompted to Save the new settings or Exit without saving.
Access from the Computer Program:
From the
, click on the "Analog Out" button. To move a single point, click on it and drag with
mouse up or down. You can use the "UP" and "Down" arrow keys to move the data point as well. By pressing
CTRL + UP/DOWN keys, you can move the data point in fine precision. To set an Edit point, double click on a
data point. An "X" will appear to mark the Edit point. When you select another point with a single click all points
between the Edit point and the Highlight point will auto fill as you drag the point. The SHIFT+LEFT/RIGHT keys
move the Highlight between data points. Use the scroll wheel and the right button on the mouse to zoom in or
out. Single click off from a data point and drag the mouse to move around a zoomed in window. Hit "ESC" or
double click off from data point to cancel selected edit point. You can also single click directly on highlighted Edit
Summary of Contents for NCC-001
Page 5: ...Introduction Part I...
Page 11: ...Parts List Part II...
Page 15: ...Installation of the NCC 001 Nitrous Control Center Part III...
Page 17: ...Installation of the NCC 001 Nitrous Control Center 16...
Page 19: ...Installation of the NCC 001 Nitrous Control Center 18...
Page 21: ...Installation of the NCC 001 Nitrous Control Center 20...
Page 23: ...Installation of the NCC 001 Nitrous Control Center 22...
Page 26: ...Lingenfelter NCC 001 Nitrous Control Center Installation and Operating Instructions 25...
Page 28: ...Lingenfelter NCC 001 Nitrous Control Center Installation and Operating Instructions 27...
Page 37: ...Installation of the NCC 001 Nitrous Control Center 36...
Page 39: ...Installation of the NCC 001 Nitrous Control Center 38...
Page 55: ...Getting to Know the User Interface Part IV...
Page 59: ...Global Menu Setup Options Part V...
Page 69: ...Nitrous Menus Nitrous1 N2O 1 and Nitrous2 N2O 2 Part VI...
Page 85: ...Setup Menu Part VII...
Page 139: ...User Program Files Data Logs and Other Software Options Part VIII...
Page 161: ...Appendices Part IX...


