Instructions for the installer
344
3.11 Gas regulations
The injectors not supplied with the appliance should be requested from the Service Centre.
If the cooking appliance is set up for a different type of gas than that available, its injectors must be
replaced, the minimum flow regulated and the rubber-holder changed. In order to replace the
injectors in the cooking hob, it is necessary to carry out the following operations:
•
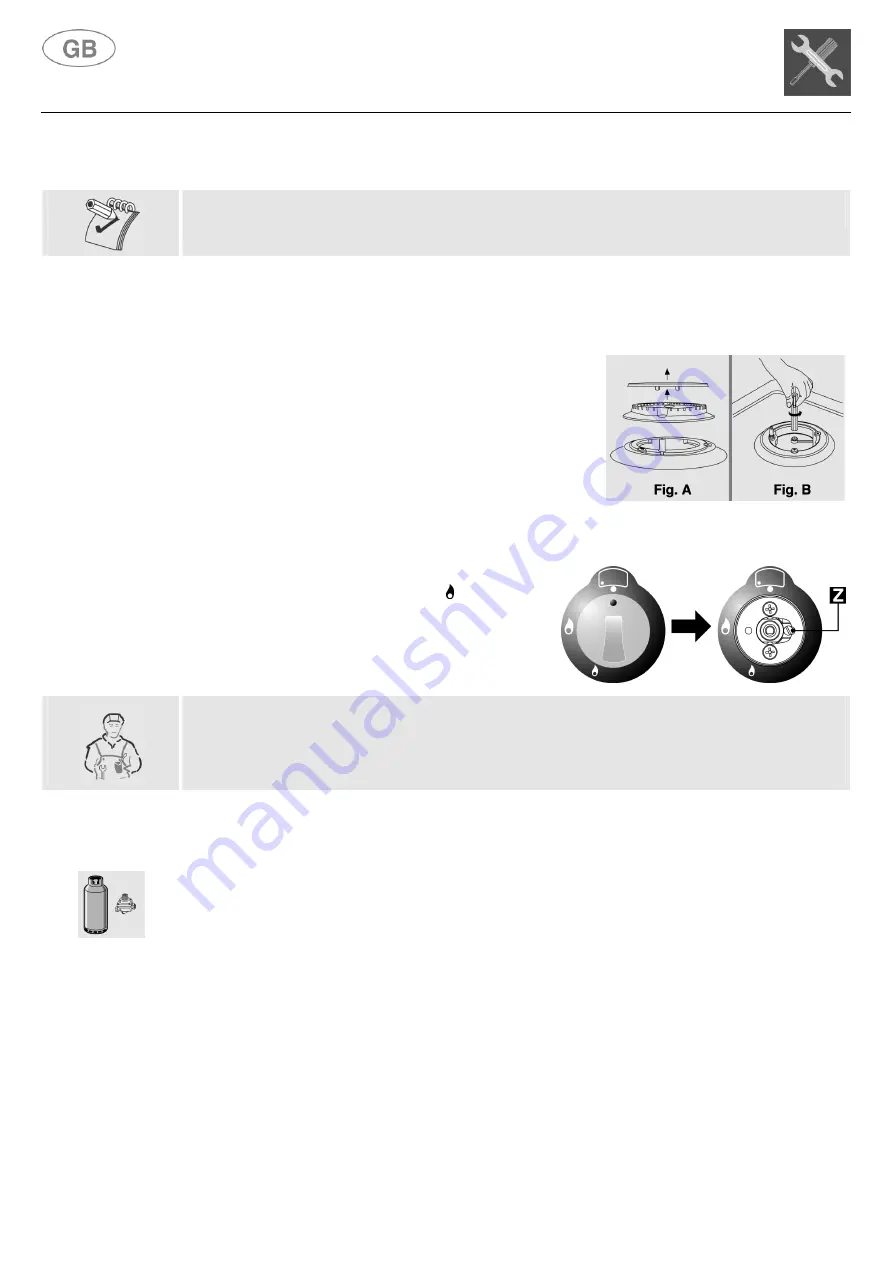
remove the pan supports;
•
remove the burners and burner caps (
Fig. A
);
•
take out the injector (
Fig. B
) and replace it with one
suitable for the new type of gas (see "
G
ENERAL
INJECTORS TABLE
" on page 345-347);
•
replace the gas label (on the rear of the appliance) with
the new one provided with the injectors kit;
•
refit all parts by following the disassembly instructions in
reverse order and taking care to position the burner cap
correctly on the burner.
3.11.1 Minimum flow of valved cooking hob taps
•
Switch on the burner and turn the control knob
towards the minimum flow position ;
•
remove the knob;
•
using a screwdriver, adjust the internal screw
Z
until the correct low flame is obtained;
•
refit the knob.
•
Unscrew the adjustment screw
Z
to increase the flow, or tighten it to reduce the flow.
•
The adjustment is correct when the low flame measures approximately
3
or
4 mm
.
•
For
butane/propane
, the adjustment screw should be tightened all the way.
•
When changing quickly from maximum to minimum flow and vice versa
make sure that the
flame does not go out.
3.12 Connecting to LPG
Use a pressure regulator and connect to the cylinder in compliance with the guidelines set out in
standards regulations in force.
Summary of Contents for MAESTRO
Page 1: ...Gebruiksaanwijzing Gebrauchsanweisung Manuel d utilisation Manuale d uso Instruction manual...
Page 2: ......
Page 3: ...NEDERLANDS 5 83 DEUTSCH 85 163 FRAN AIS 165 243 ITALIANO 245 323 ENGLISH 325 403...
Page 11: ...Aanwijzingen voor de installateur 11 GENESI ASCOT...
Page 91: ...Anweisungen f r den Installateur 91 GENESI ASCOT...
Page 171: ...Instructions pour l installateur 171 GENESI ASCOT...
Page 251: ...Istruzioni per l installatore 251 GENESI ASCOT...
Page 331: ...Instructions for the installer 331 GENESI ASCOT...
Page 407: ......


