5.
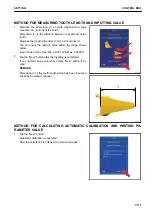
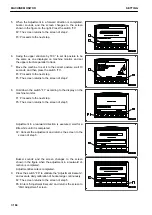
Measure the angle (5) and dimension (6) of “Bucket Identi-
fication Point”.
6.
Put the marks with marker pen at the 5 points (A), (B), (C),
(D), and (E) of “Bucket Identification Point”.
7.
“Bucket Identification Point” (A) is the cross point of
straight line of bucket bottom face and corner.
If it is difficult to distinguish the straight line of bottom face
and corner, select the point that touches the ground if the
floor face digging were performed.
“Bucket Identification Point” (E) is the most outside part on
the extended line between bucket pin and bucket link pin.
“Bucket Identification Point” (B), (C), and (D) divide equally
the distance between (A) and (E).
8.
Set the magnet pole jig (10) to the bucket pin.
Align the center of foot pin and center of pole.
(F): When the quick coupler is not installed
(G): When the quick coupler is installed
(H): When slope finishing bucket is installed
9.
Apply the plumb (11) to the magnet pole jig (10), and set
the bucket so that the line between bucket pin and tooth tip
is vertical.
10. Measure the distance between the point out of (A) to (E)
and center of pole with a tape measure, and input the data
in the dimension column (6).
11. Put the end of string to the magnet pole (10) and stretch
the string to the point out of (A) to (E).
12. Set the digital angle gauge (12) on to the string, and meas-
ure the angle (13) of (A) to (E).
Angle (13) is the angle between level line of bucket pin and each point of (A) to (E).
• When the string is below the level line of bucket pin
Subtract the angle (13) from 90 °, and input the calculated value in the Angle (5) of the Bucket Identifi-
cation Point.
• When the string is above the level line of bucket pin
Add the angle (13) to 90 °, and input the calculated value in the Angle (5) of the Bucket Identification
Point.
(F): When the quick coupler is not installed
SETTING
CONTROL BOX
7-169
Summary of Contents for A31001
Page 12: ...LOCATION OF SAFETY LABELS Options are shown with marks in the figure SAFETY LABELS SAFETY 2 4...
Page 106: ......
Page 107: ...SPECIFICATIONS 5 1...
Page 110: ......
Page 116: ......
Page 117: ...SETTING 7 1...
Page 311: ...EXECUTIONS 8 1...
Page 376: ...PC360LCi 11 PC390LCi 11 HYDRAULIC EXCAVATOR Form No CEAM032703...


