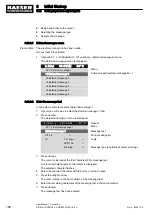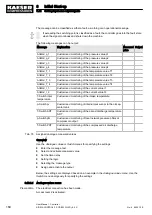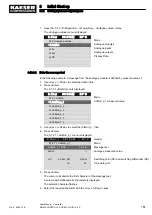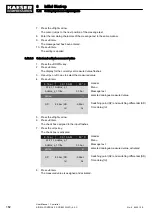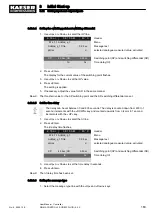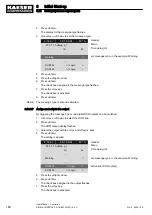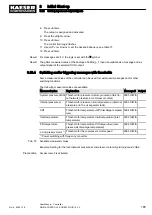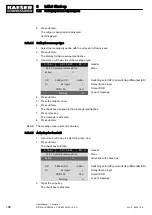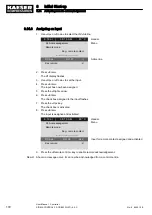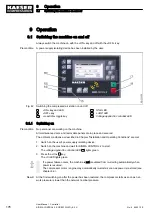
13. Press the «Enter» key.
Setting mode is active.
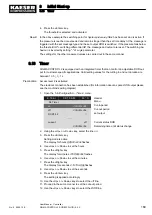
14. Use «Up» or «Down» to set the required output
DOR.
15. Press the «Enter» key.
The setting is applied accordingly.
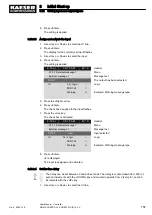
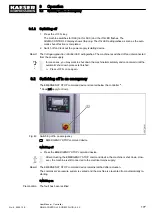
16. Press the «Right» key.
17. Press «Enter».
The check box flashes.
18. Press the «Up» key.
The check box associated to output
DOR is activated.
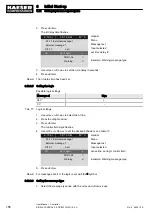
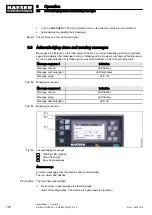
19. Press «Enter».
If output
DOR is correctly assigned and activated, ok is displayed.
6 . 1 b a r
0 8 : 1 5 A M
8 0 ° C
Header
5.8 Timer
Menu
on
:
01h:15m:00s
Cut-in period
off
:
01h:15m:00s
Cut-out period
DOR1.03
ok
☑
Set output DOR
·········
current
on
Current status DOR
00h:55m:34s
Remaining time until status change
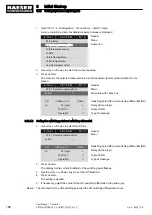
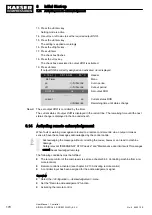
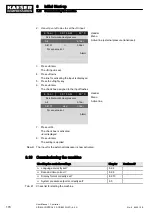
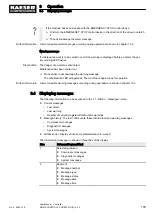
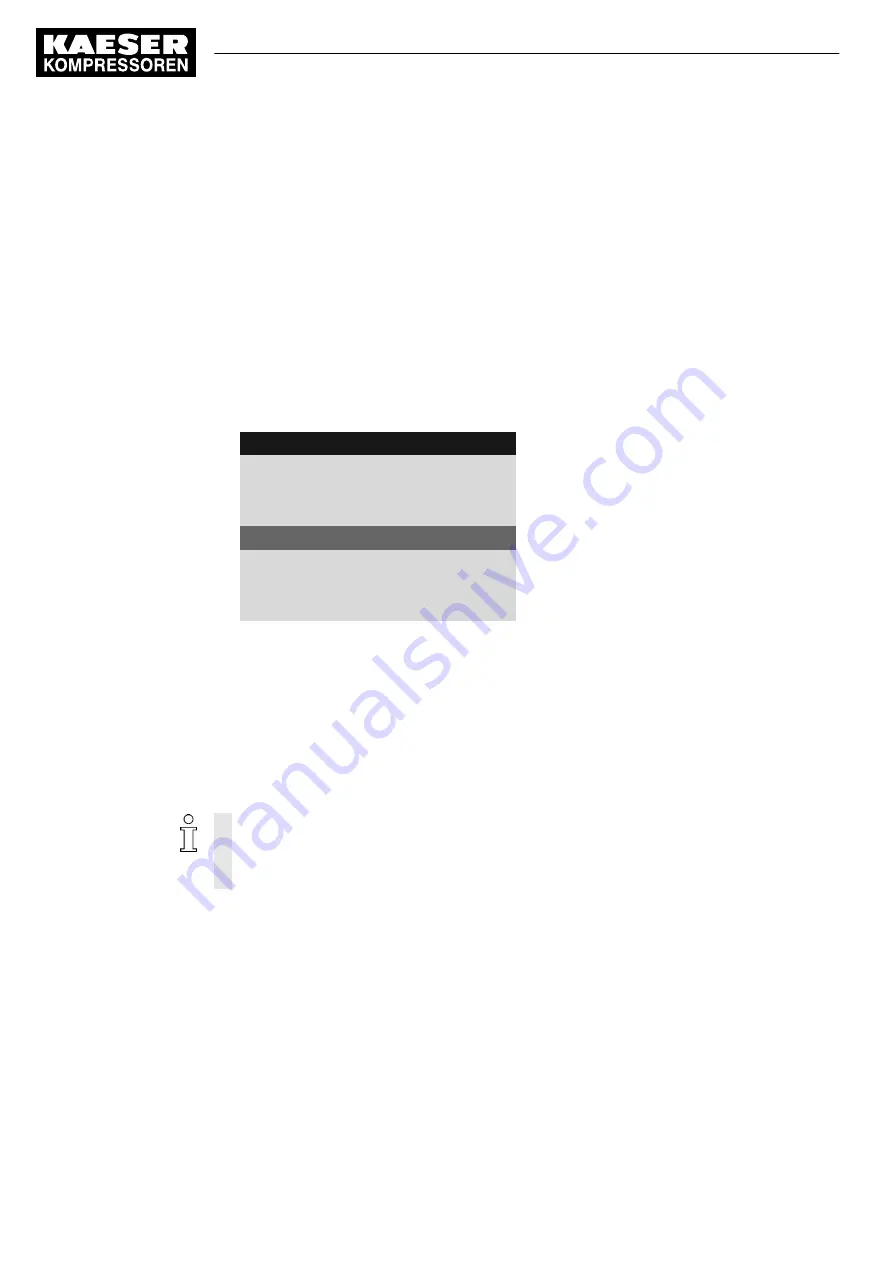
Result The set output
DOR is controlled by the timer.
The current status of output
DOR is displayed in the current line. The remaining time until the next
status change is displayed in the line underneath.
8.14 Activating remote acknowledgement
When fault or warning messages are routed to a remote control centre via an output it makes
sense to have these messages acknowledged by the control centre.
Acknowledging the message without correcting the cause, however, can lead to machine
damage.
Safety-relevant "EMERGENCY STOP device" and "Maintenance door limit switch" messages
cannot be acknowledged remotely.
The following conditions must be fulfilled:
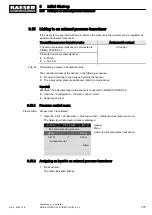
■ The remote control of the compressor is set (see chapter 8.6.3 Controlling machine from a re‐
mote location)
■ Remote control is activated (see chapter 8.2.13 Activating remote control)
■ A controller input has been assigned for the acknowledgement signal.
Overview
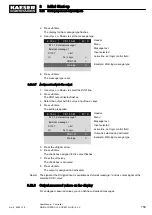
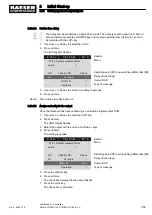
■ Select the
<Configuration – Acknowledgement> menu.
■ Set the "Remote acknowledgement" function.
■ Activating the remote control
8
Initial Start-up
8.14 Activating remote acknowledgement
170
User Manual Controller
SIGMA CONTROL 2 SCREW FLUID ≥5.0.X
No.: 9_9450 12 E

