Capacitive Touchscreen
User Manual H12 / SCAMAX® 8x1 - Version 2019.12
All information about recognized bar codes is passed along with their respective images, as metadata.
Such images are also marked with a special symbol, in the sheet information area of the scan screen
(
see chapter
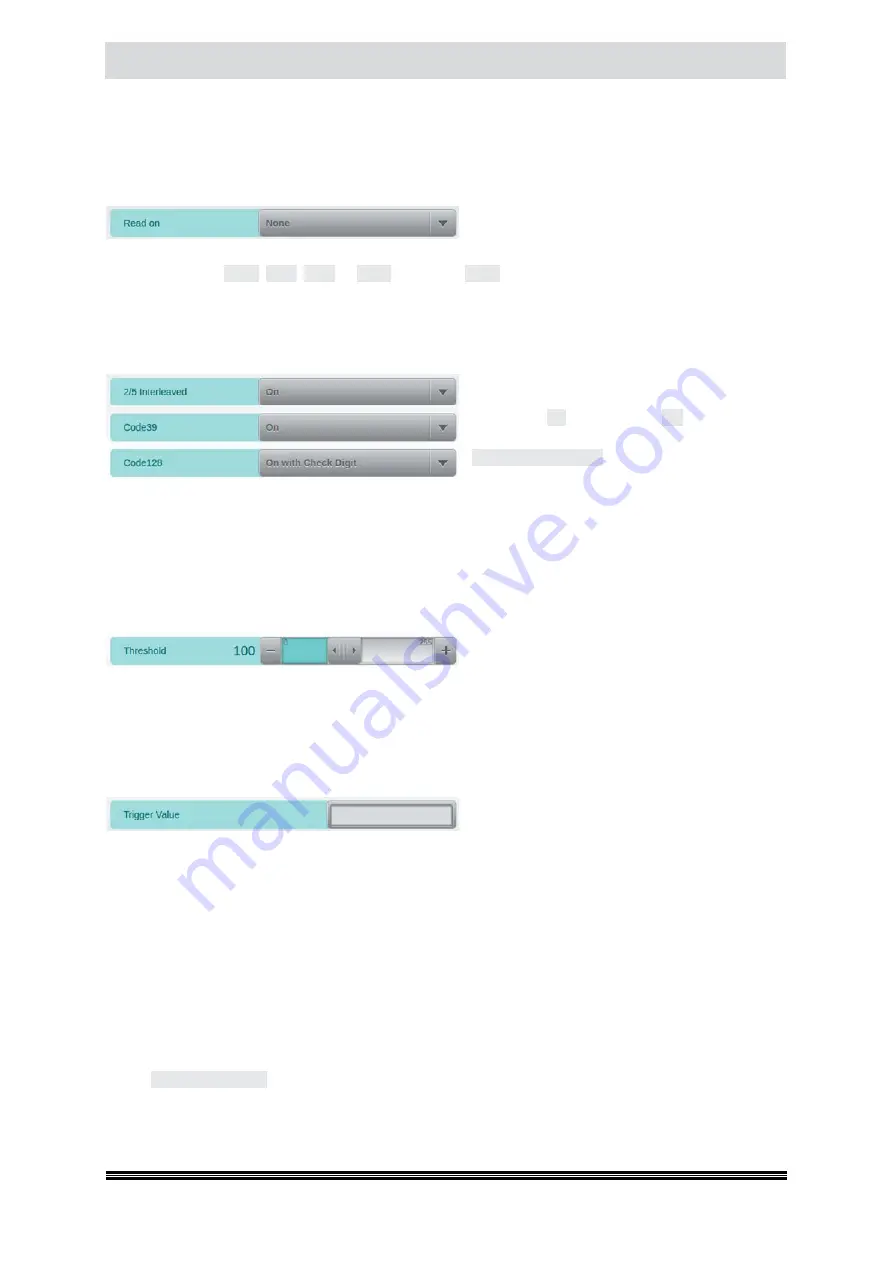
4.6.4.4.1. Read on
As is the case with patch code detection (
see
chapter
), the first item on this settings
screen determines which side of an incoming document is searched for bar codes. Again, you may
choose between
Front
,
Back
,
Both
or
None
. However,
None
is the default setting, in this case. In order
to be recognized, bar codes need to be placed within the first
140 mm
on front document sides. Bar
code detection on reverse sides is limited to the first
35 mm
of the image.
4.6.4.4.2. Barcode Types
These three fields determine whether the scan-
ner is supposed to search for the respective bar
code type (
On
) or ignore it (
Off
). You may also
choose to have the bar code checksum verified
(
On with Check Digit
), on the basis of the most
common checksum algorithm for that bar code
type. In the case of Code 128, On with Check Digit has been made the default, since this barcode type
is most frequently used with its checksum enabled. If checksum verification fails, an appropriate error
message (
see chapter
) is raised and scanning will be interrupted. Since only barcodes with up
to 16 characters in length are accepted here, bar code values longer than this will also produce an
error message (
see chapter
) and scanning will be interrupted.
4.6.4.4.3. Threshold
As is the case with patch code detection (
see
chapter
), you may adjust
Threshold
for
detecting bar codes with less than optimal print quality. The default value of 100 will provide adequate
detection with standard print qualities. Raising the threshold value will improve recognition of bar
codes with reduced print density, lowering the value may help in cases of more delicate bar codes,
with narrow lines.
4.6.4.4.4. Trigger Value
Use this field to compose a
Trigger Value
, which
will distinguish bar codes complying with this
value from other, unwanted bar codes. In order to set a Trigger Value, use the keypad to enter
•
a fixed alphanumeric string (
e.g. Invoice or 2000
)
•
a number range (
a start and an end value joined by a hyphen, e.g. 1000-1100
)
•
a wildcard expression (
some fixed alphanumeric prefix followed by an asterisk, e.g. ABC* or 123*
).
The prefix is always enforced, but the asterisk will allow any amount of arbitrary alphanumeric
characters to follow.
For added flexibility, you may also combine several definitions, by separating them with a comma, and
you may even mix trigger value types, within one Trigger Value (
e.g. 1000-1999, 3000, 4000, 8000-8999
).
Note:
If a string needs to contain a comma (
Code 128 only
), you will need to enclose the entire string
in quotation marks.
Successful validation of a bar code is signaled by an entry in the Event list (
see chapter
). It is
called
Barcode triggered
and can be used to control other functions. Also, if a barcode complies with
the
Trigger value
specified here, image icons will be marked with a turquoise barcode symbol on the
scan screen (
see chapter


