2-4
4.
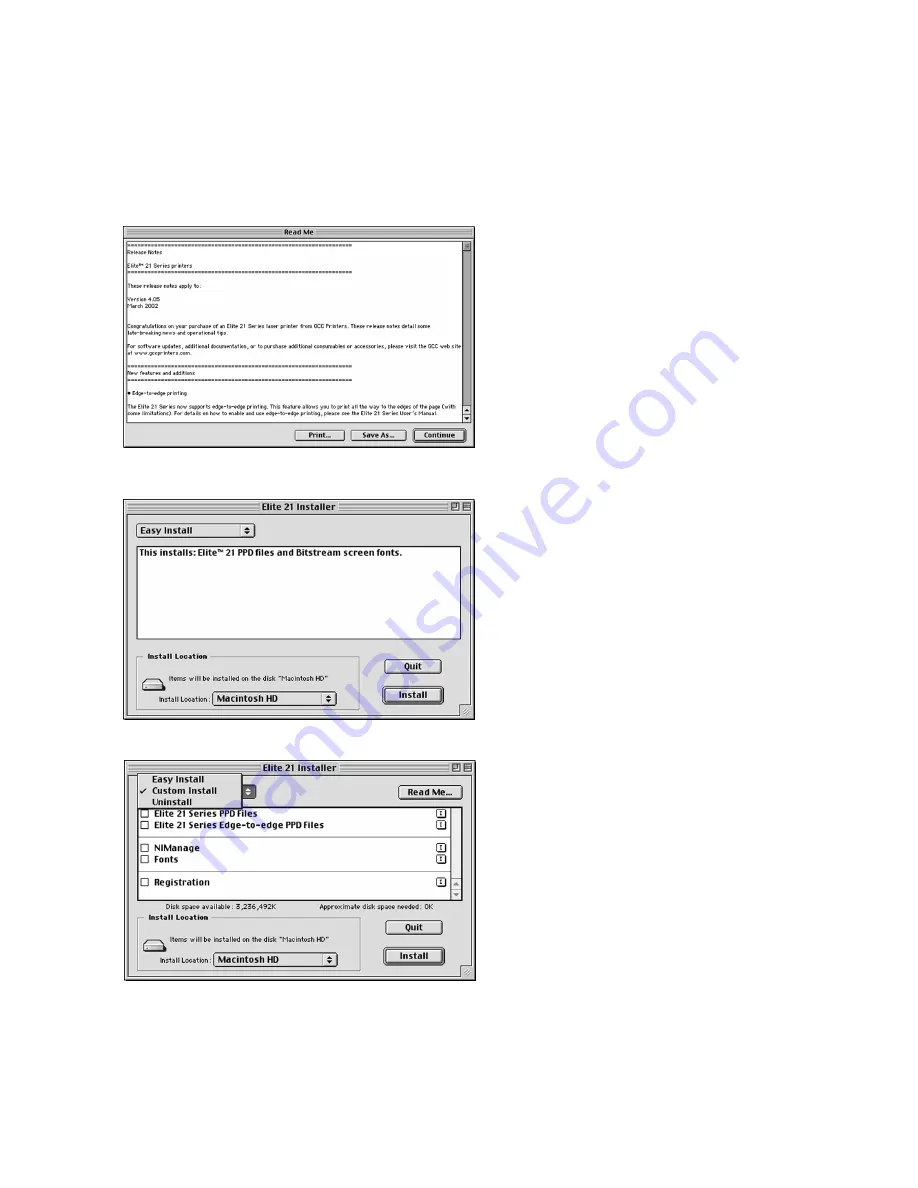
A window will open displaying the
ReadMe file for the software. Read the
information in this file and click Continue
to proceed.
5.
A window will appear listing the
components that will be installed and
asking for an Install Location. Choose the
disk that you wish to install the software
onto (the startup disk of the Mac in most
cases) and click Install.
6.
A Custom Install option is also available. If
you only wish to install certain
components of the printing software, click
on the Easy Install pull-down menu and
select Custom Install. Select the items
you wish to install by clicking on the check
boxes next to them, and click Install.
An Uninstall option is also accessible
through this window and can be used to
remove any of the software as needed.
Summary of Contents for Elite 21 Series
Page 1: ...GCC Elite 21 Series User s Manual Elite 21N Elite 21DN...
Page 14: ...1 6 Step 4 Remove Tape 1 Remove packaging tape from the front and rear covers of the printer...
Page 143: ...5 20 Clicking on Device Settings brings up the following window...
Page 159: ...6 13...
Page 163: ...6 17 Clicking on Device Settings brings up the following window...


