4-4
4.
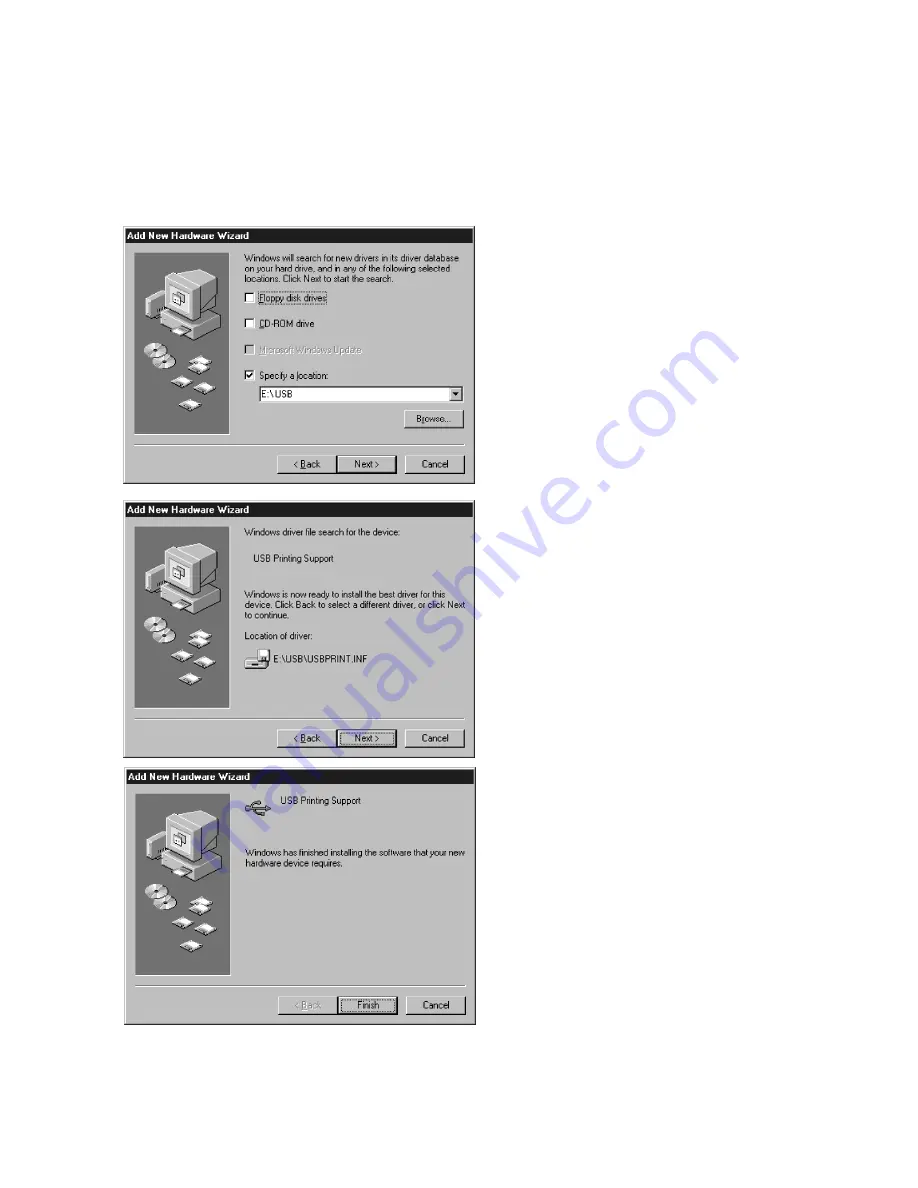
The system will then ask where to look
for new drivers. Make sure that the Elite
21 Series CD-ROM is in the drive. Check
off “Specify a Location.” Use the Browse
button to select your Elite 21 CD-ROM.
Open the folder on the CD that
corresponds to the language being used
(English, French, German, Italian or
Spanish.) Open the ‘Win95-98-ME’ folder
within this folder. Select the
USBPRINT.INF item in this folder. Click
OK. Click Next.
5.
The next window will inform you that a
driver has been found for USB Printing
Support. Click Next to install the USB
driver.
6.
A window will appear showing that the
USB driver has been sucessfully installed.
Once this driver is installed, the PC should
automatically sense the printer and begin
the second Plug and Play installation, for
the specific Elite 21 Series software.
Proceed to Step 4 of the Windows 95/98
Plug and Play via Parallel instructions on
Page 4-5 for instructions on this
installation.
Summary of Contents for Elite 21 Series
Page 1: ...GCC Elite 21 Series User s Manual Elite 21N Elite 21DN...
Page 14: ...1 6 Step 4 Remove Tape 1 Remove packaging tape from the front and rear covers of the printer...
Page 143: ...5 20 Clicking on Device Settings brings up the following window...
Page 159: ...6 13...
Page 163: ...6 17 Clicking on Device Settings brings up the following window...


