5-9
9.
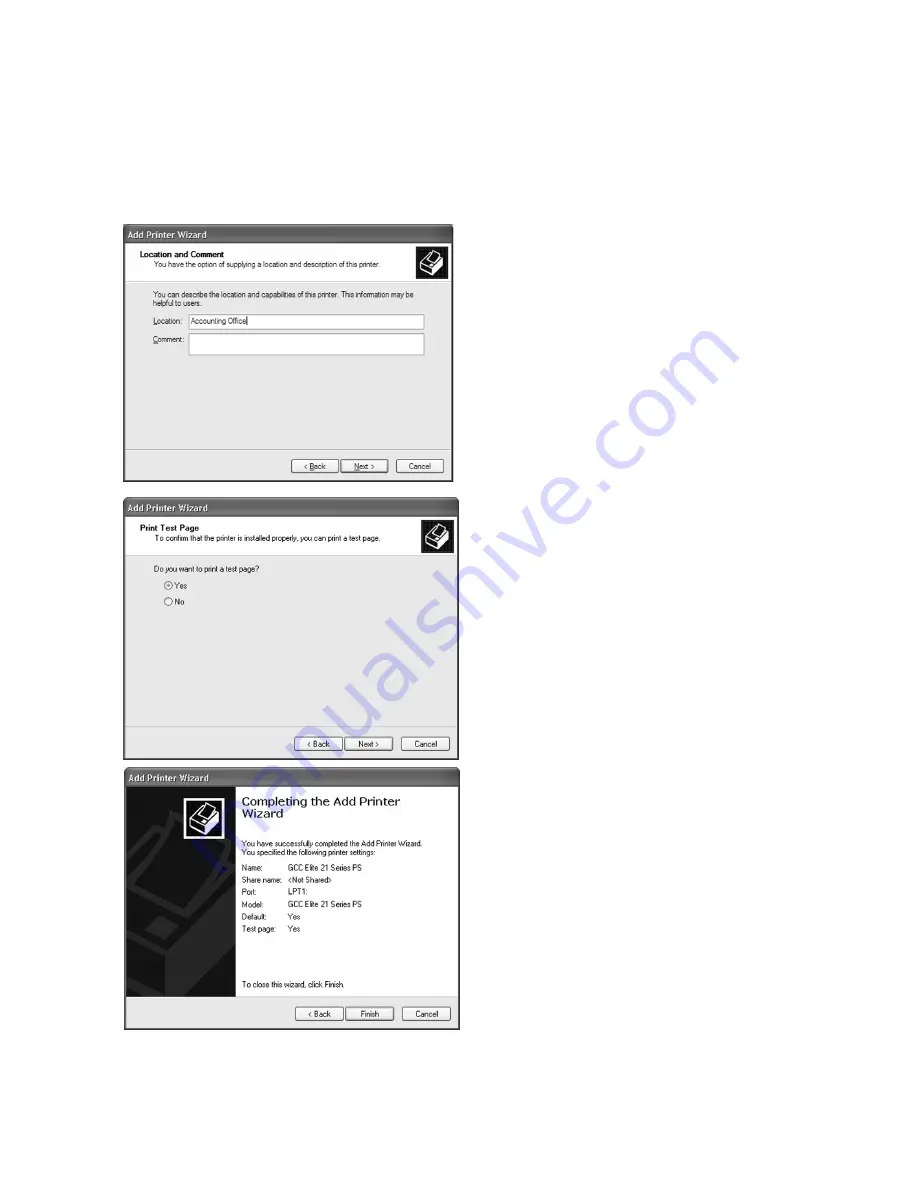
If you chose to share the printer in Step 8,
the next window allows you to specify the
location of the printer. This will allow
users to more easily identify the printer
on a large network. You can also enter
comments to specify the printer’s
capabilities, etc. to users (i.e. “Duplex” to
identify a printer that can handle double-
sided printing).
Enter information into these fields if
desired, then click Next.
10. A window will appear asking if you wish
to print a test page. Click Yes if you are
installing a local printer. Click No if you
are installing the driver and will be setting
up the printer as a network device later.
Click Next.
11. A final window will appear showing a
summary of the installation. Check over
all the information listed. If anything is
incorrect, click Back to go back and
change it. Otherwise, click Finish.
In Windows 2000, a window may appear
informing you that a Digital Signature
cannot be found for the printer and asking
if you wish to continue. Click Yes to
continue and complete the installation.
Summary of Contents for Elite 21 Series
Page 1: ...GCC Elite 21 Series User s Manual Elite 21N Elite 21DN...
Page 14: ...1 6 Step 4 Remove Tape 1 Remove packaging tape from the front and rear covers of the printer...
Page 143: ...5 20 Clicking on Device Settings brings up the following window...
Page 159: ...6 13...
Page 163: ...6 17 Clicking on Device Settings brings up the following window...


