4-13
6.
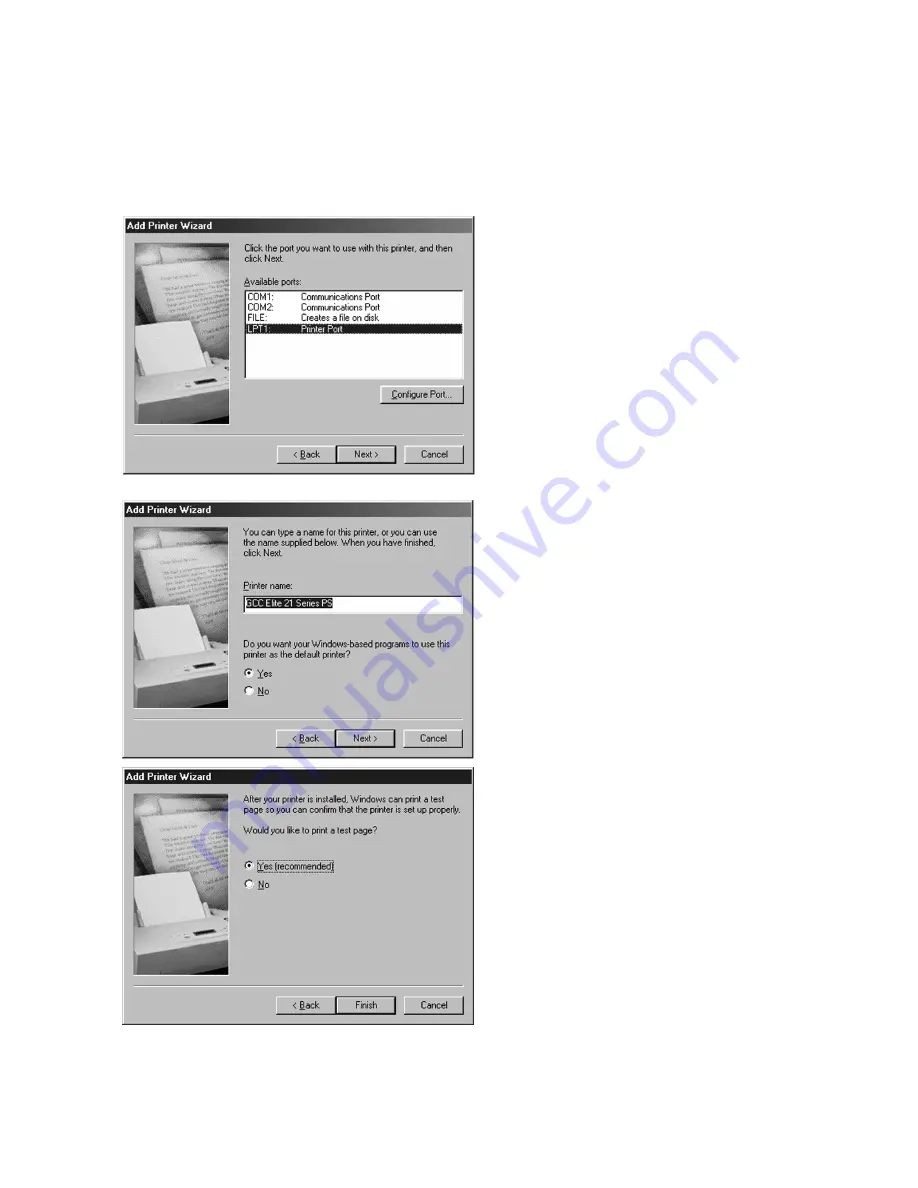
A list of ports will appear. Select the
appropriate local parallel or USB port for the
printer and click Next.
If installing as a TCP/IP network printer, select
LPT1: during this step.. After the installation,
refer to the
Windows 95/98/ME instructions
in Chapter 8 of this Manual (Networking the
Elite 21 Printer) for instructions on
configuring the printer as a network device.
7.
The next window will ask for a name for the
printer. You can type in a new name, or keep
the default name. Click Next.
If more than one printer is installed on this
computer, this window will also ask if you
wish to make this printer the default printer
for your Windows applications. Click Yes or
No. Click Next.
8.
A window will appear asking if you wish to
print a test page. Click Yes if you are
installing a local printer, click No if you are
installing the driver and will be setting up the
printer as a network device later. Click
Finish.
Windows 95/98 Users:
go to Step 9
Windows ME Users:
skip to Step 11
Summary of Contents for Elite 21 Series
Page 1: ...GCC Elite 21 Series User s Manual Elite 21N Elite 21DN...
Page 14: ...1 6 Step 4 Remove Tape 1 Remove packaging tape from the front and rear covers of the printer...
Page 143: ...5 20 Clicking on Device Settings brings up the following window...
Page 159: ...6 13...
Page 163: ...6 17 Clicking on Device Settings brings up the following window...


