background image

Page 1 


Step 1 

Remove Printer and Accessories  
from packaging 

Place Printer on a level, stable surface. Make 
sure Printer is level. 

Step 2 

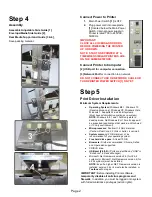
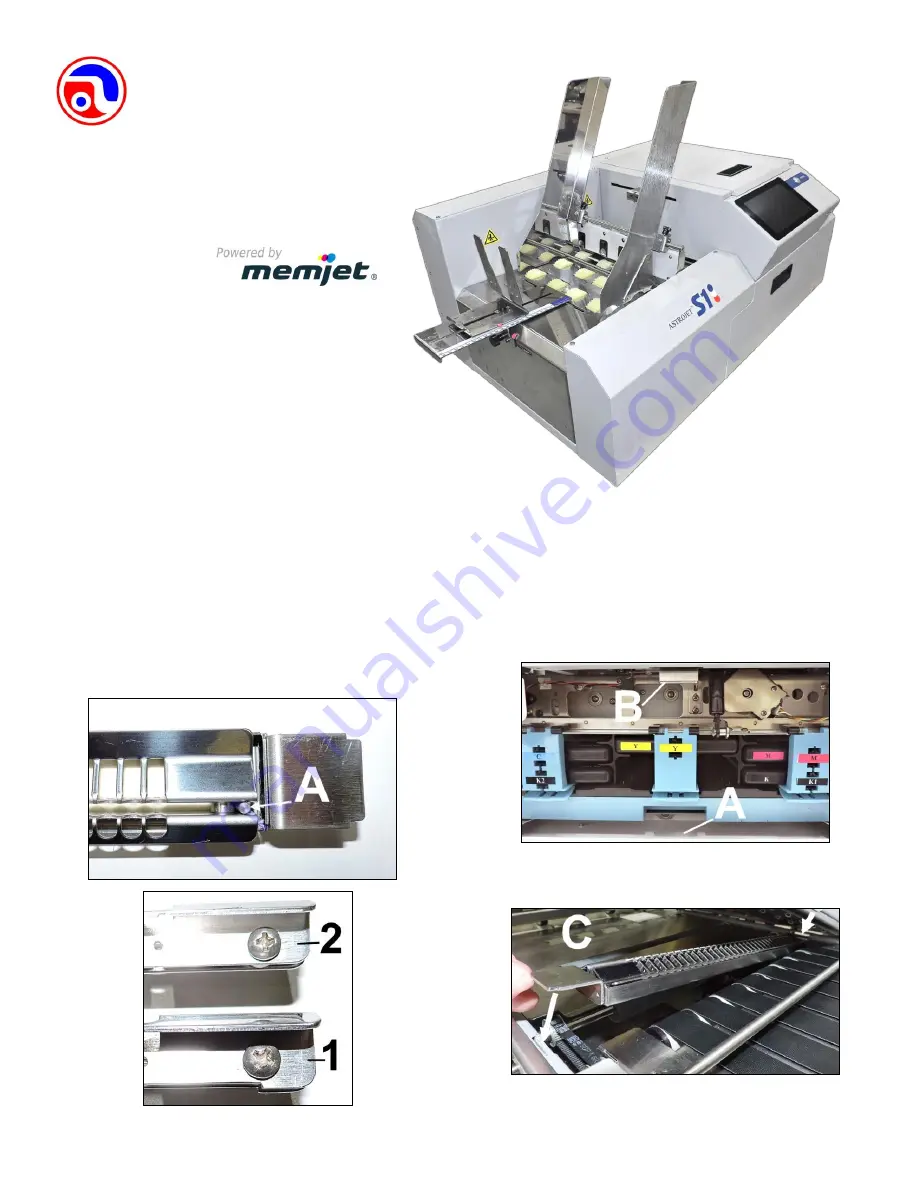
Assemble Ink Drip Tray Assembly 

1. 

Select the 

High

 or 

Low Grate

 and install it 

on the 

Ink Tray

 as shown 

[A]

High Grate [1]

 is for thinner media  

(

paper or envelopes

). 

Low Grate [2]

 is for thicker card stock  

and cardboard.


Step 3 

Install Ink Drip Tray Assembly 

1. 

Open Ink Tank Door 

[A]

.


2. 

Release Latch 

[B]

 to raise Top Assembly.


3. 

Insert tabs on Ink Drip Tray into frame slots 

[C]

 as shown.


4. 

Close Top Assembly.


AstroJet S1 

Quick Start Guide 


Summary of Contents for AstroJet S1

Page 1: ...he High or Low Grate and install it on the Ink Tray as shown A High Grate 1 is for thinner media paper or envelopes Low Grate 2 is for thicker card stock and cardboard Step 3 Install Ink Drip Tray Assembly 1 Open Ink Tank Door A 2 Release Latch B to raise Top Assembly 3 Insert tabs on Ink Drip Tray into frame slots C as shown 4 Close Top Assembly AstroJet S1 Quick Start Guide ...

Page 2: ...s 32 and 64 bit systems Must have administrative privileges on system NOTE Windows 8 8 1 and 10 will only work in desktop mode No Windows 8 or 10 metro apps will be supported applications that work in a Windows 8 or 10 only environment Microprocessor Pentium II 2 GHz minimum Pentium Dual Core 2 5 GHz or better is optimal System memory 2 GB minimum or as recommended for your operating system Free h...

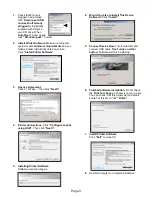
Page 3: ...I accept then click Next 4 Printer Connections Click Configure to print using USB Then click Next 5 Installing Printer Software Software download begins 6 Would You Like to Install This Device Software Click Install 5 Connect Device Now Turn Printer ON and connect USB cable Don t click on either button Software will finish installing 6 Finished software installation Do not check the Print Test Pag...

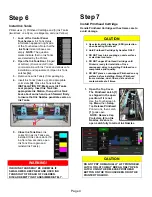
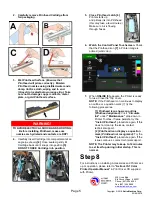
Page 4: ...ain and reinstall Ink Tank s Step 7 Install Printhead Cartridge Handle Printhead Cartridge with extreme care to avoid damage CAUTION Use electrostatic discharge ESD protection when handling Printhead Hold Printhead Cartridge by handles ONLY DO NOT touch ink couplings nozzle surface or electrical contacts DO NOT unpack Printhead Cartridge until Printer is ready for installation Once unwrapped delay...

Page 5: ... the Printhead icon continues to display an outline or a question mark try the following procedures 1 Printhead icon shows an outline Printhead unprimed Click Circulate Ink under Maintenance drop down in Printer Toolbox If issue persists try the Install Printhead procedure again If this does not clear up the issue contact technical support 2 Printhead icon displays a question mark Printhead not re...

Reviews: