94
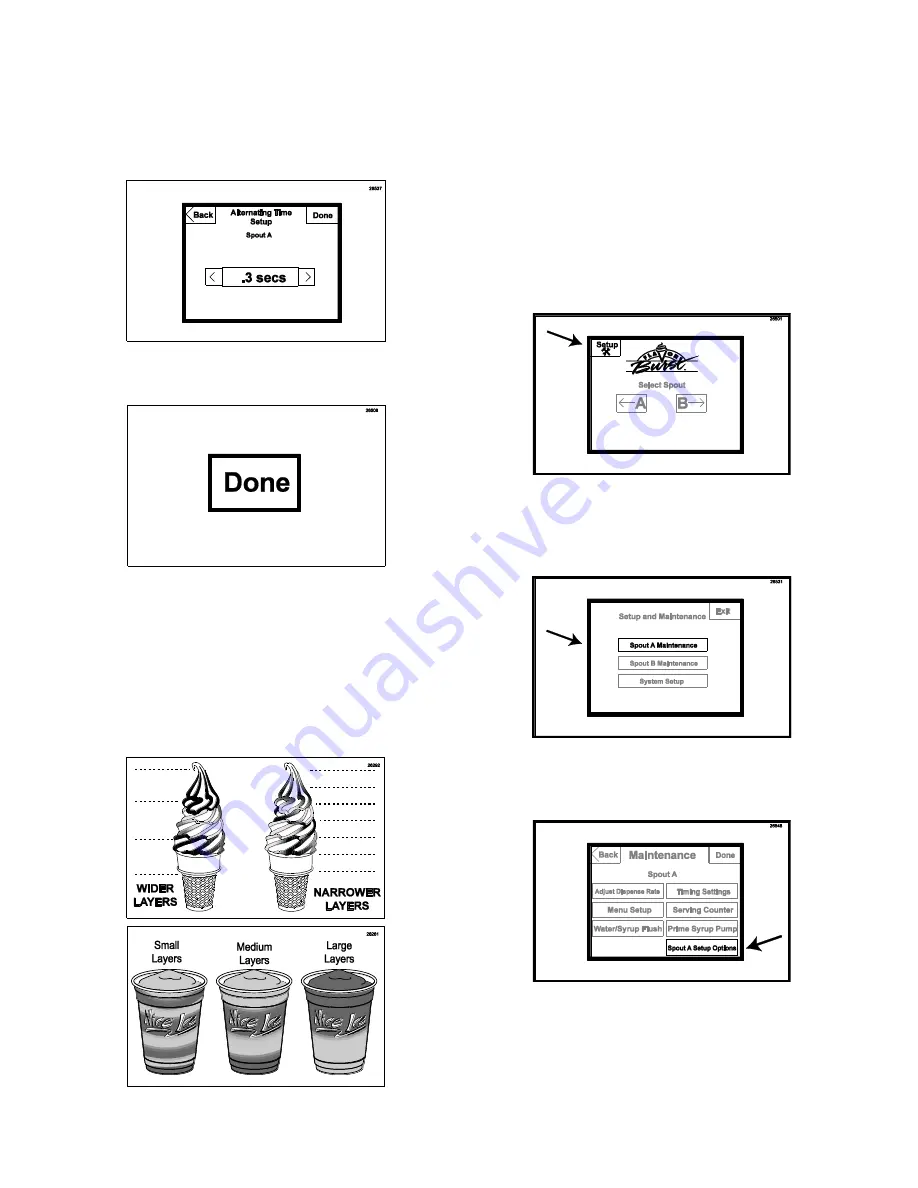
4. Use the
“<” and “>”to increase or decrease
the flow time for each layer. A higher
number increases the time each flavor is
dispensed, creating thicker or wider layers.
A lower number decreases the timing,
creating more narrow layers.
5. Press DONE to return to the main screen.
6. Repeat these instructions to set up the
dispense rate for the other spout.
7. Draw a large multi-flavored serving to
determine if the setting is acceptable.
Repeat Steps 1-6 to adjust any levels as
needed.
Enabling the Injector Flush Feature
The Injector Flush function allows the operator
to flush sanitizer solution through the Injector /
Blending Head spout between servings. This
clears out product and residual flavor to reduce
carryover to the next serving. You can also
deactivate the Injector Flush for self-serve
operations.
1. From the main menu screen, press the
SETUP key in the upper left corner. Enter
the password if required.
2. Press the SPOUT A MAINTENANCE key
(or SPOUT B MAINTENANCE if enabling
the Injector Flush on Spout B).
3. Press SPOUT A SETUP OPTIONS (or
SPOUT B SETUP OPTIONS).
Summary of Contents for TS 44SS/BEV
Page 7: ...6 General System Overview Figure 1 ...
Page 12: ...11 PAGE INTENTIONALLY LEFT BLANK ...
Page 13: ...12 Injector Assembly and Related Parts Figure 3 ...
Page 16: ...15 PAGE INTENTIONALLY LEFT BLANK ...
Page 17: ...16 Blending Assembly and Related Parts Figure 4 ...
Page 19: ...18 Syrup Pump and Related Parts Soft Serve Figure 5 ...
Page 21: ...20 Syrup Pump and Related Parts Frozen Beverage Figure 6 ...
Page 23: ...22 Sanitizer Pump and Related Parts Figure 7 ...
Page 27: ...26 Spare Parts Kit Soft Serve Figure 9 ...
Page 29: ...28 Spare Parts Kit Frozen Beverage Figure 10 ...
Page 30: ...29 PAGE INTENTIONALLY LEFT BLANK ...
Page 34: ...33 PAGE INTENTIONALLY LEFT BLANK ...


