d
Select
Network Configuration
and press [Enter].
e
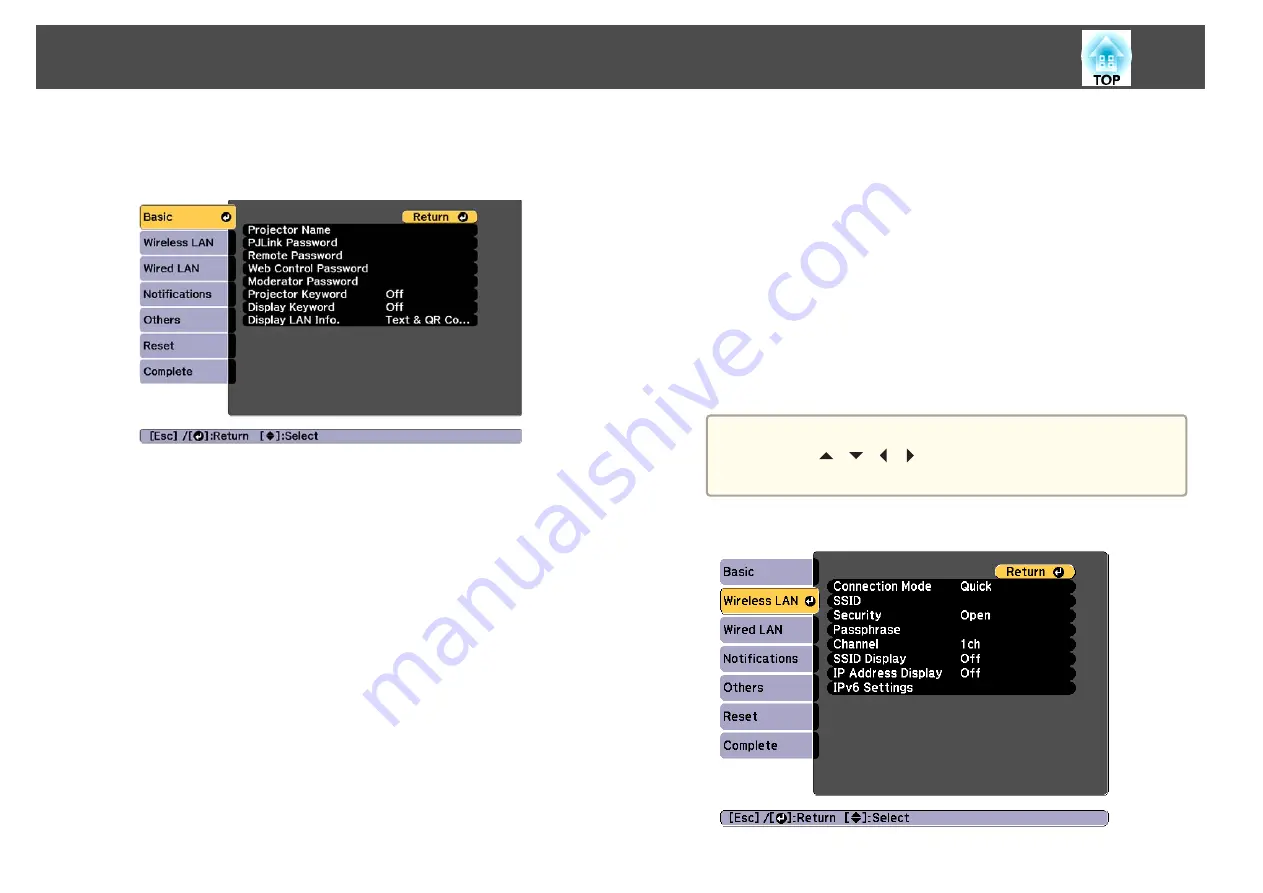
Select the
Basic
menu and press [Enter].
f
Select the basic options as necessary.
•
Projector Name
: Enter the projector name used to identify the
projector over a network. You can enter up to 16 single-byte
alphanumeric characters.
•
PJLink Password
: Lets you set a password for using the PJLink
protocol for projector control. You can enter up to 32 single-byte
alphanumeric characters.
•
Remote Password
: Allows you to set an authentication password
for using the Remote function in Epson Web Control when setting
or controlling the projector. You can enter up to 8 single-byte
alphanumeric characters. (The user name is
EPSONREMOTE
; the
default password is
guest
.)
•
Web Control Password
: Allows you to set an authentication
password for using Web Control in Epson Web Control when
setting or controlling the projector. You can enter up to 8 single-
byte alphanumeric characters. (The user name is
EPSONWEB
; the
default password is
admin
.)
•
Moderator Password
: Allows you to set an authentication password
for using Epson iProjection when connecting to the projector as a
moderator. Enter four digits for the password. (There is no default
password.)
•
Projector Keyword
: Lets you turn on a security password to
prevent access to the projector by anyone not in the room with it.
Turn on "Projector Keyword" when using thumbnail display or the
send function between the projector and connected devices.
•
Display Keyword
: Lets you display a projector keyword on the
projection screen when connecting to the projector using Epson
iProjection.
•
Display LAN Info.
lets you set the display format for the
projector's network information.
a
Use the displayed keyboard to enter the name and password.
Press [
][
][
][
] buttons on the remote control to
highlight characters and press [Enter] to select them.
g
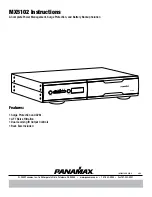
Select the
Wireless LAN
menu and press [Enter].
Wireless Network Projection
125
Summary of Contents for EB-L1050U
Page 1: ...User s Guide ...
Page 14: ...Introduction This chapter explains the names for each part ...
Page 57: ...Basic Usage This chapter explains how to project and adjust images ...
Page 135: ...Configuration Menu This chapter explains how to use the Configuration menu and its functions ...
Page 207: ...Cleaning the Parts 207 ...
Page 214: ...Appendix ...


