Setup Using a USB Flash Drive
This section explains how to perform batch setup using a USB flash drive.
a
•
Use a FAT format USB flash drive.
•
The batch setup function cannot be used by USB flash drives that
incorporate security functions. Use a USB flash drive that does not
incorporate security functions.
•
The batch setup function cannot be used by USB card readers or
USB hard disks.
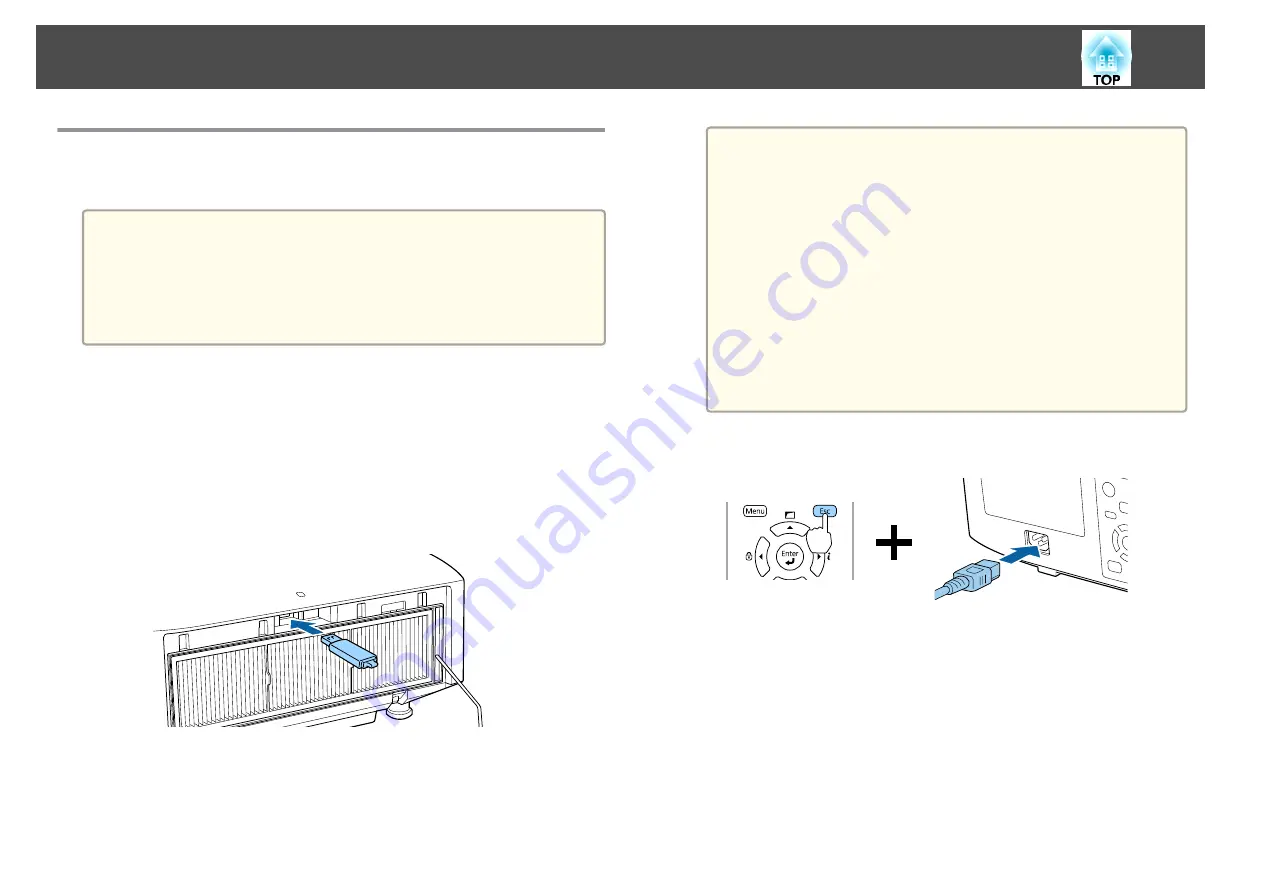
Saving settings to the USB flash drive
a
Disconnect the power cord from the projector, and check that all
of the projector's indicators have turned off.
b
Connect a USB flash drive to the projector's USB-A port (the
wireless LAN module installation section).
s
"Installing the Wireless LAN Unit"
a
•
Connect the USB flash drive directly to the projector. If the
USB flash drive is connected to the projector through a USB
hub, the settings may not be saved correctly.
•
Connect an empty USB flash drive. If the USB flash drive
contains data other than the batch setup file, the settings may
not be saved correctly.
•
If you have saved a batch setup file from another projector to
the USB flash drive, delete the file or change the file name.
The batch setup function cannot overwrite a batch setup file.
•
The file name for the batch setup file is PJCONFDATA.bin. If
you need to change the file name, add text after
PJCONFDATA. If you change the file name in any other way,
the projector may not be able to recognize the file correctly.
•
You can only use single-byte characters for the file name.
c
While holding down the [Esc] button on the remote control or the
control panel, connect the power cord to the projector.
Batch Setup
165
Summary of Contents for EB-L1050U
Page 1: ...User s Guide ...
Page 14: ...Introduction This chapter explains the names for each part ...
Page 57: ...Basic Usage This chapter explains how to project and adjust images ...
Page 135: ...Configuration Menu This chapter explains how to use the Configuration menu and its functions ...
Page 207: ...Cleaning the Parts 207 ...
Page 214: ...Appendix ...


