a
Connect your device to the same network as the connected
projector.
The connection method varies depending on the device. See the
manual supplied with your device for details. When using a mobile
device, check the Wi-Fi settings.
b
Start the Web browser on your device.
c
Connect by entering the address of the connected projector in the
URL field of the Web browser.
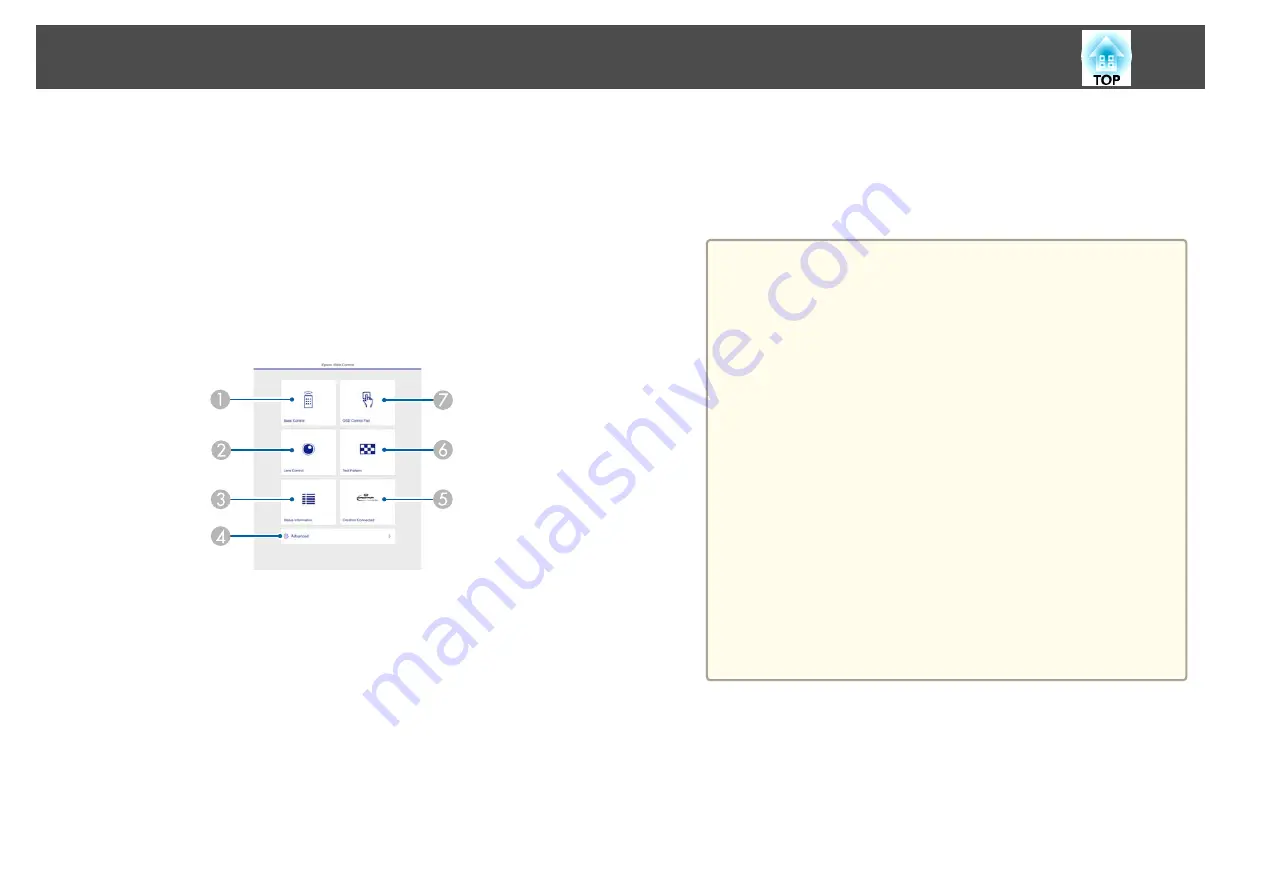
The Home screen is displayed.
A
Basic Control
s
B
Lens Control
s
C
Status Information
s
D
Advanced
You are moved to the Advanced screen.
E
Crestron Connected
s
F
Test Pattern
s
"Test Pattern Operation Screen"
G
OSD Control Pad
s
a
•
When performing the functions from the Home screen, you
may be prompted to enter the user name and password.
When the login screen is displayed, enter your user name and
password. (The user name is
EPSONWEB
; the default
password is
admin
.)
•
You cannot change the user name. You can change the
password in the Network menu from the Configuration menu.
s
Network
-
Basic
-
Web Control Password
•
You must enter the user name for Web Control Password
even when the password is disabled.
•
You can only set the following items from the
Advanced
screen.
Monitor Password (up to 16 single-byte alphanumeric
characters)
s
Network
-
Basic
-
Monitor Password
IPv6 Settings (Manual)
s
Network
-
IPv6 Settings
Add HTTP port (for the port number used for Web control,
use anything except for 80 (default), 843, 3620, 3621, 3625,
3629, 4352, 4649, 5357, 10000, 10001, 41794)
s
Network
-
Others
Basic Control Screen
You can perform basic projector operations.
When the login screen is displayed, enter your user name and password.
(The user name is
EPSONREMOTE
; the default password is
guest
.)
Monitoring and Controlling
216
Summary of Contents for EB-L1050U
Page 1: ...User s Guide ...
Page 14: ...Introduction This chapter explains the names for each part ...
Page 57: ...Basic Usage This chapter explains how to project and adjust images ...
Page 135: ...Configuration Menu This chapter explains how to use the Configuration menu and its functions ...
Page 207: ...Cleaning the Parts 207 ...
Page 214: ...Appendix ...


