a
If auto adjustment does not work for the clipped image, adjust
the aspect ratio, and then select
Auto
.
s
"Changing the Aspect Ratio of the Projected Image"
e
Set
Scale Mode
.
(1)
Select
Scale Mode
, and then press the [
] button.
(2)
Select
Zoom Display
or
Full Display
, and then press the [
] button.
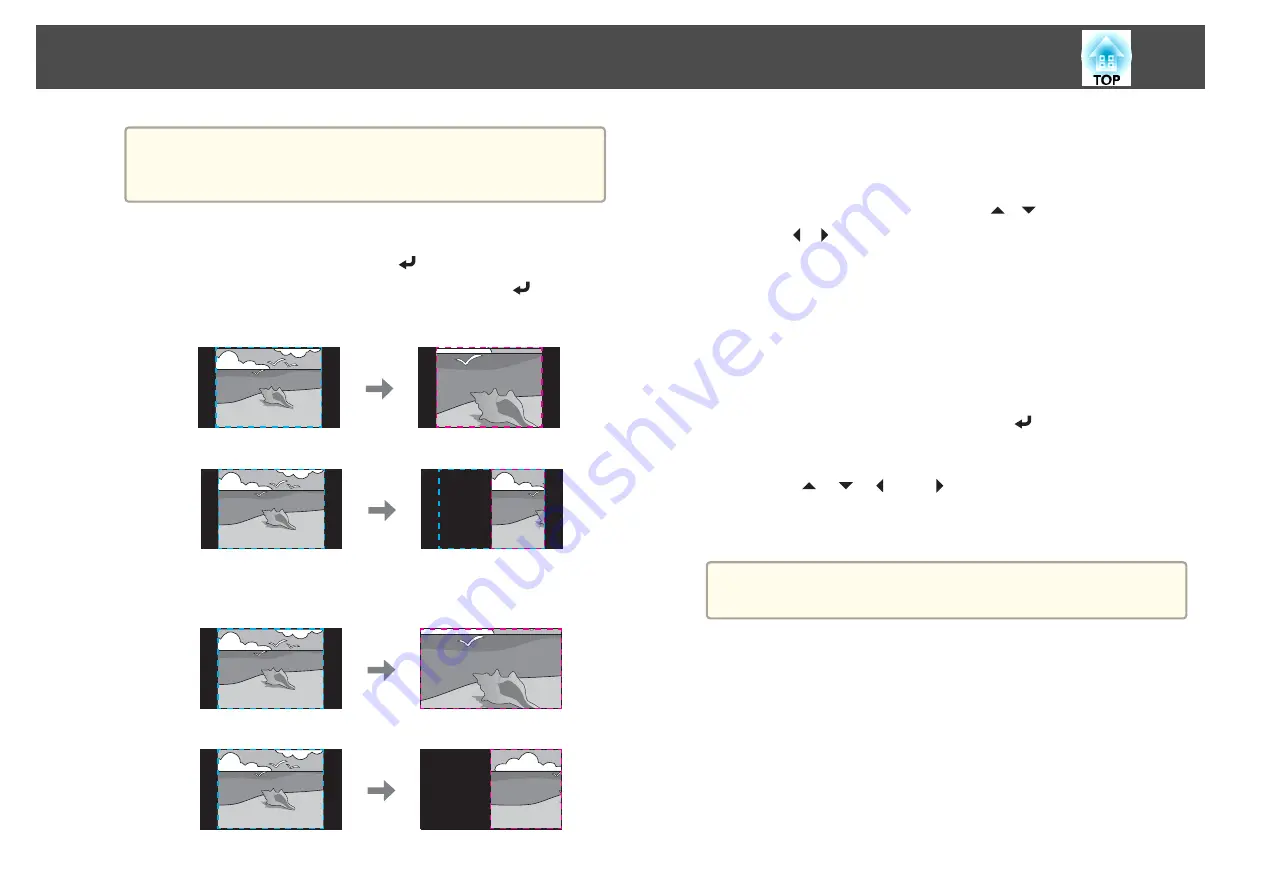
Zoom Display
: Adjusts according to the image currently displayed.
Enlarge
Move
Full Display
: Adjusts according to the projector's panel size (the
maximum area in which an image can be displayed).
Enlarge
Move
(3)
Press the [Esc] button to return to the previous screen.
f
Adjust the scale.
Select the adjustment method with the [
][
] buttons, then adjust
using the [ ][ ] buttons. (Minimum magnification of 0.5 to
maximum magnification of 10)
-+
: Enlarges or reduces an image horizontally and vertically at the
same time.
Scale Vertically
: Enlarges or reduces an image vertically.
Scale Horizontally
: Enlarges or reduces an image horizontally.
g
The image is clipped and adjusted.
(1)
Select
Clip Adjustment
, and then press the [
] button.
If you select
Clip Range
, the range and coordinates of the image that the
projector will project is displayed.
(2)
Use the [
], [
], [
], and [
] buttons to scroll the image.
Adjust the coordinates and size of each image while viewing the screen.
(3)
Press the [Menu] button to finish making settings.
a
You can check the displayed area after clipping for the entire
image from
Clip Range
.
Multi-Projection Function
98
Summary of Contents for EB-L1050U
Page 1: ...User s Guide ...
Page 14: ...Introduction This chapter explains the names for each part ...
Page 57: ...Basic Usage This chapter explains how to project and adjust images ...
Page 135: ...Configuration Menu This chapter explains how to use the Configuration menu and its functions ...
Page 207: ...Cleaning the Parts 207 ...
Page 214: ...Appendix ...


