


Chapter 1
1-24
1.2.4.2 Cleaning (LCD type)
0017-5953
iR2018 / iR2022
The parts that should be cleaned by the customer to maintain the design performance and the cleaning method are described below.
The service engineer should instruct the customer to clean the machine at regular intervals (once a month).
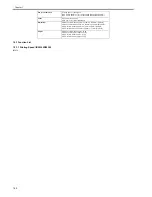
1. Pressure Plate
Clean the pressure plates [1] with a cloth dampened with water or neutral detergent and squeezed hard, and then wipe it with a dry soft cloth.
F-1-22
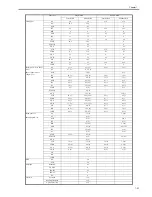
2. Document Glass/Glass holder (jump board)
Clean the document glass [1] with a cloth dampened with water or neutral detergent and squeezed hard, and then wipe them with a dry soft cloth.
When an ADF is installed, clean is document glass (small) [2] and glass holder [3] in the same manner.
F-1-23
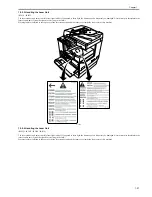
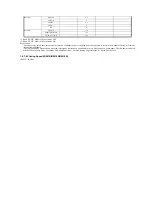
3. Cleaning the Fixing Pressure Roller
If white streaks are seen on the printed paper, the fixing pressure roller can be dirty. If white streaks are seen on the printed paper, clean the fixing pressure roller
in the user mode. Be sure to clean the fixing pressure roller after replacing the toner bottle.
1) Press the user mode key "
" to enter the user mode.
2) Using the left an right arrow keys, display the "ADJUST./CLEANING" menu.
3) Press the OK key.
4) Using the left and right arrow keys, select "FIX. UNIT CLEANING". Next press the OK key.
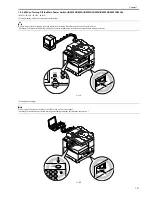
5) Using the left and right arrow keys, select "CLEAN PAPER PRT". Next press the OK key. A cleaning pattern will be printed.
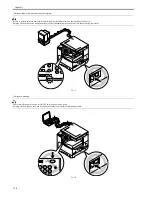
6) Open the manual feed tray.
F-1-24
[6]
Exterior cleaning
As required
When cleaning the fixing pressure roller, manually feed A4 paper.
MEMO:
The time required for cleaning is about 100 seconds.
[1]
[1]
[2]
[3]
Summary of Contents for imageRunner 2022
Page 1: ...Aug 8 2007 Service Manual iR2030 2025 2022 2018 Series ...
Page 2: ......
Page 6: ......
Page 20: ...Contents ...
Page 21: ...Chapter 1 Introduction ...
Page 22: ......
Page 57: ...Chapter 1 1 33 ...
Page 60: ......
Page 61: ...T 1 11 ...
Page 64: ......
Page 65: ...T 1 12 ...
Page 68: ......
Page 69: ...Chapter 2 Installation ...
Page 70: ......
Page 72: ......
Page 125: ...Chapter 2 2 53 ...
Page 126: ......
Page 127: ...Chapter 3 Main Controller ...
Page 128: ......
Page 130: ......
Page 142: ......
Page 143: ...Chapter 4 Original Exposure System ...
Page 144: ......
Page 170: ......
Page 171: ...Chapter 5 Laser Exposure ...
Page 172: ......
Page 174: ......
Page 181: ...Chapter 6 Image Formation ...
Page 182: ......
Page 184: ......
Page 196: ......
Page 197: ...Chapter 7 Pickup Feeding System ...
Page 198: ......
Page 217: ...Chapter 8 Fixing System ...
Page 218: ......
Page 220: ......
Page 234: ......
Page 235: ...Chapter 9 External and Controls ...
Page 236: ......
Page 255: ...Chapter 10 RDS ...
Page 256: ......
Page 258: ......
Page 268: ......
Page 269: ...Chapter 11 Maintenance and Inspection ...
Page 270: ......
Page 272: ......
Page 275: ...Chapter 12 Standards and Adjustments ...
Page 276: ......
Page 278: ......
Page 281: ...Chapter 12 12 3 ...
Page 282: ......
Page 283: ...Chapter 13 Correcting Faulty Images ...
Page 284: ......
Page 286: ......
Page 299: ...F 13 11 F 13 12 1 2 3 4 5 6 7 8 9 10 11 12 13 14 15 16 17 ...
Page 300: ......
Page 301: ...Chapter 14 Self Diagnosis ...
Page 302: ......
Page 304: ......
Page 317: ...Chapter 15 Service Mode ...
Page 318: ......
Page 381: ...Chapter 16 Upgrading ...
Page 382: ......
Page 384: ......
Page 411: ...Chapter 17 Service Tools ...
Page 412: ......
Page 414: ......
Page 417: ...Aug 8 2007 ...
Page 418: ......


