


Chapter 15
15-2
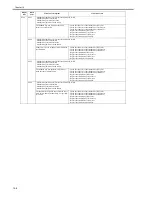
Displays ROM information, such as version numbers and checksums.
#TEST MODE
Makes various status checks, such as contact sensor, sensor and print status.
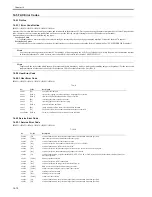
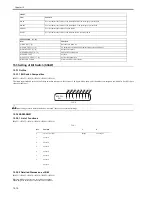
15.1.2 Using the Mode (Touch Panel Type)
0017-8509
iR2022i / iR2025 / iR2030 / iR2018i
F-15-1
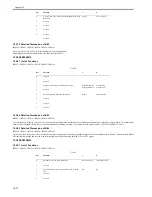
15.1.3 Using the Mode (LCD Type)
0017-8510
iR2018 / iR2022
1) Selecting Service Mode
Press the Additionalfunctions
key, 2key, 8key, Additional functions
key sequentially.
#SSSW
# N U M E R I C P a r a m .
# N U M E R I C P a r a m .
2) Selecting a Menu Item
Select the Menu item using the
[left arrow]/[right arrow] on the
touch panel.
3) Press [OK].
5) Registering/Setting Data
Enter data using the keypad,
and then press [OK].
6) Press the [Stop]/[Additional
functions]/[Reset] key to end
the service mode.
# N U M E R I C P a r a m .
# 3
NUMER I C
P a r am.
0 0 1
0 0 1
0 0 2
0 0 2
0
0
1 0
4) Selecting a Prarameter
Select the Prarameter using the
[left arrow]/[right arrow].
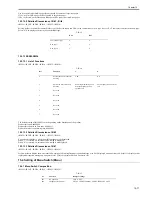
1) Selecting Service Mode
Press the Additionalfunctions
key, 2key, 8key, Additional functions
key sequentially.
#SSSW
3) Selecting a Menu Item
Press [OK].
2) Press [OK] on the
touch panel.
5) Registering/Setting Data
Enter data using the keypad,
and press the [OK].
6) Press the [Stop]/[Additional
functions]/[Reset] key to end
the service mode.
0 3 3
4) Selecting a Bit Switch
Select the bit using the
[left arrow]/[right arrow] on
the touch panel.
# S S S W
# S S S W
000000000
000000000
<Operation at the time of Bit SW>
<Operation at the time of Parameter>
0 3 3
# S S S W
000000000
0 3 3
# S S S W
000000001
Summary of Contents for imageRunner 2022
Page 1: ...Aug 8 2007 Service Manual iR2030 2025 2022 2018 Series ...
Page 2: ......
Page 6: ......
Page 20: ...Contents ...
Page 21: ...Chapter 1 Introduction ...
Page 22: ......
Page 57: ...Chapter 1 1 33 ...
Page 60: ......
Page 61: ...T 1 11 ...
Page 64: ......
Page 65: ...T 1 12 ...
Page 68: ......
Page 69: ...Chapter 2 Installation ...
Page 70: ......
Page 72: ......
Page 125: ...Chapter 2 2 53 ...
Page 126: ......
Page 127: ...Chapter 3 Main Controller ...
Page 128: ......
Page 130: ......
Page 142: ......
Page 143: ...Chapter 4 Original Exposure System ...
Page 144: ......
Page 170: ......
Page 171: ...Chapter 5 Laser Exposure ...
Page 172: ......
Page 174: ......
Page 181: ...Chapter 6 Image Formation ...
Page 182: ......
Page 184: ......
Page 196: ......
Page 197: ...Chapter 7 Pickup Feeding System ...
Page 198: ......
Page 217: ...Chapter 8 Fixing System ...
Page 218: ......
Page 220: ......
Page 234: ......
Page 235: ...Chapter 9 External and Controls ...
Page 236: ......
Page 255: ...Chapter 10 RDS ...
Page 256: ......
Page 258: ......
Page 268: ......
Page 269: ...Chapter 11 Maintenance and Inspection ...
Page 270: ......
Page 272: ......
Page 275: ...Chapter 12 Standards and Adjustments ...
Page 276: ......
Page 278: ......
Page 281: ...Chapter 12 12 3 ...
Page 282: ......
Page 283: ...Chapter 13 Correcting Faulty Images ...
Page 284: ......
Page 286: ......
Page 299: ...F 13 11 F 13 12 1 2 3 4 5 6 7 8 9 10 11 12 13 14 15 16 17 ...
Page 300: ......
Page 301: ...Chapter 14 Self Diagnosis ...
Page 302: ......
Page 304: ......
Page 317: ...Chapter 15 Service Mode ...
Page 318: ......
Page 381: ...Chapter 16 Upgrading ...
Page 382: ......
Page 384: ......
Page 411: ...Chapter 17 Service Tools ...
Page 412: ......
Page 414: ......
Page 417: ...Aug 8 2007 ...
Page 418: ......


