Electrical and Ignition
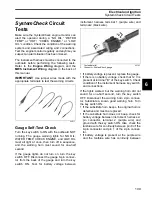
SystemCheck Circuit Tests
110
the two connectors, replace
SystemCheck
gauge.
Turn the key switch OFF and reconnect all discon-
nected circuits.
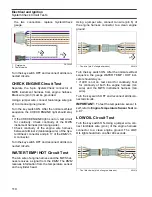
CHECK ENGINE Circuit Test
Separate the 6-pin
SystemCheck
connector of
MWS instrument harness from engine harness.
Black wire (pin 3) must be grounded.
Using a jumper wire, connect tan/orange wire (pin
2) to a clean engine ground.
Turn the key switch ON. After the normal self-test
sequence, the CHECK ENGINE light should stay
on.
•
If the CHECK ENGINE light is not on, test circuit
for continuity. Check continuity of the MWS
instrument harness (tan/orange wire).
•
Check continuity of the engine wire harness
between terminal 2 (tan/orange wire) of the
Sys-
temCheck
connector and pin 17 of the
EMM
J1-
A connector.
Turn the key switch OFF and reconnect all discon-
nected circuits.
WATER TEMP/ HOT Circuit Test
The tan wire of engine harness and the MWS har-
ness receives a signal from the
EMM.
The
EMM
receives information from the temperature sensor
on the cylinder head.
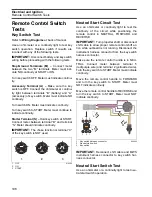
Using a jumper wire, connect tan wire (pin 6) of
the engine harness connector to a clean engine
ground.
Turn the key switch ON. After the normal self-test
sequence, the gauge WATER TEMP / HOT indi-
cator should stay on.
•
If LED is not on, test circuit for continuity. Test
for continuity of both the engine harness (tan
wire) and the MWS instrument harness (tan
wire).
Turn the key switch OFF and reconnect all discon-
nected circuits.
IMPORTANT:
To test the temperature sensor it-
self, refer to
Engine Temperature Sensor Test
LOW OIL Circuit Test
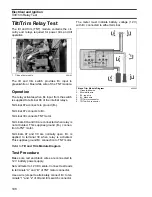
Turn the key switch ON. Using a jumper wire, con-
nect tan/black wire (pin 4) of the engine harness
connector to a clean engine ground. The LOW
OIL light should turn on after 40 seconds.
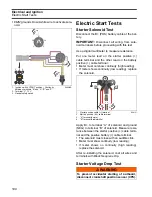
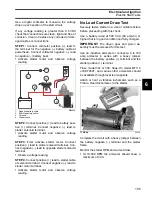
1.
Purple wire
2.
Tan/blue wire
DRC6280
1
2
1.
Tan wire (pin 6 of engine harness)
002079
1.
Tan / black wire (pin 4 of engine harness)
002079
1
1
Summary of Contents for EVINRUDE E-TEC BE225HGXABA
Page 163: ...Oiling System Oil Supply Diagrams 163 8 008208R Port Side View Starboard Side View ...
Page 165: ...Oiling System Oil Supply Diagrams 165 8 008432R Port Side View Starboard Side View ...
Page 167: ...Oiling System Oil Recirculation Diagrams 167 8 008207R Starboard View Port View ...
Page 251: ...Powerhead Powerhead Views 251 11 Powerhead Views Port Hose Routings 3 3 L models 007153 ...
Page 252: ...252 Powerhead Powerhead Views Starboard Hose Routings 3 3 L models 007154 ...
Page 253: ...Powerhead Powerhead Views 253 11 Port Hose Routings 3 4 L models 008503 ...
Page 254: ...254 Powerhead Powerhead Views Starboard Hose Routings 3 4 L models 008502 ...
Page 255: ...Powerhead Powerhead Views 255 11 Port 3 3 L models 008448 ...
Page 256: ...256 Powerhead Powerhead Views Starboard 3 3 L models 008449 ...
Page 257: ...Powerhead Powerhead Views 257 11 Port 3 4 L models 008441 ...
Page 258: ...258 Powerhead Powerhead Views Starboard 3 4 L models 008442 ...
Page 259: ...Powerhead Powerhead Views 259 11 Front 3 3 L models 008450 ...
Page 260: ...260 Powerhead Powerhead Views Front 3 4 L models 008439 ...
Page 261: ...Powerhead Powerhead Views 261 11 Rear 3 3 L models 007142 ...
Page 262: ...262 Powerhead Powerhead Views Rear 3 4 L models 008440 ...
Page 263: ...Powerhead Powerhead Views 263 11 Top 008438 ...
Page 264: ...264 Powerhead Powerhead Views Starboard ICON models 008504 ...
Page 269: ...Midsection Service Charts 269 12 Muffler 004117R ...
Page 320: ...S 322 ...

