Photos – Uploading Photos
What site visitors see
Photos may be uploaded onto the site by anyone creating a photo gallery or profile. They may also be uploaded
for faculty bios, extracurriculars and other purposes.
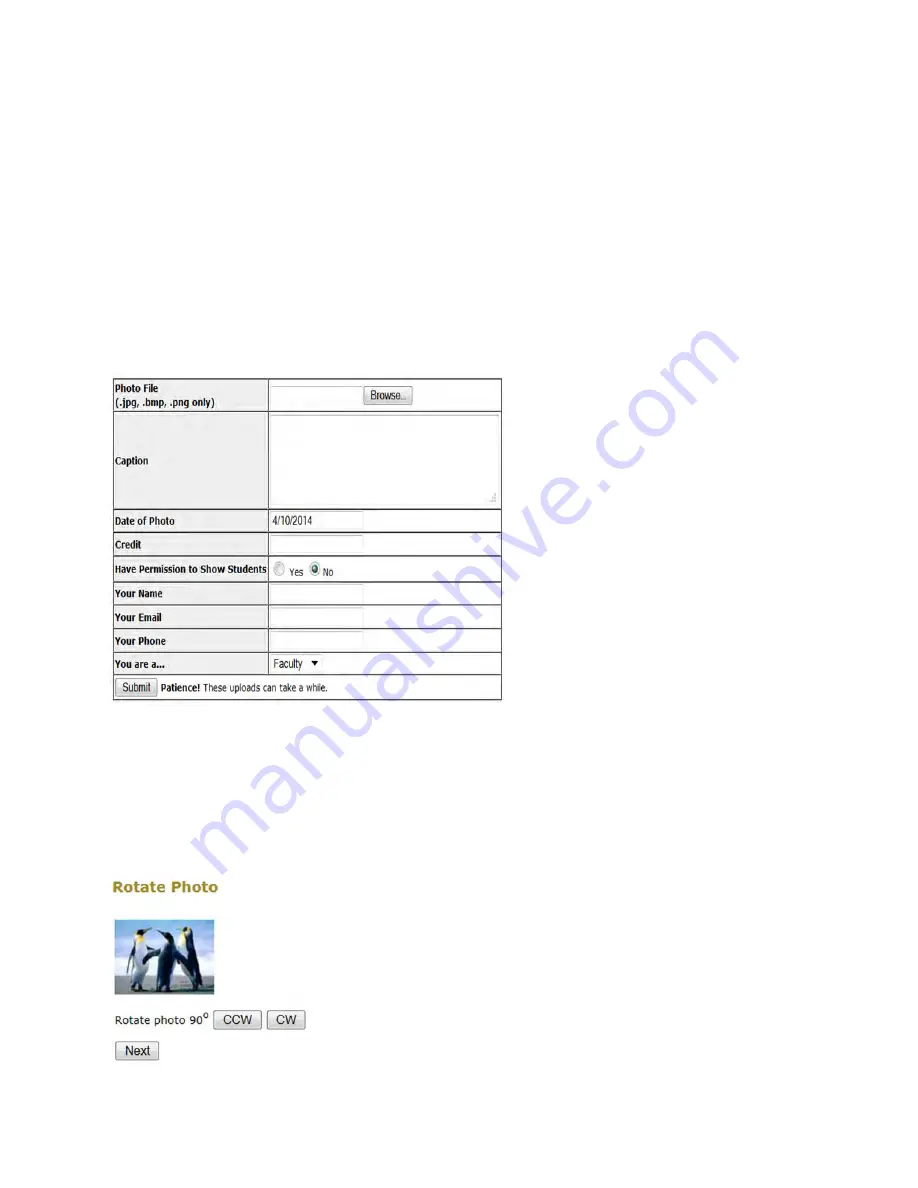
File uploading is a four-step process that uploads the photo, resizes it to match design standards, adds indexing
information, and rotates the photo for proper orientation.
Uploaded photos will not appear on the site, except to the individual who uploaded it, until approved.
Uploading a photo
Photos can be uploaded in the process of
another task such as building a photo gallery
or a profile. The uploading process is carried
out through a pop-up window.
1.
If you would like to upload a photo that is
not on the site but is on your computer, click
the Upload Photo link. A popup window
will appear that you will use to upload your
photo. (Remember that you can upload .jpg,
.bmp and .png photos only. Photos with .gif
extensions cannot be uploaded. ) Click the
Browse link. A popup window will appear
with all of the files on your computer listed.
Navigate through your files until you find
the photo that you want to upload and either
double click the file name or click on the file
name and click the Open button.
2.
Enter a brief caption, date and credit for the photo. Note that uploading a photo means you own the photo
(typically meaning you took the picture) and are giving the school the right to display it.
3.
Enter your contact info. Click Submit to upload and resize the photo.
4.
Click on CCW (counter clockwise) or CW
(clockwise) to rotate the photo if needed.
Summary of Contents for F30
Page 1: ...PROCEDURE MANUAL BIG SPRING ISD TECHNOLOGY 3600 11TH PLACE 432 264 4155 ...
Page 6: ...You will need to set your profile the first time you login by clicking on my profile ...
Page 7: ...Choose the correct campus that you are assigned to and then choose Save Changes ...
Page 8: ...You will need to click Request New Ticket ...
Page 9: ...Please select the problem type you are having from this list ...
Page 10: ...Click on yes to start your ticket Once you start your ticket there is no way to quit ...
Page 12: ...Click on the home button when you are done to see your open ticket ...
Page 65: ...Email Certificate Installation 3 Click Next 4 Click Next again ...
Page 66: ...Email Certificate Installation 5 Select Finish 6 Select Yes on the Security Warning screen ...
Page 68: ...Email Certificate Installation 9 Click Yes in the Security Alert box ...
Page 77: ......
Page 141: ...19 Click Next 20 Click Next 21 Click Install ...
Page 170: ......
Page 190: ......


