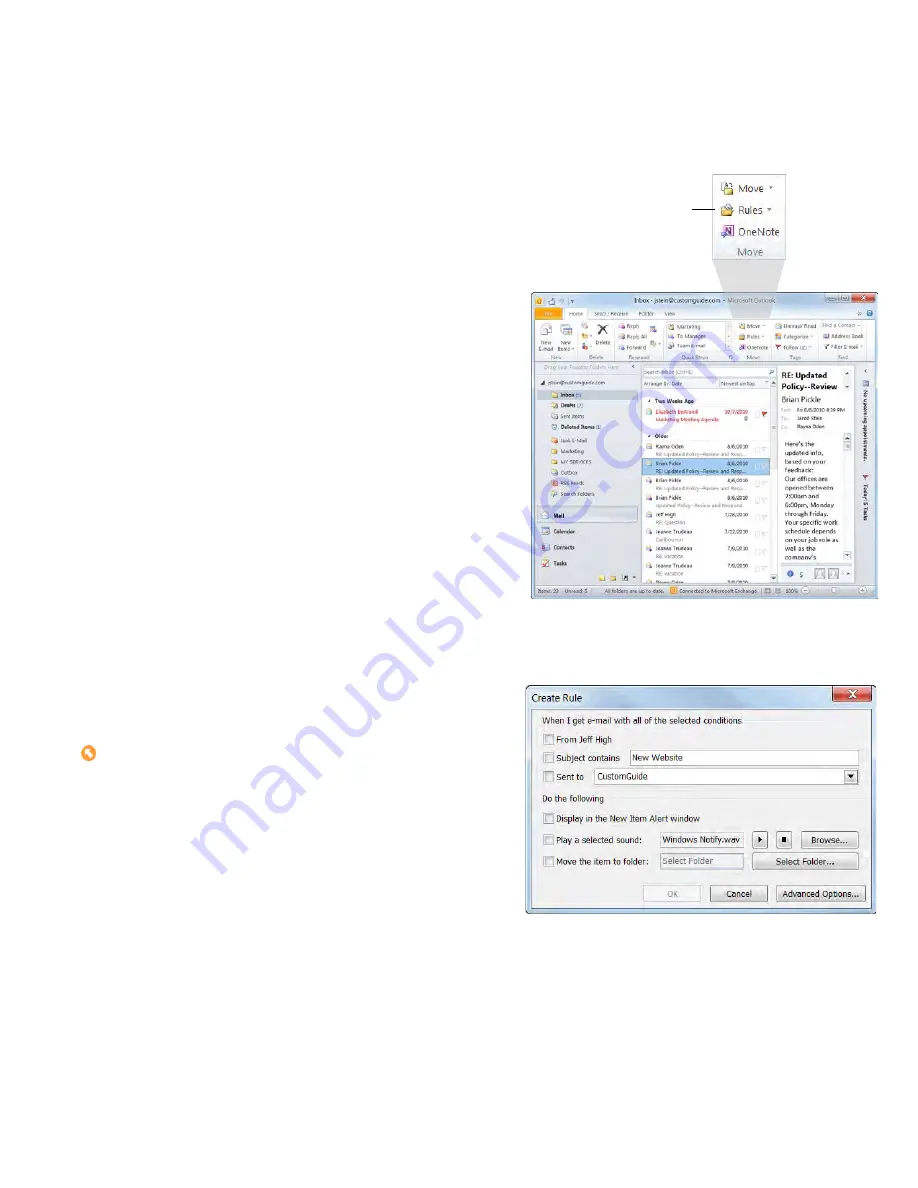
Click for options
to create a rule.
Creating a Rule
Rules are powerful tools that help you manage your e-mail messages by performing specific actions automatically. When you create a
rule, Outlook takes the action specified in the rule when a message arrives in your Inbox or when you send a message. You can use
rules to automatically:
•
Organize your messages:
For example, move all incoming messages
that have the word “Picnic” in the subject to a Picnic folder.
•
Create a notification:
Play a sound when you receive an e-mail from
your boss.
There are two different ways to create a rule:
•
By example:
Create a rule based on an e-mail message. Simply select
the message that contains the sender, subject, or recipient you want to
use in the rule.
•
Using the Rules Wizard:
You can create a rule based on a template
from the Stay Organized or Stay Up to Date collections of templates.
Or, you can start with a blank rule and let Outlook walk you through the
entire process of creating a rule using all your own conditions and
actions.
First let’s look at the easiest way to create a rule—by example.
1.
Click the
button in the Navigation Pane.
2.
Click the
Home
tab on the Ribbon and click the
Rules
button in the
Move group.
A list of options for creating rules appears. In Outlook 2010, options for creating Always Move rules based on sender or recipient
appear by default.
If you want to create a different kind of rule, you can use the Create Rule dialog box.
3.
Select
Create Rule
.
The Create Rule dialog box appears.
Other Ways to Create a Rule:
Right-click the message you want to base the rule on, select
Rules
from the contextual menu, and select the appropriate option or
Create Rule
.
4.
Select condition(s) for the rule.
Choose from From, Subject contains, or Sent To conditions. The rule
will apply only when you receive e-mail that satisfies all the selected
conditions.
Summary of Contents for F30
Page 1: ...PROCEDURE MANUAL BIG SPRING ISD TECHNOLOGY 3600 11TH PLACE 432 264 4155 ...
Page 6: ...You will need to set your profile the first time you login by clicking on my profile ...
Page 7: ...Choose the correct campus that you are assigned to and then choose Save Changes ...
Page 8: ...You will need to click Request New Ticket ...
Page 9: ...Please select the problem type you are having from this list ...
Page 10: ...Click on yes to start your ticket Once you start your ticket there is no way to quit ...
Page 12: ...Click on the home button when you are done to see your open ticket ...
Page 65: ...Email Certificate Installation 3 Click Next 4 Click Next again ...
Page 66: ...Email Certificate Installation 5 Select Finish 6 Select Yes on the Security Warning screen ...
Page 68: ...Email Certificate Installation 9 Click Yes in the Security Alert box ...
Page 77: ......
Page 141: ...19 Click Next 20 Click Next 21 Click Install ...
Page 170: ......
Page 190: ......


