7-5
IM AQ7280-01EN
System Configuration
1
2
3
4
5
6
7
8
Index
7.4 Configuring Network Settings (/LAN option)
Procedure
Network Setup Screen
1.
Press
SETUP
and then the
System Setup
soft key.
2.
Using the
rotary knob
and
ENTER
, select
Network Setup
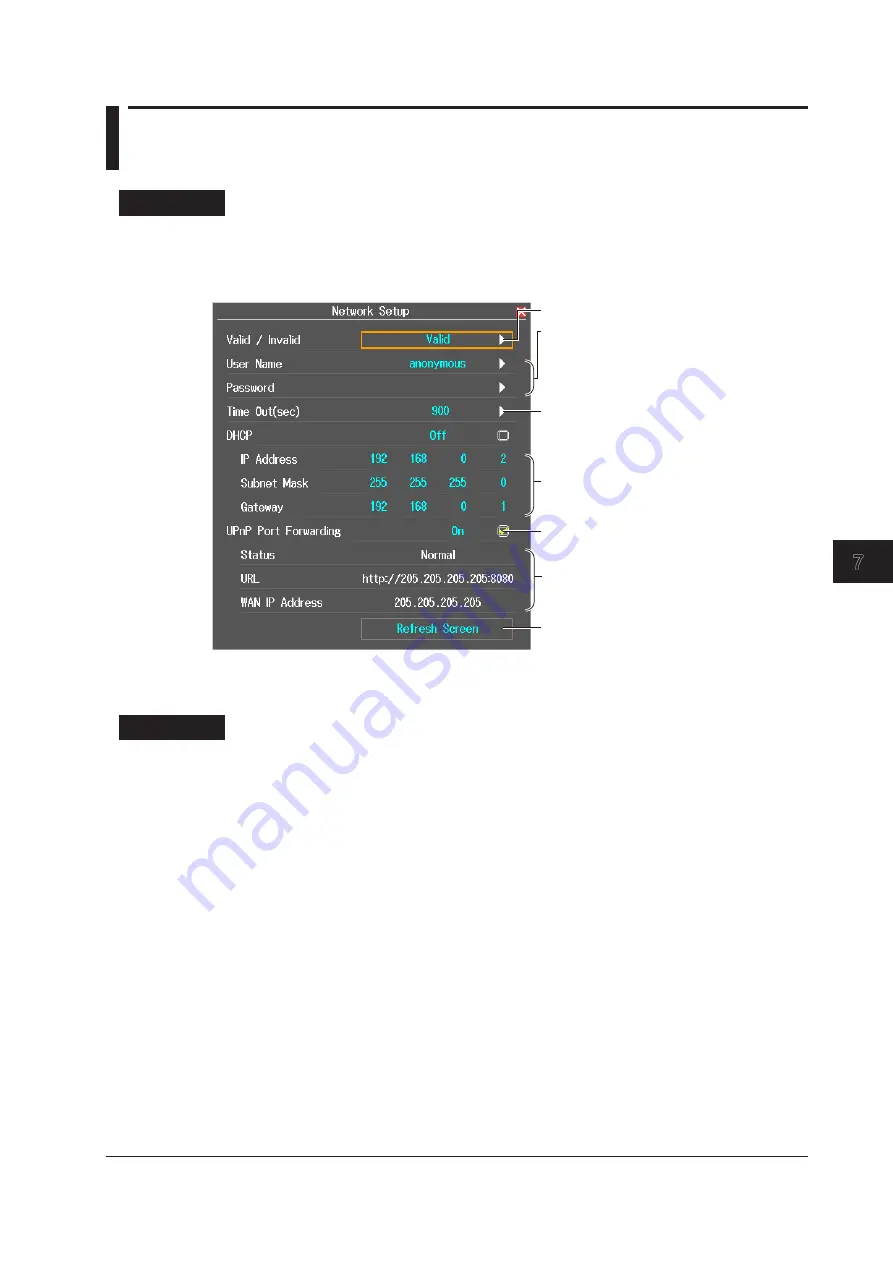
to display the following screen.
Enables or disables port
forwarding
Settings of a router with
a UPnP compatible NAT
Manually updates the display
of settings
When port forwarding is enabled,
the display of settings is updated
automatically every minute.
Enable or disable the network feature.
Set the user name and password.
Enter the user name and password by
following the procedure provided in
“Entering Character Strings” in the
Getting Started Guide, IM AQ7280-02EN.
Set the timeout value.
Set the TCP/IP parameters.
Explanation
Network settings apply models with the /LAN option.
You can use communication commands through the Ethernet port to control the AQ7280 or access the
AQ7280 from a PC that has an FTP client and download the data that is stored on the AQ7280 internal
memory.
For details on DHCP and TCP/IP, contact your network administrator.
Enabling and Disabling the Network Feature
Set the user name, password, timeout value, and TCP/IP parameters, and then select Valid.
When you enable the network feature, you can start communicating over the network. You do not have
to restart the AQ7280.
Valid: Communication is possible using the network feature.
Invalid: Communication is not possible using the network feature.
User Name and Password
Set the user authentication user name and password for accessing the AQ7280 from a PC.
User Name
You can use up to 15 characters. The default setting is “anonymous.”
Password
You can use up to 15 characters.


