Wam Overview
Wam is browser based. You can access it at wam.wazer.com.
After logging in, you will import the Design to be cut. After setting your Cut Parameters, Wam
will generate a unique Cut File which you will transfer to WAZER. This Cut File will contain all the
information WAZER needs to cut the Design in your chosen Material.
Despite Wam being browser based all of the design file processing is done locally on your
computer. Often there is a misconception that web based software means data is being sent and
processed on servers somewhere on the internet. This is extremely far from the truth and by
using Wam your design files are never sent to WAZER servers or across the internet... period. As
some additional insight on the matter, WAZER uses a browser based system for the following three
reasons:
•
Provide you free of charge updates to the software seemlessly upon login.
•
Free you of software installation needs and PC/Mac compatibility issues.
•
Collect information on the parameters that were chosen for a cut file so we can continue to
provide meaningful updates on features and options that are actually being used.
Wam Setup
Registration
You’ll need to register before using Wam for the first time.
•
Go to:
https://wam.wazer.com and select “register”.
•
Use WAZER’s software serial number to register your account and gain full access to the
Wam feature set. The software serial number is located on the first page of your user
manual that shipped with your Wazer.
•
Acknowledge you have read “Terms of Services” and “Privacy Policy” by clicking the adjacent
box.
NOTE:
Some users have reported trouble with registering their serial number later because of a
block symbol on the Submit Serial Number button. Once you have typed in your number, either
click outside the text box or press Enter to validate the number, then the button will activate and
allow you to finish registering.
Logging In
•
Go to: https://wam.wazer.com.
•
Log in using your registered user name and password (case sensitive).
•
You will remain logged in for 24 hours.
How to Use Wam
User Interface
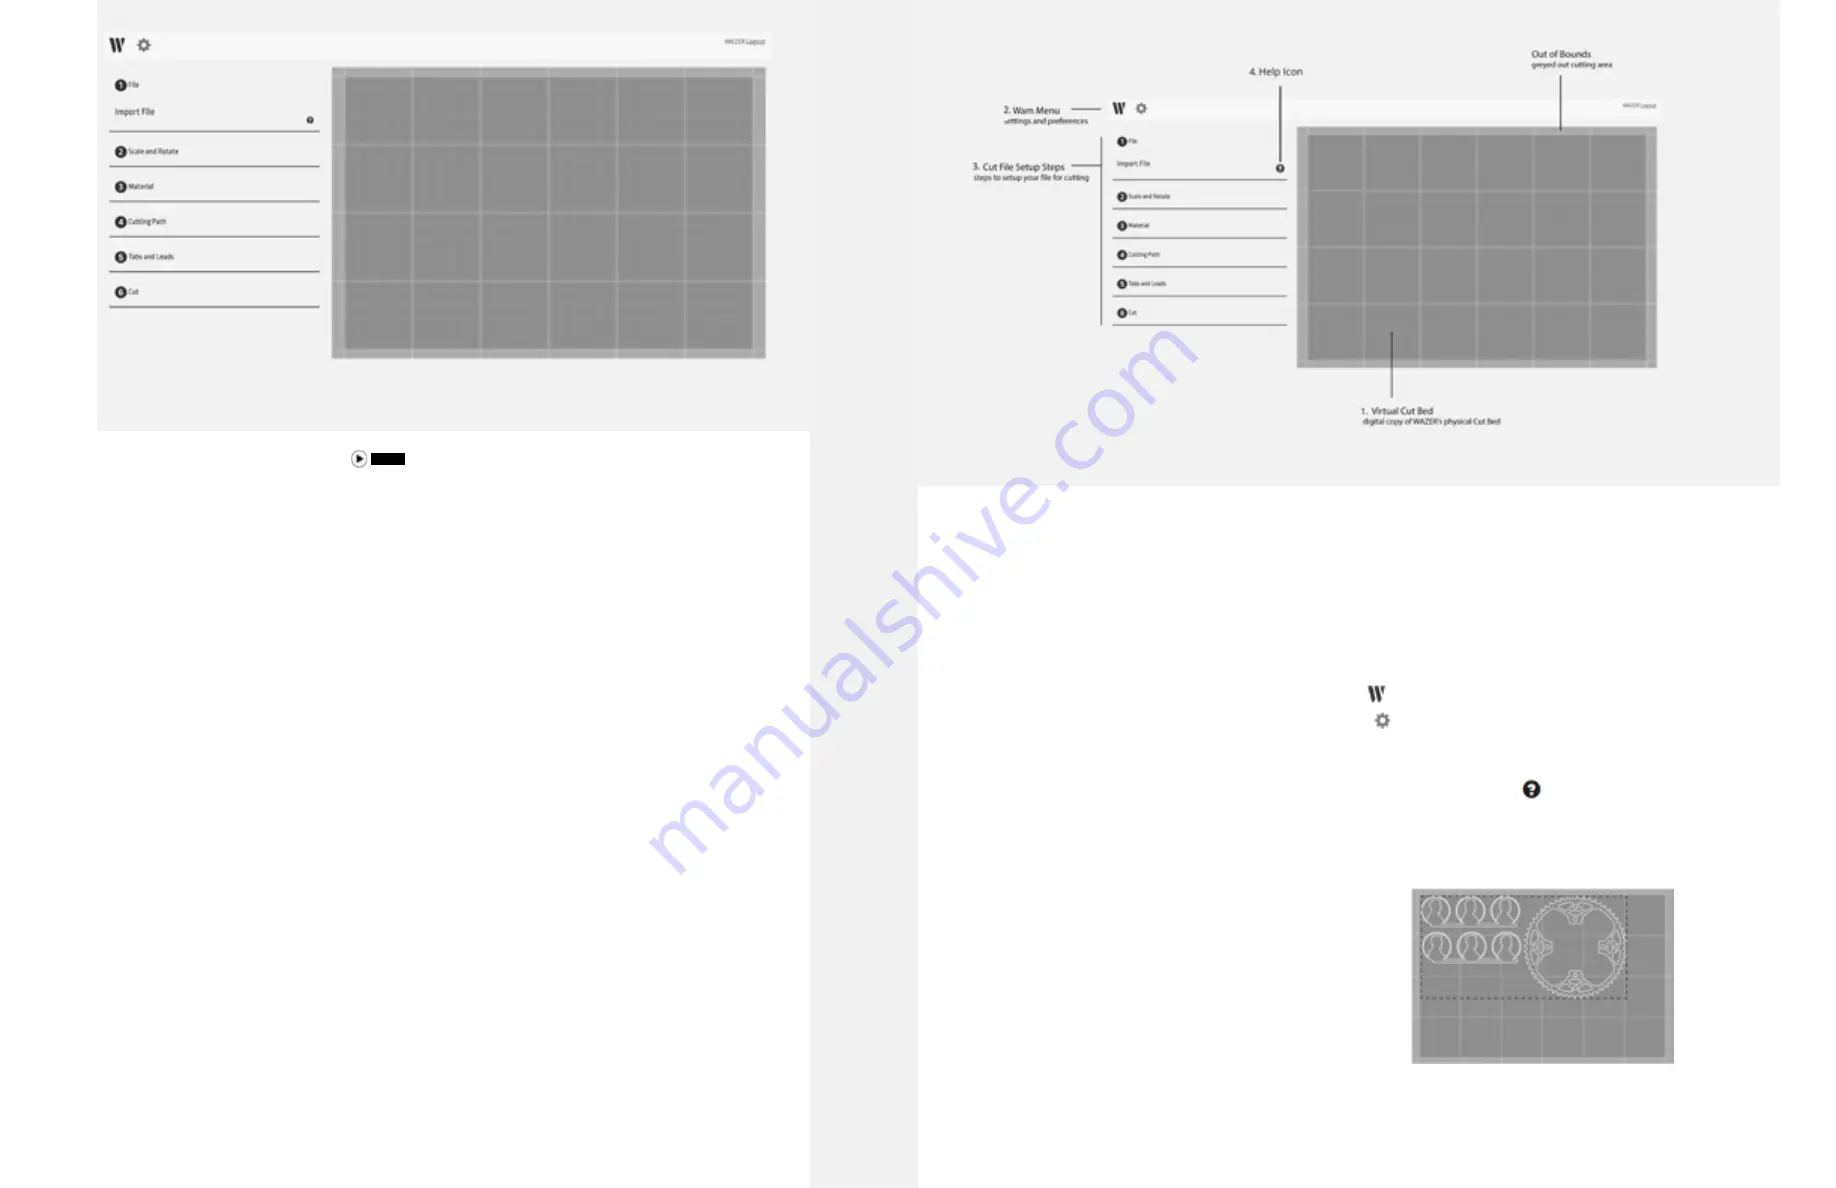
At the highest level, you can view Wam as having four areas
1.
Virtual Cut Bed
: This area represents the WAZER Cut Bed. This allows you to arrange various
Designs to be cut, exactly as they will be cut on WAZER’s Cut Bed.
2.
Wam Menu
:
•
Start a new Wam setup by clicking on the Icon.
•
Select the options menu by clicking on the Icon to change user account settings,
preferences, and your personal WAZER settings.
3.
Cut File Section
: Use these six expandable Sections to configure the Cut on WAZER.
4.
Help Icons:
Next to each of the tabs you will notice a question mark ic icon. Clicking these
icons at any point will explain how to use that tab to effectively setup your design for cutting
on the WAZER.
The Virtual Cut Bed
•
Arrange Cut Groups for cutting
. Left-click on the
desired Cut Group and drag into place.
•
Select multiple Cut Groups at once:
•
Apply the same settings to multiple Cut
Groups.
•
Hold the CNTRL or SHIFT key, and select
multiple Cut Groups.
•
The Bounding Box indicates selected Cut
Groups.
•
Move the Cut Groups as a group into the desired position.
VIDEO
Cr
eatin
g C
ut F
iles |
SE
C
TION 6
84
85


