1-4
1
Getting Started
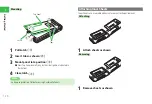
Inserting & Removing the USIM Card
7
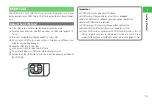
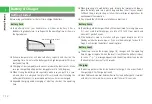
Before inserting or removing the USIM card, turn off the handset and
remove the battery pack.
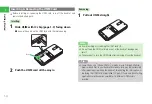
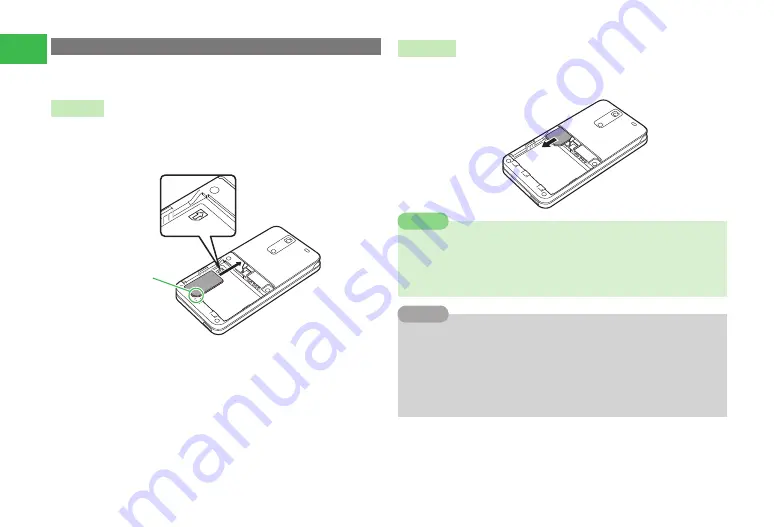
Inserting
1
Slide USIM with IC chip (page 1-3) facing down
●
Line up the notch on the USIM card with the inlet opening.
�����
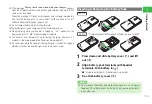
2
Push the USIM card all the way in
Removing
1
Pull out USIM straight
7
Avoid touching or scratching the USIM card’s IC.
7
Do not force the USIM card into or out of the handset; damage may
result.
7
Take care not to lose the USIM card after removing it from the handset.
Note
7
Some Chaku-Uta
®
/Chaku-Uta Full
®
, melody, movie, S! Appli, Lifestyle-
Appli or book files in your handset or memory card may be inaccessible
after repairing or replacing the handset, terminating the subscription, or
replacing the USIM card. Preinstalled S! Appli, S! Town and BookSurfing
applications may become unavailable if a different USIM card is
inserted.
Tip
Содержание 814T
Страница 3: ...iii...
Страница 32: ...1 2 1 Getting Started...
Страница 66: ...2 14 2 Basic Operations...
Страница 130: ...6 26 6 Camera...
Страница 186: ...11 18 11 Settings...
Страница 196: ...12 10 12 Security Settings...
Страница 254: ...14 10 14 Optional Services...
Страница 320: ...18 18 18 Communications...
Страница 338: ...20 10 20 S FeliCa...
Страница 356: ...21 18 21 Appendix AC Charger Input Voltage 100 to 240 V AC 50 60 Hz Charging Temperature Range 5 to 35 C...

