Operating Manual
Page 99 / 116
Copyright © REA Elektronik
REA ScanCheck 3n
V 1.2.0 24/02/2020
REA
VERIFIER
However, a licence key must be entered in the device to enable work with TransWin32. The
Service Tool does not require a licence key.
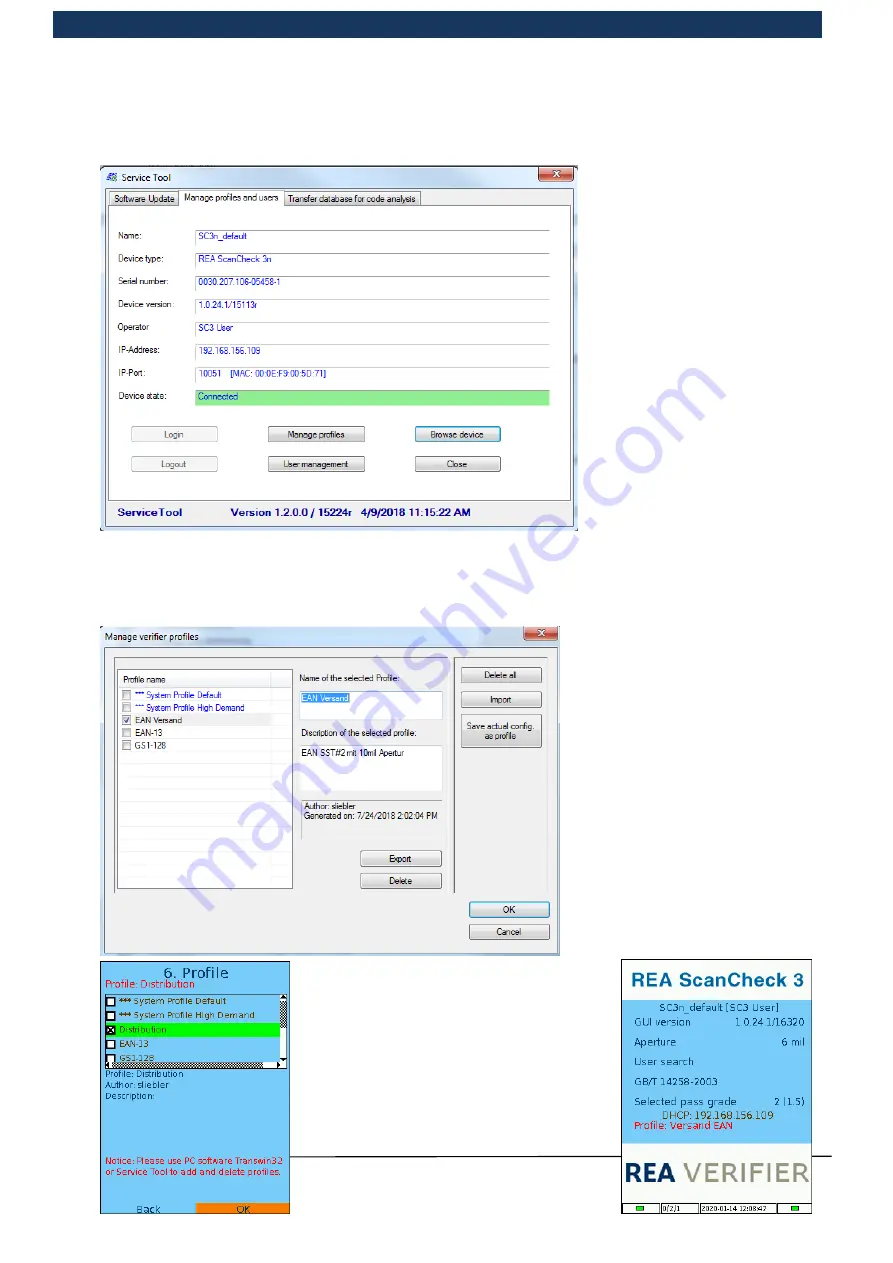
First, it is necessary to connect
the REA ScanCheck 3n with the
Service Tool. The network cable
must be connected from the PC
adapter to the POE power
supply unit and from the POE
power supply unit to the REA
ScanCheck 3n, as described in
chapter 3.2 Connecting the REA
ScanCheck 3n to the mains
power supply
Verweisquelle konnte nicht
gefunden werden.
. It is now
possible to select the “Browse
device” button in the Service
Tool, and then choose the
respective device. The status
“device state” must be set to
“Connected”, as marked in
green above.
Profiles are now edited via the “Manage profiles” button.
The left column shows the list of
profiles currently stored on the
device with their names.
The tick marks which of the profiles
is currently switched to active.
To activate a profile, mark it by
clicking in the empty box with the
mouse and then confirm the
selection with the <OK> button.
If the user marks a profile in the list
with the mouse pointer, the profile
name in the list is highlighted in
grey and the name and an
associated description of the profile
are displayed in the fields to the
right of this.
An available profile can also be selected
in the set-up menu directly on the REA
ScanCheck 3n in the main menu
“Configuration”, under item “6 Profile”.
Here, the currently selected profile is
shown with a green background.
The selected profile is shown on the start
screen in red.


