background image

Preface

Scalar i500 User’s Guide

3

Mercury Statement

Projectors, LCD displays, and some multifunction printers may 
use lamp(s) that contain a small amount of mercury for energy-

efficient lighting purposes. Mercury lamps in these products 

are labeled accordingly. Please manage the lamp according to 

local, state, or federal laws. For more information, contact the Electronic 

Содержание Scalar i500

Страница 1: ...Quantum Scalar i500 Tape Library 6 01210 04 A Quantum Scalar i500 Tape Library User s Guide User s Guide User s Guide User s Guide User s Guide Sc ala r i50 0...

Страница 2: ...TATEMENT Copyright 2008 by Quantum Corporation All rights reserved Your right to copy this manual is limited by copyright law Making copies or adaptations without prior written authorization of Quantu...

Страница 3: ...s 14 Stackability 15 Front Panel Components 16 Access Door 16 I E Station 17 Operator Panel 17 Front Power Switch 18 Back Panel Components 18 Rear Power Switches 19 Power System 20 Library Control Bla...

Страница 4: ...46 Chapter 3 Configuring Your Library 47 About the Setup Wizard 47 Using the Default Administrative User Account 48 Completing the Library Configuration With Menu Commands 48 Using the Setup Wizard 4...

Страница 5: ...omer Contact Information 88 Configuring the Library E mail Account 88 Working With E mail Notifications 90 Creating E mail Notifications 91 Modifying E mail Notifications 91 Deleting E mail Notificati...

Страница 6: ...ibrary 121 Chapter 4 Running Your Library 122 Logging In 122 Logging In When LDAP or Kerberos is Enabled 123 Logging Out 123 Understanding the Location Coordinates 124 Modules 125 Columns 125 Slots 12...

Страница 7: ...g Advanced Reporting Data 160 Saving and E mailing Advanced Reporting Data 160 Viewing FC I O Blade Information 161 Viewing FC I O Blade Port Information 162 Chapter 6 Updating Library and Tape Drive...

Страница 8: ...n Existing Library232 Preparing to Permanently Remove the 9U Expansion Module 233 Removing the Expansion Module 236 Preparing to Use the New Library Configuration 241 Replacing the Control Module 247...

Страница 9: ...ving or Shipping 321 Chapter 8 Troubleshooting 323 About RAS Tickets 323 Viewing RAS Tickets 324 Resolving RAS Tickets 325 Capturing Snapshots of Library Information 326 Saving and E mailing the Libra...

Страница 10: ...ibrary Demo 351 Configuring the Internal Network 352 Library Diagnostics 352 Q EKM Path Diagnostics 353 Drives Diagnostics 355 Drive Tests 355 Media Tests 356 Robotics Diagnostics 357 Chapter 9 Workin...

Страница 11: ...Scalar i500 User s Guide xi Glossary 382...

Страница 12: ...I E Station Slots Available 74 Table 7 Control Path Assignment During Partition Creation 78 Table 8 Rackmount Kit Contents 285 Table 9 Rack Ear Kit Contents 287 Table 10 LED Color and Blade Status 34...

Страница 13: ...Scalar i500 User s Guide xiii Table 18 Library Capacity 365 Table 19 TapeAlert Flag Severity Codes 372 Table 20 TapeAlert Flag Descriptions 373...

Страница 14: ...stems Plus Expansion Modules 15 Figure 5 Front Panel Components 16 Figure 6 Back Panel Components 19 Figure 7 Power Supply LEDs 21 Figure 8 Library Control Blade 23 Figure 9 FC I O Blade 25 Figure 10...

Страница 15: ...e 24 Power Cord Management 197 Figure 25 Ethernet Cable Management 200 Figure 26 Cable Management All Cables 201 Figure 27 Recommended Module Locations 207 Figure 28 Y Rail in Unlocked Functional Posi...

Страница 16: ...ent of the Scalar i500 library including Installing the library Basic library operations Operator commands Troubleshooting Product Safety Statements This product is designed for data storage and retri...

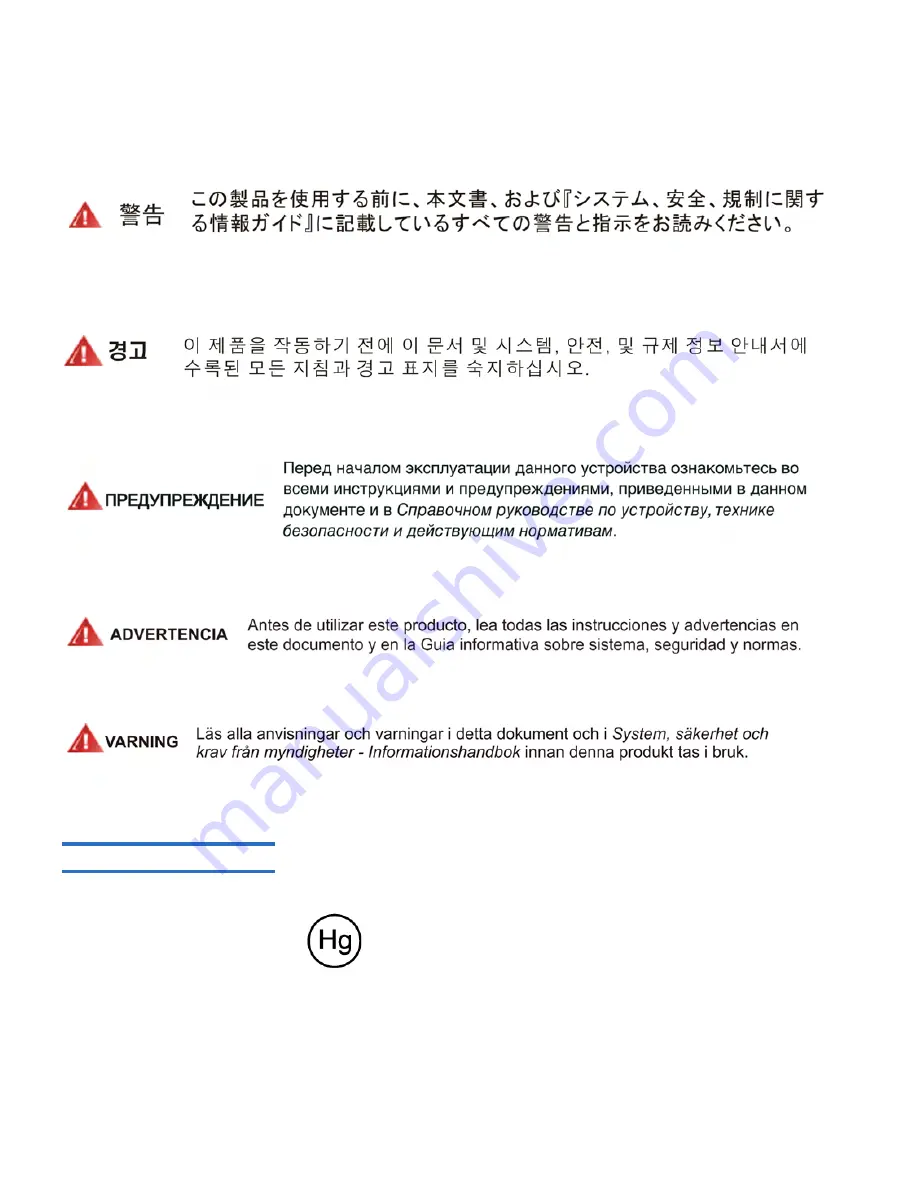
Страница 17: ...Preface Scalar i500 User s Guide 2 Warning Before operating this product read all instructions and warnings in this document and in the System Safety and Regulatory Guide...

Страница 18: ...me multifunction printers may use lamp s that contain a small amount of mercury for energy efficient lighting purposes Mercury lamps in these products are labeled accordingly Please manage the lamp ac...

Страница 19: ...our waste equipment for recycling please visit our web site at http www quantum com AboutUs weee Index aspx or contact your local government authority your household waste disposal service or the busi...

Страница 20: ...ons lists the library s specifications Appendix B TapeAlert Flag Descriptions describes of all the TapeAlerts you may see listed in RAS tickets and reports on your library This document concludes with...

Страница 21: ...xx Quantum Intelligent Libraries Reference Guide for the Scalar i500 and Scalar i2000 Provides an interface standard that can be used in a SAN environment 6 01370 xx Scalar i500 SNMP Reference Guide...

Страница 22: ...CO 80112 800 854 7179 or 303 397 2740 Contacts Quantum company contacts are listed below Quantum Corporate Headquarters 0 To order documentation on the Scalar i500 or other products contact Quantum Co...

Страница 23: ...n the Service and Support website at www quantum com support The Service and Support Website contains a collection of information including answers to frequently asked questions FAQs You can also acce...

Страница 24: ...d tape drive requirements change expansion modules can be added to the library allowing a configuration of up to a full 41 rack units 41U where 1U 1 75 The Scalar i500 library is designed for ease of...

Страница 25: ...i500 systems By adding 9U expansion modules you can upgrade a base system to A 32U library consisting of one 5U control module and three 9U expansion modules A 41U library consisting of one 5U control...

Страница 26: ...Chapter 1 Description Scalar i500 User s Guide 11 Figure 2 14U Library Configuration 5U Control Module Plus One 9U Expansion Module 1 Control module 2 Expansion module...

Страница 27: ...Chapter 1 Description Scalar i500 User s Guide 12 Figure 3 23U Library Configuration 5U Control Module Plus Two 9U Expansion Modules 1 5U control module 2 9U expansion module 3 9U expansion module...

Страница 28: ...ptively with users data And the Scalar i500 is designed to integrate easily with disk backup making it the perfect library for next generation backup architectures With the Scalar i500 Information Tec...

Страница 29: ...ed storage slots I E station slots and tape drive slots available See Library Capacity on page 365 for the number of slots available for each library configurations Control Module 1 The control module...

Страница 30: ...ary is 41U which consists of a 5U control module and four 9U expansion modules Figure 4 illustrates the stackability of the library and the recommended library configurations Figure 4 Base Systems Plu...

Страница 31: ...s of the library The paragraphs following Figure 5 describe the components in detail Figure 5 Front Panel Components Access Door 1 The access door allows access to the internal components of the libra...

Страница 32: ...ntory I E Station 1 I E stations enable importing and exporting cartridges with minimal interruption of normal library operations I E stations are located on the front of the control module and on the...

Страница 33: ...he front power switch turns off the robot and operator panel but power still runs to the power supplies Use the front power switch to manually shut down the library See Shutting Down or Restarting the...

Страница 34: ...wer supply Turning off the rear power switch on a power supply removes all power from the library The rear power switches should be used in all emergency and service situations 1 Library control blade...

Страница 35: ...arning Turn off the rear power switch whenever you are servicing the library In the event of danger to personnel or property immediately turn off the rear power switch and remove all power cords Cauti...

Страница 36: ...s LEDs that provide status information These LED status indicators are green and blue in color Green represents AC OK or DC OK Blue represents swap mode power status Figure 7 shows the power supply LE...

Страница 37: ...Fibre Channel FC I O blade slots The LCB has four Ethernet ports supporting a total of four FC I O blades in the library The LCB indicates its status with three LED Reliability Availability and Servi...

Страница 38: ...in the library Each FC I O blade has an embedded controller that provides connectivity and features that enhance the performance and reliability of tape drive operations I O blades also aggregate FC...

Страница 39: ...umber of installed expansion modules the library can support from one to four FC I O blades No library configuration can contain more than four FC I O blades Any FC drive in the library including driv...

Страница 40: ...xpansion module For information on installing the fan blade see Adding Removing and Replacing the I O Fan Blade on page 317 Figure 10 shows the I O fan blade including the LED The single amber LED rep...

Страница 41: ...rives and the I E station The robotic arm picker has picker fingers that enable it to grab tape cartridges and move them into positions along X Y and Z motion coordinates The robotic system and the ba...

Страница 42: ...ion must contain at least one tape drive Control modules can hold a maximum of two tape drives Expansion modules can hold a maximum of four tape drives Please see Supported Components on page 363 for...

Страница 43: ...face and functionality See Chapter 2 Understanding the User Interface for more information about the operator panel and the web client Partitions 1 Partitions are virtual sections within a library tha...

Страница 44: ...es extra data security by prohibiting accidental data erasure The WORM feature is supported whenever you use WORM cartridges Licensable Features In addition to the standard features the following addi...

Страница 45: ...sed 87 The remaining 46 slots of the 14U library can be activated at a later time by purchasing an upgrade The full 133 slots would then be available for use If you upgrade to more slots your new lice...

Страница 46: ...ased your library you must install the license key on your library to enable the Q EKM functionality When you purchase Q EKM Quantum s Service department will schedule an appointment to install the ap...

Страница 47: ...hich tape drives are working at optimum capacity and which are under utilized This can help you allocate your tape drive resources properly Media Integrity Analysis Report Provides TapeAlert count for...

Страница 48: ...he library Some functionality is only available through the web client and some functionality is only available through the operator panel However using the web client rather than the operator panel t...

Страница 49: ...nd access to the menu tabs on the main screen On all other screens this area is a single bar and provides the screen name Menu Bar web client Lists the menu choices Main Main content area of the scree...

Страница 50: ...Chapter 2 Understanding the User Interface Common User Interface Elements Scalar i500 User s Guide 35 Figure 11 Operator Panel User Interface Figure 12 Web Client User Interface...

Страница 51: ...de labels Each button has three states indicated by color The three states are Green No RAS tickets exist or if any tickets do exist they have all been closed Yellow The library contains open and unop...

Страница 52: ...re online in the Storage Slots section The current user s login privileges determine the information that is displayed in the Capacity View Details about Capacity View include On the web client users...

Страница 53: ...Keypads 2 When a user touches a text box requiring data entry a keypad screen appears The alpha numeric or month keypad appears depending on the type of input field touched All alphabetic character e...

Страница 54: ...users can also access commands to lock or unlock the I E station and to shut the library down The Tools menu consists of commands that you can use to maintain your library such as viewing RAS Tickets...

Страница 55: ...ing Slots Partitions Change Mode Save Restore Configuration Network Settings I E Station Slots Drive Load Unload Change Mode Email Configuration Record Logged in Usersa Drive Settings I E Station Lock...

Страница 56: ...ms are available for libraries that contain I O blades Network Management Network SNMP SNMP Trap Registrations IO Blade Infob User Management User Accounts Remote Authentication IO Blade Port Infob IO...

Страница 57: ...Slots Configure Cleaning Slots Move Media All RAS Ticketsa User Mgmt Create User Modify User Import Media Capture Snapshota Drive Settings Fibre SCSI SAS Export Media Drive Mgmta Clean drive Reset dr...

Страница 58: ...minutes a Touch screen audio Unload assista Logical SN Addressinga Manual Cartridge Assignmenta Disable Remote Service Usera Enable SSL Enable SNMP V1 V2 Enable IPv6 Enable SMI S IO Bladesb Port Confi...

Страница 59: ...ee Working With User Accounts on page 92 for more information on setting user privilege levels Three types of users are defined in Scalar i500 libraries Administrative users have access to the entire...

Страница 60: ...on user privileges include The library can contain eighteen user accounts user or administrative or both including the default administrative user account Eighteen user user or administrative or both...

Страница 61: ...logging on to the library remotely from either the web client or over the Ethernet service port The service user will still be able to log on to the library from the operator panel interface For more...

Страница 62: ...he Setup Wizard which walks you through the initial configuration of the library s basic operational settings The Setup Wizard on the operator panel only runs once at initial startup After that admini...

Страница 63: ...xt box and password in the Password text box As soon as the initial setup is complete you should change the password on the default administrative account For information on changing passwords see Mod...

Страница 64: ...er access the Setup Wizard from the operator panel You can always access the Setup Wizard from the Setup menu on the web client The recommended procedure for using the Setup Wizard for the initial con...

Страница 65: ...partitions I E stations storage slots cleaning slots and loaded media See Viewing the Library Configuration on page 149 for more information on the Library Configuration report Details on using the S...

Страница 66: ...he total number depends on number of pre activated slots purchased Network settings DHCP enabled IPv6 disabled Import export I E station slots 6 Cleaning cartridge slots 0 Partitions By default the li...

Страница 67: ...an feature Configuring I E Station Slots operator panel and web client Allows you to configure import export I E station slots Working With Partitions operator panel and web client Allows you to set t...

Страница 68: ...web client using a Web browser When typing the IP address into the Web browser make sure to precede it with http for example http 123 123 123 123 Managing the Network Administrative users can configu...

Страница 69: ...net mask IPv4 only net prefix IPv6 only and default gateway address In addition from the web client when DHCP is disabled can configure the primary and secondary Domain Name System DNS server addresse...

Страница 70: ...digits 2001 0ff8 55cc 033b 1319 8a2e 01de 1374 is an example of a valid IPv6 address Also if one or more of the four digit groups contains 0000 you can omit the zeros and replace them with two colons...

Страница 71: ...abled Disabling SSL settings creates an unencrypted connection from a Web browser to the web client See the SMI S Reference Guide 6 01317 xx for further configuration and access details Caution Modify...

Страница 72: ...Bs with an SNMP management application contact your network management application vendor Administrative users can perform the following SNMP procedures Register the IP addresses and port numbers of e...

Страница 73: ...y default the library ignores all SNMP SET operations so external management applications cannot register themselves to receive SNMP traps from the library After registering the transport protocols IP...

Страница 74: ...any issues that occur during the operation See the Basic SNMP Reference Guide 6 01370 xx for further configuration and access details The path to open the appropriate screen is as follows From the web...

Страница 75: ...s this string should be modified When modifying the community string adhere to the following guidelines the community string is case sensitive cannot be empty and cannot exceed 32 characters See the B...

Страница 76: ...01370 xx or contact Quantum Technical Support For contact information see Getting More Information or Help on page 8 For information on integrating MIBs with an SNMP management application contact yo...

Страница 77: ...When you automatically create partitions you add to the number of existing partitions Manually An administrative user can create partitions one at a time Creating partitions manually gives you more co...

Страница 78: ...using the automatic partitioning process Automatic partitioning assigns available library resources proportionately among the partitions grouping tape drives according to their interface type SCSI FC...

Страница 79: ...page 78 for a description of the default control paths and how to change them By default the library applies the Standard barcode format to each partition You can change this setting by modifying the...

Страница 80: ...underscores _ Media Barcode Format defaults to Standard The available options are as follows Standard Six Six character barcode number with or without a one or two character media ID for example XXXXX...

Страница 81: ...o open the appropriate screen is From the web client select Setup Partitions Modifying Partitions 3 Using the web client administrative users can modify partition settings any time after the partition...

Страница 82: ...assigned to the partition You cannot modify partitions manually from the operator panel The path to open the appropriate screen is From the web client select Setup Partitions Deleting Partitions 3 A...

Страница 83: ...d across the library s physical modules and share resources the library will report errors if you permanently remove or replace a module in your library without first deleting partitions and modifying...

Страница 84: ...hanging Partition Access 3 An administrative user can control which partitions a specified user can access by modifying the user s account Also any user assigned to a partition that has been deleted c...

Страница 85: ...ated in the Active column of the partition table The paths to open the appropriate screens are as follows From the web client select Operations Partitions Change Mode From the operator panel select Op...

Страница 86: ...When manual cartridge assignment is disabled host notification via SCSI Unit Attention 6 2801 depends on the number of configured partitions If multiple partitions are defined the host application is...

Страница 87: ...mum number of cleaning slots that can be configured is four To disable AutoClean configure zero cleaning slots Administrative users can configure cleaning slots during the initial library configuratio...

Страница 88: ...can also choose to configure zero I E station slots and use all slots in all I E stations for tape cartridge storage For more information on configuring zero I E slots see Configuring Zero I E Statio...

Страница 89: ...reconfigure the storage slots as I E station slots The default number of dedicated I E slots is six If you accept the Setup Wizard default configuration settings six I E slots will be created in the...

Страница 90: ...143 I E station slots are shared by all partitions within a library To identify how a specific I E station magazine is configured view the Library Configuration report available from the Reports menu...

Страница 91: ...ed If the affected partition is online it will be taken offline before the parameters are set and brought back online after they are set Each device on a SCSI bus including the host bus adapter HBA ne...

Страница 92: ...nterface speed can be set to Auto default 1 Gb s 2 Gb s and 4 Gb s When you set the speed to 4 Gb s using the web client a caution message appears informing you that the 4 Gb s speed selection may not...

Страница 93: ...l path note the following No FC I O blades Any combination of tape drive interface types SCSI FC or SAS The first tape drive assigned to the partition You must select a tape drive as the control path...

Страница 94: ...ol path selection The paths to open the appropriate screens are as follows From the web client select Setup Control Path From the operator panel select Setup Control Path Caution Do not select an FC t...

Страница 95: ...ficate The license key certificate contains an authorization code that enables you to retrieve your license key from the Quantum web site Once you install the license key on the library the feature be...

Страница 96: ...he proper key associated with the library serial number License keys do not expire Once installed on the library license keys cannot be removed unless you replace the control module or the library con...

Страница 97: ...t Tools About Library or On the web client select Reports About Scalar i500 4 Access the web site for the feature you want 5 In the Serial Number box enter your serial number Note If you order more th...

Страница 98: ...library See Applying a License Key Applying a License Key 3 A license key may be applied to the library during the initial configuration or whenever licensed features are purchased If an additional fe...

Страница 99: ...irmware to the latest released versions Step 2 Install the License Key on the Library 3 If your license key is not already installed on the library install it now see Applying a License Key on page 83...

Страница 100: ...y Q EKM server if DNS is enabled 4 Enter the port number for the primary Q EKM server into the Primary Q EKM port number text box The default port number is 3801 unless SSL is enabled If SSL is enable...

Страница 101: ...written to non supported media is not encrypted Data written to encryption supported media in Q EKM supported tape drives will be encrypted unless data was previously written to the media in a non enc...

Страница 102: ...a assigned to the partition Allow Application Managed Not for use with Q EKM Allows an external backup application to provide encryption support to all encryption capable tape drives and media within...

Страница 103: ...customer contact information from the web client only but you can view it from the operator panel The paths to open the appropriate screens are as follows From the web client select Setup Notification...

Страница 104: ...Capturing Snapshots of Library Information on page 326 Authentication includes a means to enter the login account name and password for the library Selecting the box enables use authentication Clearin...

Страница 105: ...figuring the Library E mail Account on page 88 for information on how to configure the e mail account See Creating E mail Notifications on page 91 for information on setting up additional e mail notif...

Страница 106: ...th E mail Notifications Each e mail notification includes an optional Comments text box you can use to enter important system configuration details such as the network environment or third party softw...

Страница 107: ...your needs This section covers how to set up user accounts and authentication for both local and remote authentication Local Authentication vs Remote Authentication 3 Local authentication control is...

Страница 108: ...and all of its partitions The library ships with a default administrative user account The user name for this account is admin and the password is password You cannot delete this user account or chang...

Страница 109: ...ser Modifying Local User Accounts 3 After a local user account has been created administrative users can modify the account settings such as the password privilege level and partition access You canno...

Страница 110: ...user account information on an LDAP server This must be done by the directory service provider For more information on working with local user accounts see About Local User Accounts on page 93 Using M...

Страница 111: ...need to be assigned to partition related groups on the LDAP server The Login screen displays LDAP login options only when LDAP is enabled Configuring LDAP on the Library 3 Before configuring LDAP obta...

Страница 112: ...e test is unsuccessful Operation Failed appears in the Progress Window Follow the instructions listed in the Progress Window to resolve any issues that occur during the operation After configuring LDA...

Страница 113: ...ectory domain on the Windows 2003 server 2 At the command prompt enter dcpromo 3 Windows 2003 servers only Install Windows Support Tools on the Windows 2003 server as follows a Go to www microsoft com...

Страница 114: ...RB5_NT_SRV_HST crypto RC4 HMAC NT mapUser ourrealm local computers kerbtest For Windows 2008 ktpass out library keytab princ library fqdn of library realm rndPass ptype KRB5_NT_SRV_HST crypto AES256 S...

Страница 115: ...ate and time events take place and to set the time for automatic backup and restore functions At a minimum you should set the library s date and time as part of the initial library configuration The t...

Страница 116: ...the Date Time screen When NTP is enabled you cannot manually configure date and time For more information on setting date and time manually see Setting the Date and Time Manually on page 100 You can e...

Страница 117: ...ovide host connections to LTO 2 LTO 3 and LTO 4 FC drives The number of FC I O blades in any library configuration cannot exceed four and each FC I O blade in the library supports up to four FC tape d...

Страница 118: ...as six ports Ports 1 and 2 are always target ports and are configurable Ports 3 through 6 are always initiator ports and are not configurable For information on viewing the current configured settings...

Страница 119: ...as follows From the web client select Setup I O Blades Port Configuration From the operator panel select Setup I O Blades Port Configuration FC I O Blade Internal Virtual Port for Medium Changers 3 F...

Страница 120: ...ured so that all target FC ports have access to all initiator ports For information on host port failover see Configuring FC Host Port Failover on page 113 The Setup Blade Channel Zoning screen on the...

Страница 121: ...annel zoning save the library configuration For instructions on how to save the library configuration see Saving and Restoring the Library Configuration on page 329 The paths to open the appropriate s...

Страница 122: ...e the host device name I O Blade the location of the FC I O blade in the library Status the online offine connectivity status of the host web client only Host Port the host port number WWPN the World...

Страница 123: ...connection save the library configuration For instructions on how to save the library configuration see Saving and Restoring the Library Configuration on page 329 Creating an FC Host Connection 3 For...

Страница 124: ...from the I O blade wait for the FC host to go offline and then continue to delete the FC host connection The paths to open the appropriate screens are as follows From the operator panel select Setup...

Страница 125: ...r tape drive or controller device LUNs will need to be mapped to each WWPN for host servers that use multiple ports e g multi ported HBAs or multiple HBAs if access is desired via all the host server...

Страница 126: ...the FC host to configure and proceed to the next screen The screen lists the available partitions and tape drives connected to the I O blade to which the FC host is attached For each available partit...

Страница 127: ...and device s and configure the LUN number s Note A warning message will display if the command and control LUN CCL or another device is not mapped to LUN 0 zero LUN 0 is typically occupied by the com...

Страница 128: ...hile the passive standby port is kept idle In addition channel zoning must be configured so that target ports 1 and 2 have access to all initiator ports ports 3 6 Setup I O Blades Channel Zoning If th...

Страница 129: ...the library configuration For instructions on how to save the library configuration see Saving and Restoring the Library Configuration on page 329 The paths to open the appropriate screens are as foll...

Страница 130: ...k Enable to make the port available for another failover or for reconfiguration as the active port Once the error is corrected and the link is enabled the port s state is online and the Intervention i...

Страница 131: ...lowing parameters for the selected I O blade The level at which the data path is monitored between an I O blade and the FC tape drives connected to it The two levels are as follows Interface Test perf...

Страница 132: ...from accessing the library This setting is enabled by default ICMP enables or disables external attempts to discover the library by pinging it by means of the Internet Control Message Protocol ICMP E...

Страница 133: ...etting of the internal network using the Internal Network Configuration screen Select the new internal IP address from the list on the screen You can select from nine IP addresses The Internal Network...

Страница 134: ...al serial number remains the same From the host application s perspective the replacement tape drive is the same as the original Manual Cartridge Assignment Administrative users can disable or enable...

Страница 135: ...ystem settings include Users can configure only the Touch screen audio setting Administrative users can configure all the settings on the System Settings screen You cannot configure the system setting...

Страница 136: ...open the appropriate screen is as follows From the operator panel select Tools Display Settings Registering the Library Registering the library activates the warranty After completing the initial set...

Страница 137: ...the library for the first time using the default administrator account type admin in the User Name text box and password in the Password text box After you log on for the first time change the passwo...

Страница 138: ...ctory service user name and password For more information on LDAP see Configuring LDAP on page 95 For more information on Kerberos see Configuring Kerberos on page 97 Logging Out Logging out secures t...

Страница 139: ...e Location Coordinates This section describes the numbering system used to identify components of the library The library location coordinates contain the following digits Module Column Slot Figure 13...

Страница 140: ...n module stacked directly below module 1 is number 2 and so on Columns 4 A storage column is a group of slots arranged vertically in the library Columns are represented by the second digit of a librar...

Страница 141: ...rs can use commands on the web client and operator panel Operations menu to perform the following media operations Import data cartridges into the library Export data cartridges from the library Move...

Страница 142: ...The Assign IE screen prompts you to use the operator panel to assign the cartridges to a specific partition or to the system partition The cartridges can be used only by the assigned partition Adminis...

Страница 143: ...n appears do the following a Assign the cartridges to the appropriate partition by selecting a partition listed on the Assign IE screen The screen lists only the partitions to which you have been give...

Страница 144: ...e web client select Operations Media Import From the operator panel select Operations Import Media For step by step procedures see the library s online Help To access the online Help system click the...

Страница 145: ...d open the access door and manually insert directly into storage slots as many cartridges as you plan to use The cartridges will not go in all the way if they are inserted incorrectly After the initia...

Страница 146: ...se the Move Media operation to move a single data cartridge between tape drives and slots within a partition This topic focuses on using the library user interface not the host application to move med...

Страница 147: ...y I E station slots for removal from the library This topic focuses on using the library user interface not the host application to export media Using the library to export media may necessitate perfo...

Страница 148: ...reens include information about the partition mode online or offline and the number of empty I E station slots The number of cartridges you can export is limited to the number of empty slots Media The...

Страница 149: ...t back online after the operation is complete You will be asked to confirm that you want to take the partition offline You can select only partitions to which you have been given access Default tape d...

Страница 150: ...tions to which you have been given access If the affected partition is online it will be taken offline before the unload operation is performed and brought back online after it is complete You need to...

Страница 151: ...mode may affect the host application See your host application documentation for more information Details on changing the tape drive mode include The default tape drive mode is online You can select...

Страница 152: ...e performing the operation needs cleaning the library will perform the move operation and then automatically clean the tape drive with a cleaning cartridge before informing the host application that t...

Страница 153: ...cleaning cartridges from the I E station to designated cleaning slots For information on configuring cleaning slots see Configuring Cleaning Slots on page 71 For a description of AutoClean see About...

Страница 154: ...a specific partition b Select Apply 3 Use the Import Cleaning Media screen on either the operator panel or the web client to import the cleaning cartridges into the library Follow the on screen promp...

Страница 155: ...aning cartridges or free up cleaning slots for data storage After exporting cleaning cartridges you can reduce the number of configured cleaning slots The extra slots become available for use as stora...

Страница 156: ...anel select Operations Export Cleaning Media For step by step procedures see the library s online Help To access the online Help system click the Help icon at the top right of the web client or operat...

Страница 157: ...e cleaning cartridge back to the I E station slot and takes the partition back online For step by step procedures see the library s online Help To access the online Help system click the Help icon at...

Страница 158: ...open and close sensors A secondary door located behind the I E station door acts as a redundant indicator as to whether the I E station is opened or closed When you are finished accessing the I E stat...

Страница 159: ...ontrol module This in turn unlocks all remaining I E stations in the library allowing you to access all remaining access doors in the library The paths to open the appropriate screens are as follows F...

Страница 160: ...are When performing a shutdown the library finishes all active commands received from the host application and does not process any new commands It shuts down all partitions and lowers the robot to th...

Страница 161: ...for the control module and longer for the 14U and 23U library configurations If the Not Initialized message appears on the operator panel after the restart process is complete the library did not prop...

Страница 162: ...n find information in the Reports and Tools menus Viewing Information About the Scalar i500 The About screen gives you a quick glance at your library settings From the web client you can view the Abou...

Страница 163: ...drives partitions The paths to open the appropriate screens are as follows From the web client select Reports About Scalar i500 From the operator panel select Tools About Library Viewing System Infor...

Страница 164: ...n the following resources Click on the item you want to view and the information appears in a box to the right of the library diagram Tape drives depending on the interface type the information provid...

Страница 165: ...ration Viewing Network Settings The Network Settings report provides information on the following library network settings Network host name primary DNS alternate DNS IPv4 Settings Dynamic Host Config...

Страница 166: ...name of the system being used to access the system Management interface user interface being used to access the system web client or operator panel The path to open the report from the web client is R...

Страница 167: ...ed a tape from the slot Get Retries the number of times the picker had to perform a recovery operation to remove a tape from the slot Put Count the number of times the picker successfully placed a tap...

Страница 168: ...he oldest information is replaced as new information is added Cleaning Log Shows all cleanings that have been performed in the library since firmware version 520G was installed When the log reaches it...

Страница 169: ...ation is added This may affect how much historical data you can access The on screen report contains a chart and a data table When the log files are large it would take an excessively long time to loa...

Страница 170: ...tween the tape drives in your library The following information is collected for each tape drive installed in the library Drive location module row Drive serial number Partition Megabytes read Megabyt...

Страница 171: ...ault Line or Pie Type The chart type Select one of the following Rollup default Displays the Grouping on the x axis and the Attribute amount on the y axis Trend Shows how the Attribute amount changes...

Страница 172: ...rts Advanced Reporting Drive Resource Utilization Configuring the Media Integrity Analysis Report 5 This report provides TapeAlert count for various combinations of tape drives tape cartridges and Tap...

Страница 173: ...Alerts for the combination of Grouping and Attributes you selected default Trend Shows the occurrence of TapeAlerts over time Grouping Specifies which drive s or tape cartridge s on which to base the...

Страница 174: ...he template from the drop down list and click Load Deleting a Template 5 To delete a template select the template from the drop down list and click Delete Loading and Reloading Advanced Reporting Data...

Страница 175: ...Saving and E mailing Advanced Reporting Data 5 You cannot save the report as it appears on the screen but you can save or e mail the report data as a comma separated values csv file You can then impo...

Страница 176: ...s the following FC I O blade information Location Library location coordinates of the blade module blade where blade is 1 for the top blade in the module and 2 for the bottom blade in the module Firmw...

Страница 177: ...rt 0 125 On the web client if the port connection type is Point to Point or if the port is not in a ready state N A displays On the operator panel if the port is not in a ready state N A displays Requ...

Страница 178: ...are upgrades but you need to make sure that the firmware you download is compatible with your library and tape drives Upgrading Library Firmware The library firmware upgrade operation allows you to up...

Страница 179: ...ave upgraded the firmware save the library configuration again For more information see Saving and Restoring the Library Configuration on page 329 It is also a good idea to capture a snapshot of curre...

Страница 180: ...an reconfigure your library s settings For more information see Saving and Restoring the Library Configuration on page 329 and Restoring the Library Configuration and Library Firmware on page 330 Note...

Страница 181: ...ng the tape drives with the correct version of firmware For contact information see Getting More Information or Help on page 8 Details on using an image file to upgrade tape drive firmware include The...

Страница 182: ...e PGA1 77BE If you need to downgrade LTO 4 tape drive firmware from level 82FB or higher to level 77BE or lower contact Quantum Technical Support for instructions and assistance Caution Before you upg...

Страница 183: ...re image file to the library If you have multiple versions of FC tape drives installed in your library for example LTO 3 and LTO 4 you must upload a unique firmware image file for each version You can...

Страница 184: ...vel tape drive firmware In addition you might want to delete a firmware image file if your library no longer contains a specific version of tape drives For example if you replace all LTO 2 tape drives...

Страница 185: ...or you may not need to impact the status of the library at all Warning All libraries taller than 14U must be installed in a rack having a main protective earthing grounding terminal and power must be...

Страница 186: ...hange Mode 2 For each partition that you want to take online click Online 3 Click Apply Warning Without tape drives tape cartridges or power supplies a control module weighs approximately 58 lbs An ex...

Страница 187: ...g Library SCSI Cables to Hosts 7 Use this procedure along with Figure 16 and Figure 17 if you are installing a library that includes SCSI tape drives Warning All libraries taller than 14U must be inst...

Страница 188: ...ary Scalar i500 User s Guide 173 Figure 16 Stand Alone 5U Control Module SCSI Cabling 1 Ethernet cable to customer network 2 GB Ethernet port 3 SCSI terminator 4 Power supply 5 Rear power switch 6 SCS...

Страница 189: ...500 User s Guide 174 Figure 17 Multi Module SCSI Cabling 1 Module to module cable 2 Library control blade 3 GB Ethernet port 4 SCSI terminator 5 Power supply 6 Rear power switch 7 Power cords 8 SCSI c...

Страница 190: ...module s top and bottom module terminator connector b If you need to add expansion modules to the control module remove the module terminator from the control module terminator connection that is clos...

Страница 191: ...Power up the host system 8 Verify communication with all devices on the bus 9 Configure the library using the commands on the operator panel See configuration information in Configuring Your Library...

Страница 192: ...Scalar i500 User s Guide 177 Figure 18 Stand Alone Control Module Fibre Channel Cabling 1 Ethernet cable to customer network 2 GB Ethernet port 3 Power supply 4 Rear power switch 5 Power cord 6 Fibre...

Страница 193: ...calar i500 User s Guide 178 Figure 19 Multi Module Fibre Channel Cabling 1 Ethernet cable to network 2 GB Ethernet port 3 Power supply 4 Rear power switch 5 Power cords 6 Fibre cables to host 7 Module...

Страница 194: ...nd one in the bottom terminator connector on the bottommost module Warning All libraries taller than 14U must be installed in a rack having a main protective earthing grounding terminal and power must...

Страница 195: ...the power supply on the control module If redundant power supplies are used connect a power cord to each of the additional power supply outlets 7 Power on the library a Turn on the rear power switch...

Страница 196: ...C I O blade Ports 1 and 2 on each FC I O blade are reserved for connection to hosts Ports 1 and 2 are always in target mode The other four ports 3 4 5 and 6 are always in initiator mode See Figure 20...

Страница 197: ...User s Guide 182 Figure 20 FC I O Blade Use the following procedure along with Figure 21 if you are installing a library that includes FC tape drives that are connected to FC I O blades 1 Target port...

Страница 198: ...Chapter 7 Installing Removing and Replacing Cabling the Library Scalar i500 User s Guide 183 Figure 21 FC With I O Blade Cabling...

Страница 199: ...rminator 8 FC cable to host 9 Module to module cable 10 Ethernet cable to network 11 UPPER and LOWER Ethernet ports Warning All libraries taller than 14U must be installed in a rack having a main prot...

Страница 200: ...n page 193 for best practices in routing the Ethernet cables 3 Remove and discard the necessary number of the black rubber protective covers from the ports on the FC I O blades 4 Carefully unwrap the...

Страница 201: ...ule 10 Connect the module to module cable from the control module to the expansion module 11 Connect an Ethernet cable to the Gigabit GB Ethernet port on the Library Control Blade LCB for remote acces...

Страница 202: ...sion module as the tape drive The 24 inch fibre cables are orange in color You will need to provide fibre cables long enough to connect a host or a SAN switch to a target port on an FC I O blade It is...

Страница 203: ...Capacity Library Tape Drive I O Blade I O Blade Port 1 1 N A direct attached 1 2 N A direct attached 1 3 1 2 Port 3 1 4 1 2 Port 4 0 1 1 2 Port 5 0 2 1 2 Port 6 1 1 1 2 Port 3 1 2 1 2 Port 4 1 3 1 2 P...

Страница 204: ...es taller than 14U must be installed in a rack having a main protective earthing grounding terminal and power must be supplied via an industrial plug and socket outlet and or an appliance coupler comp...

Страница 205: ...the Library Scalar i500 User s Guide 190 Figure 22 Stand Alone Control Module SAS Cabling 1 Ethernet cable to network 2 GB Ethernet port 3 Power supply 4 Rear power switch 5 Power cord 6 SAS cable to...

Страница 206: ...ibrary Scalar i500 User s Guide 191 Figure 23 Multi Module SAS Cabling 1 Module to module cable 2 Library control blade 3 GB Ethernet port 4 Power supply 5 Rear power switch 6 Power cords 7 SAS cables...

Страница 207: ...in the top terminator connector on the topmost module and one in the bottom terminator connector on the bottommost module b If you need to add expansion modules to the control module remove the module...

Страница 208: ...nfiguring Your Library on page 47 Cable Management Guidelines As the library expands to support larger configurations it is important to restrain and organize cables and power cords on the rear of the...

Страница 209: ...and loop fastener Secures Ethernet cables to expansion modules 1 Push in clip to secure hook and loop fasteners to expansion modules 2 M5 thumbscrew For older library models without drilled holes for...

Страница 210: ...the back of the expansion module for the hook and loop fastener This hole is located on the rear of the library about three inches from the top of the expansion module near the right side of the libr...

Страница 211: ...rd into a bundle in the shape of a figure eight The bundle should be small enough to hold comfortably with one hand or about eight inches in length 7 Wrap the bundle with the hook and loop fastener Th...

Страница 212: ...Chapter 7 Installing Removing and Replacing Cable Management Guidelines Scalar i500 User s Guide 197 Figure 24 Power Cord Management...

Страница 213: ...he Ethernet cables with the fastener Ethernet cables and Ethernet hook and loop straps that are shipped with the library are blue in color Apply the following procedure to any library that contains at...

Страница 214: ...e into the Ethernet port labeled LOWER 7 Open the wire saddle nearest the LCB place the Ethernet cable inside and snap the wire saddle shut 8 Repeat for the other wire saddle 9 If there is excess Ethe...

Страница 215: ...Chapter 7 Installing Removing and Replacing Cable Management Guidelines Scalar i500 User s Guide 200 Figure 25 Ethernet Cable Management...

Страница 216: ...lacing Cable Management Guidelines Scalar i500 User s Guide 201 Figure 26 shows how a 41U library would appear with power Ethernet and fibre cables installed and managed according to these guidelines...

Страница 217: ...ontrol module and place it in the desired location 5 If you are placing the control module in a rack use the rack ears to fasten the control module to the rack For instructions see Installing the Bott...

Страница 218: ...Configuration Use this procedure for installing a new multi module library A multi module library contains a control module and up to four expansion modules There are no restrictions on where the cont...

Страница 219: ...ll of the modules you plan to install See Adding Removing and Replacing Power Supplies on page 281 for instructions on removing power supplies 4 Park the robot assembly in the control module Before un...

Страница 220: ...hold it in place with one hand and using your other hand move the parking tab in a counter clockwise direction until it stops in the parked position The metal parking tab is located at the bottom of...

Страница 221: ...dule Library Configuration Scalar i500 User s Guide 206 5 Remove and replace the cover plates if appropriate 1 Parking tab in parked position Caution Before removing the control module s bottom cover...

Страница 222: ...the control module and the bottom plate of the expansion module located above the control module c If you plan to stack the control module at the bottom of the library and if an expansion module will...

Страница 223: ...er s Guide 208 Installing the Expansion Module 7 Install the expansion module as follows 1 Open the expansion module s access door and raise the guide pin by pulling it up and turning it slightly as i...

Страница 224: ...cated at the base of the back of the module Then lower the module s guide pin located at the base of the front of the module by turning it and pushing it down 4 Tighten all thumbscrews located at the...

Страница 225: ...Chapter 7 Installing Removing and Replacing Installing a New Multi Module Library Configuration Scalar i500 User s Guide 210 1 Front Y rail 2 Rear Y rail 3 Y rail this end up 4 Squeeze here to release...

Страница 226: ...r Y rail release mechanism which is located in the interior of the right side of the module Squeeze the handle of the Y rail release mechanism lift it out of its locked position and slide it downward...

Страница 227: ...se the rack ears to fasten the control module to the rack 6 If not already installed install the library control blade LCB in the control module See Removing and Replacing the Library Control Blade an...

Страница 228: ...d access doors 3 Add the tape drives to the modules For details see Adding Removing and Replacing Tape Drives on page 303 4 If your library contains FC I O blades install both the I O blades and the a...

Страница 229: ...der to synchronize its logical inventory with the physical inventory of the library Adding Expansion Modules to an Existing Library Adding expansion modules to the library increases the number of data...

Страница 230: ...control module can be installed in the library configuration However the recommended placement of the control module for library configurations up to 32U is on top of all installed expansion modules T...

Страница 231: ...et and or an appliance coupler complying with IEC 60309 or an equivalent national standard and having a protective earth ground conductor with a cross sectional area of at least 1 5 mm2 14 AWG To ensu...

Страница 232: ...assembly must be placed in the control module a Open the I E station and access doors of each module b Using your hands gently lift the robot assembly into the control module The robot assembly shoul...

Страница 233: ...r i500 User s Guide 218 6 Remove all power supplies from each module 7 Remove all tape drives from each module Unstacking the Existing Modules 7 Unstack the modules as follows 1 Starting with the topm...

Страница 234: ...ule Squeeze the handle of the Y rail release mechanism lift it and release it so that it locks into place b From the rear of the library find the rear Y rail release mechanism located in the interior...

Страница 235: ...Chapter 7 Installing Removing and Replacing Adding Expansion Modules to an Existing Library Scalar i500 User s Guide 220 1 Front Y rail 2 Rear Y rail 3 Y rail this end up 4 Squeeze here to release...

Страница 236: ...Adding Expansion Modules to an Existing Library Scalar i500 User s Guide 221 3 Remove the rack ears that fasten the module to the rack 4 Loosen the thumbscrews located at the base of the front and re...

Страница 237: ...oors of the module beneath it 6 From the front of the library slide the entire module toward you and lift it off of the module below it 7 Repeat these steps for each module that you need to remove Ins...

Страница 238: ...between expansion modules remove both the top and bottom plates of the control module Also remove the top plate of the expansion module located below the control module and the bottom plate of the exp...

Страница 239: ...n expansion module 5U 14U 23U 32U 41U cover plate cover plate NEW Expansion Module cover plate Control Module Control Module cover plate Control Module Expansion Module Expansion Module cover plate Co...

Страница 240: ...an Existing Library Scalar i500 User s Guide 225 3 Open the expansion module s access door and raise the guide pin by pulling it up and turning it slightly as if it were a screw Otherwise the guide pi...

Страница 241: ...at the base of the front of the module and the two thumbscrews located at the base of the back of the module Then lower the module s guide pin located at the base of the front of the module by turning...

Страница 242: ...Chapter 7 Installing Removing and Replacing Adding Expansion Modules to an Existing Library Scalar i500 User s Guide 227 1 Front Y rail 2 Rear Y rail 3 Y rail this end up 4 Squeeze here to release...

Страница 243: ...s it will go c From the back of the library find the rear Y rail release mechanism which is located in the interior of the right side of the module Squeeze the handle of the Y rail release mechanism l...

Страница 244: ...ibrary 7 Prepare to use the library as follows 1 Add the tape drives to the modules For details see Adding Removing and Replacing Tape Drives on page 303 2 Add the power supplies For details see Addin...

Страница 245: ...the robot assembly a Gently raise the robot assembly so that it no longer rests on the parking tab b With your free hand move the parking tab in a clockwise direction until it stops in the unparked p...

Страница 246: ...ta cables and module to module cables Make sure the module terminators are installed at the top and bottom of the stack of modules For cabling instructions see Cabling the Library on page 172 7 Power...

Страница 247: ...n module from the library There are some configuration settings to take into account when removing an expansion module from an existing library COD licenses remain the same After the expansion module...

Страница 248: ...nnect all power cords network data cables and module to module cables from each module you will be removing Warning All libraries taller than 14U must be installed in a rack having a main protective e...

Страница 249: ...nto the control module The robot assembly should glide slowly and with some resistance c After raising the robot assembly to the approximate middle of the control module hold it in place with one hand...

Страница 250: ...Guide 235 6 Remove all power supplies from each module that you intend to remove For details see Adding Removing and Replacing Power Supplies on page 281 7 Remove all tape drives from each module tha...

Страница 251: ...on Module 7 To remove the expansion module 1 For each module that you plan to remove open the I E station and access doors of each module 2 Disengage the Y rails so the modules can be unstacked safely...

Страница 252: ...r 7 Installing Removing and Replacing Permanently Removing Expansion Modules From an Existing Library Scalar i500 User s Guide 237 1 Front Y rail 2 Rear Y rail 3 Y rail this end up 4 Squeeze here to r...

Страница 253: ...it so that it locks into place b From the rear of the library find the rear Y rail release mechanism located in the interior of the right side of the module Squeeze the handle of the Y rail release me...

Страница 254: ...g Removing and Replacing Permanently Removing Expansion Modules From an Existing Library Scalar i500 User s Guide 239 5 Loosen the two thumbscrews located at the base of the back of the module 1 Thumb...

Страница 255: ...top of the library and if an expansion module will be located below it remove the control module s bottom cover plate and the expansion module s top plate b If you plan to stack the control module be...

Страница 256: ...rary Configuration 7 Prepare to use the new library configuration as follows 1 Ensure that the Y rails are properly aligned and the thumbscrews are tightened 5U 14U 23U 32U cover plate cover plate Con...

Страница 257: ...r 7 Installing Removing and Replacing Permanently Removing Expansion Modules From an Existing Library Scalar i500 User s Guide 242 1 Front Y rail 2 Rear Y rail 3 Y rail this end up 4 Squeeze here to r...

Страница 258: ...s far as it will go b From the back of the library find the rear Y rail release mechanism which is located in the interior of the right side of the module Squeeze the handle of the Y rail release mech...

Страница 259: ...Removing and Replacing Power Supplies on page 281 4 Add the LCB to the control module For details see Removing and Replacing the Library Control Blade and LCB Compact Flash Card on page 276 5 If your...

Страница 260: ...move the parking tab in a clockwise direction until it stops in the unparked position When in the correct position the parking tab is removed completely from the interior of the module and will not ac...

Страница 261: ...all power cords network data cables and module to module cables Make sure the module terminators are installed at the top and bottom of the stack of modules For cabling instructions see Cabling the L...

Страница 262: ...applied one or more license keys to the original control module you will need to replace each license key and apply it to the new control module For more information see Adding or Upgrading Licensabl...

Страница 263: ...odule that you intend to remove For details see Adding Removing and Replacing Power Supplies on page 281 4 Remove all tape drives from each module that you intend to remove For details see Adding Remo...

Страница 264: ...Gently lower the robot assembly to rest on the parking tab Caution The library will not be able to locate tape cartridges that are removed from one partition and returned to a different partition The...

Страница 265: ...alar i500 User s Guide 250 7 If there are expansion modules stacked above the control module remove them now Removing the Control Module 7 1 Starting with the topmost module of your library open the I...

Страница 266: ...il release mechanism lift it and release it so that it locks into place b From the rear of the library find the rear Y rail release mechanism located in the interior of the right side of the module Sq...

Страница 267: ...Control Module Scalar i500 User s Guide 252 3 Remove the rack ears that fasten the module to the rack 4 Loosen the thumbscrews located at the base of the front and rear of the module 1 Front Y rail 2...

Страница 268: ...Chapter 7 Installing Removing and Replacing Replacing the Control Module Scalar i500 User s Guide 253...

Страница 269: ...door and raise the guide pin by pulling it up and turning it slightly as if it were a screw Otherwise the guide pin may scratch the front doors of the module beneath it 6 Slide the entire module towar...

Страница 270: ...e at the bottom of the library and if an expansion module is located above it remove the control module s top cover plate 4 Remove the LCB from the control module and set it aside The LCB stores infor...

Страница 271: ...crews located at the base of the back of the module Then lower the module s guide pin located at the base of the front of the module by turning it and pushing it down 9 Stack all expansion modules if...

Страница 272: ...he module Squeeze the handle of the Y rail release mechanism lift it out of its locked position and slide it downward as far as it will go 11 Unpark the robot assembly a Gently raise the robot assembl...

Страница 273: ...in a clockwise direction until it stops in the unparked position When in the correct position the parking tab is removed completely from the interior of the module and will not accidentally swing int...

Страница 274: ...and Adding Removing and Replacing the I O Fan Blade on page 317 6 Connect all power cords network data cables and module to module cables Make sure the module terminators are installed in their previ...

Страница 275: ...ng your I E station export all the tape cartridges from your library Delete all partitions Delete all cleaning slots Set the number of I E station slots to six Note The maximum number of expansion mod...

Страница 276: ...you intend to remove For details see Adding Removing and Replacing Tape Drives on page 303 5 If your library contains FC I O blades remove both the I O blades and the accompanying fan blades from the...

Страница 277: ...al parking tab is located at the bottom of column 1 d Gently lower the robot assembly to rest on the parking tab Caution The library will not be able to locate tapes that are removed from one partitio...

Страница 278: ...Chapter 7 Installing Removing and Replacing Replacing an Expansion Module Scalar i500 User s Guide 263 1 Parking tab in parked position...

Страница 279: ...xpansion Module 7 1 Starting with the topmost module of your library open the I E station and access doors of each module 2 Disengage the Y rails so the modules can be unstacked safely Caution Before...

Страница 280: ...Chapter 7 Installing Removing and Replacing Replacing an Expansion Module Scalar i500 User s Guide 265 1 Front Y rail 2 Rear Y rail 3 Y rail this end up 4 Squeeze here to release...

Страница 281: ...ks into place b From the rear of the library find the rear Y rail release mechanism located in the interior of the right side of the module Squeeze the handle of the Y rail release mechanism lift it a...

Страница 282: ...apter 7 Installing Removing and Replacing Replacing an Expansion Module Scalar i500 User s Guide 267 5 Loosen the two thumbscrews located at the base of the back of the module 1 Thumbscrews behind doo...

Страница 283: ...expansion module located below the control module and the bottom plate of the 9U expansion module located above the control module c If you plan to stack the control module at the bottom of the librar...

Страница 284: ...talling Removing and Replacing Replacing an Expansion Module Scalar i500 User s Guide 269 4 Lift the new expansion module and from the front of the library place it in the desired location 1 Guide pin...

Страница 285: ...e front of the module and the two thumbscrews located at the base of the back of the module Then lower the module s guide pin located at the base of the front of the module by turning it and pushing i...

Страница 286: ...Chapter 7 Installing Removing and Replacing Replacing an Expansion Module Scalar i500 User s Guide 271 1 Front Y rail 2 Rear Y rail 3 Y rail this end up 4 Squeeze here to release...

Страница 287: ...t it out of its locked position and slide it downward as far as it will go b From the back of the library find the rear Y rail release mechanism which is located in the interior of the right side of t...

Страница 288: ...ition the parking tab is removed completely from the interior of the module and will not accidentally swing into the path of the robot c Gently release the robot assembly It will lower to the bottom m...

Страница 289: ...e the 9U Expansion Module 7 1 Close the library s I E station and access doors 2 Add the tape drives to the modules For details see Adding Removing and Replacing Tape Drives on page 303 3 Add the powe...

Страница 290: ...page 276 6 Connect all power cords network data cables and module to module cables Make sure the module terminators are installed at the top and bottom of the stack of modules For cabling instructions...

Страница 291: ...If you replace the compact flash card then you need to reconfigure your library Replacing the LCB and LCB Compact Flash Card7 These instructions explain how to remove the existing LCB and existing LC...

Страница 292: ...ew LCB 7 Insert the new LCB into the vacant LCB slot on the back of the library When inserting the new LCB into the slot be sure that the LCB LEDs are located at the top of the blade and that the latc...

Страница 293: ...te the next few screens to configure the host name and IP address es for your library You are prompted to choose whether to enable IPv6 When you are finished configuring click Apply A progress window...

Страница 294: ...Required tools None 1 Power off the library 2 Access the back of the library and locate the existing LCB 3 Disconnect all cables from the existing LCB You may want to label each cable that is connect...

Страница 295: ...the new LCB with existing LCB compact flash card into the vacant LCB slot on the back of the library When inserting the new LCB into the slot be sure that the LCB LEDs are located at the top of the bl...

Страница 296: ...on the front of the control module provides power to all control module and 9U expansion module power supplies You can also turn off library power using the web client if necessary Adding a Redundant...

Страница 297: ...the power supply s power using the switch on the rear of the power supply 8 Check the status of the power supply s LEDs The top green LED and the blue LED should be solidly lit 9 Power on the library...

Страница 298: ...uration on page 329 2 If the library does not use a second redundant power supply power off the library 3 Access the back of the library and locate the power supply that you want to replace 4 Turn off...

Страница 299: ...in how to install your stand alone library into a rack and how to install additional modules into an existing rack Installing the modules into the rack requires at least two people Warning Under no ci...

Страница 300: ...tom module in the rack It includes rack ears for additional security You need one rack ear kit for each additional module Each rack ear kit contains the supplies to install right and left rack ears on...

Страница 301: ...ing Installing the Library in a Rack Scalar i500 User s Guide 286 Rack ear left Holds the modules in the rack 1 Rack ear right Holds the modules in the rack 1 Rack shelf left Secures the modules in th...

Страница 302: ...ser s Guide 287 Table 9 Rack Ear Kit Contents Rack shelf right Secures the modules in the rack 1 Component Description Quantity Required Nut clip Used in racks with square holes 4 Cage nut Used in rac...

Страница 303: ...ith the installation of the rackmount kit and the modules that you plan to add to the rack 3 Consider removing the front and back doors of the rack to obtain full access to the mounting holes and othe...

Страница 304: ...markers which is usually a comfortable height for reading the operator panel Remember the control module can be placed anywhere within the library configuration above below or between any expansion m...

Страница 305: ...t shelves into the rack so that they are level with one another a Install the shelf s rear studs in the rack s rear mounting holes b Position the shelf to the appropriate side of the rack right or lef...

Страница 306: ...nting holes pull the front of the shelf toward you to extend it to the necessary length Hold the base of the shelf with one hand and pull the extensible part of the shelf with your other hand g Insert...

Страница 307: ...n this chapter that explain how to install modules and libraries These related sections contain important information on how to prepare the module safely and correctly for installing in a rack includi...

Страница 308: ...nt shelves From the front of the rack lift the module onto the shelf and gently slide it into the rack Slide the module to the back of the rack so that the front of the module is flush with the mounti...

Страница 309: ...r open open the left door the access door of the module and locate the slot in the lower left corner of the module The flexible door hinge allows the door to be pulled away from the module providing a...

Страница 310: ...the library 8 Cable your library as necessary following the instructions provided in Cabling the Library on page 172 9 Power on the library Installing Additional Modules Into the Rack 7 All modules th...

Страница 311: ...tion on the rack For example if the expansion module s rack ears are located at 1U and 2U then the nut clips or cage nuts should be installed at 10U and 11U Next determine which holes you must use wit...

Страница 312: ...holes After the nut clip is installed you can slide it up and down the mounting holes if necessary Installing cage nuts a Hold the cage nut so that its hinges face outside the rack and so that its hi...

Страница 313: ...that it is parallel with the module below it and slide it into place 6 Lower the module s guide pin by turning it and pushing it down 7 Secure the module to the module beneath it by tightening the thu...

Страница 314: ...Chapter 7 Installing Removing and Replacing Installing the Library in a Rack Scalar i500 User s Guide 299 1 Control module front 2 Thumbscrews 3 Control module rear...

Страница 315: ...E station door At the lower right corner of the module is a vertical slot Insert the hinge of the right rack ear into the slot and then position the holes of the rack ear flush with the rack rail b U...

Страница 316: ...ss the slot located in the lower left corner of the module The flexible door hinge allows the door to be pulled away from the module providing access to the slot b Install the left rack ear in the sam...

Страница 317: ...the Library in a Rack Scalar i500 User s Guide 302 10 Close the module s doors 11 Reinstall the tape drives to the library 12 Cable your library as necessary following the instructions provided in Ca...

Страница 318: ...ot Using the guide rails on both the tape drive and in the tape drive slot slowly slide the tape drive into the slot The tape drive must be level to slide in smoothly 4 Tighten the tape drive s thumbs...

Страница 319: ...to change the button status to Online 10 If necessary update drive firmware by following the instructions provided in Updating Library and Tape Drive Firmware on page 163 The library can use the driv...

Страница 320: ...problems with one that is currently in use You can remove a tape drive while the library is powered on Do not however remove a tape drive that is currently in use Required tools None 1 Prepare host ap...

Страница 321: ...ownloading firmware the green LED is solidly lit for three seconds and then blinks twice Firmware begins to download as soon as the library detects a new tape drive Firmware downloads may take more th...

Страница 322: ...that cools the FC I O blade The fan blade is installed to the right of the I O blade in the expansion module Each expansion module has four bays and can accommodate two FC I O blades and two fan blad...

Страница 323: ...stalling Removing and Replacing Adding Removing and Replacing FC I O Blades Scalar i500 User s Guide 308 Figure 31 FC I O Blade and Fan Blade Bays in Expansion Module 1 FC I O blade 2 Fan blade 3 Expa...

Страница 324: ...an Ethernet cable to the Ethernet port labeled Lower in the lower right corner of the expansion module Connect the other end of the cable to a port in the Ethernet hub on the LCB If the FC I O blade i...

Страница 325: ...e installing two FC I O blades in an expansion module install the lower one first 7 Make sure cover plates are installed over any unused bays in the expansion module 8 Connect the library and tape dri...

Страница 326: ...To enable host port failover you must configure target ports 1 and 2 on the I O blade as point to point connections Setup I O Blades Port Configuration For more information see Configuring FC Host Por...

Страница 327: ...slots in the bay The status LEDs must be at the bottom 5 Evenly apply pressure to both sides of the blade and slide it into the expansion module until the latch hooks begin to move towards the middle...

Страница 328: ...el the blade pins connect with the expansion module s backplane as the blade locks into place 6 Remove the necessary number of the black rubber protective covers from the ports on the FC I O blades wh...

Страница 329: ...Chapter 7 Installing Removing and Replacing Adding Removing and Replacing FC I O Blades Scalar i500 User s Guide 314 1 Latch hooks locked 2 FC I O blade 3 Cover plate on empty bay 4 FC I O blade LEDs...

Страница 330: ...Tag and disconnect all FC cables from the FC I O blade 3 Lift the latch hooks out of the locked position and push them up You will feel the FC I O blade unplug from the expansion module s backplane 4...

Страница 331: ...remove the old FC I O blade following the directions in Removing an FC I O Blade on page 315 3 Press up and out to open the latch hooks on each side of the replacement FC I O blade 4 Carefully align t...

Страница 332: ...FC I O blades and two fan blades The recommended order of installing the FC I O blade and fan in the expansion module is starting from the bottom two bays and moving up Note The LEDs for the FC I O bl...

Страница 333: ...fan blade to your library You can add an I O fan blade while the library is powered on Required tools None 1 Access the back of the expansion module 2 Remove the cover plate from blade bay to the rig...

Страница 334: ...n Blade 7 These instructions explain how to remove an I O fan blade from your library You can remove an I O fan blade while the library is powered on Required tools None 1 Access the back of the expan...

Страница 335: ...ne so remove the old I O fan blade following the directions in Removing an I O Fan Blade on page 319 3 Press up and out to open the latch hooks on each side of the replacement I O fan blade 4 Carefull...

Страница 336: ...power to each power supply on the back of the library 6 Install the orange robot restraint assembly that secures the robot to the floor of the library The robot restraint assembly was part of the pac...

Страница 337: ...shelves for use in the new location 11 Place the module in the bottom of the shipping carton 12 Reinstall the tape drives in the module 13 Complete the packing For further details see the Unpacking I...

Страница 338: ...tion technology to alert you of problems as soon as they occur The library performs numerous self tests to monitor the library s temperature voltage and currents and standard library operations It per...

Страница 339: ...list is a brief description of the error condition captured by the RAS ticket The All RAS Tickets screen allows you to view RAS ticket details and navigate to ticket resolution information If you want...

Страница 340: ...All RAS Tickets screen appears 3 Identify the RAS ticket you want to resolve 4 Click Resolve The Ticket Resolution window appears This window contains information on how to resolve the ticket 5 Revie...

Страница 341: ...pture Snapshot file from both the operator panel and the web client On the web client you can also download the Capture Snapshot file to a computer You cannot download Capture Snapshot files from the...

Страница 342: ...configuration record can be saved or e mailed to a specified e mail address Information in the library The configuration record includes Product information vendor model product ID product version lib...

Страница 343: ...ecord 8 Administrative users can use the Tools Email Configuration Record screen on the web client to e mail the library configuration record Do not enter more than one e mail address in the E mail Ad...

Страница 344: ...en it is in a known working state In the event of a hardware failure the saved configuration can be used to restore the configuration after hardware repairs are made Before initiating a firmware upgra...

Страница 345: ...ation is available only on the web client The path to open the appropriate screen is From the web client select Tools Save Restore Configuration Troubleshooting Library Not Ready Messages The operator...

Страница 346: ...he library generates a RAS ticket whenever the library enters a not ready state The RAS ticket may provide information that can help you troubleshoot the problem See Viewing RAS Tickets on page 324 fo...

Страница 347: ...page 104 To prevent this do the following Ensure that host mapping is enabled see Enabling Disabling FC Host Mapping on page 107 Assign each medium changer a unique LUN and map each one to the approp...

Страница 348: ...nt Identify Drives screen lists the following information for each tape drive Location coordinates Mode status online offline State ready not ready Drive type Protocol Control path tape drive status y...

Страница 349: ...k of the selected tape drives Only tape drives in a ready state will flash If you have selected a specific partition or have only one partition configured all the green LEDs on the tape drives within...

Страница 350: ...want to take the tape drive and partition offline Tape drive logs adhere to the following naming convention UDS_ID_SN dmp where ID identifies the tape drive coordinate location within the library and...

Страница 351: ...he tape drive sled from which you want to retrieve logs A Save dialog allows you to specify where you want to save the tape drive sled log files file For detailed step by step instructions see your li...

Страница 352: ...irmware must be configured to stop monitoring the blade Administrative users can perform this operation by selecting the FC I O blade and performing the remove blade operation on the Setup Blade Contr...

Страница 353: ...of communication with connected hosts The screen will display a warning message about the communication loss and ask you to confirm that you want to proceed Note This operation should not be performed...

Страница 354: ...information can help you isolate the source of an issue such as a library device or host application You can select any configured FC I O blade in the library and display a list of associated library...

Страница 355: ...t prohibits the library from generating RAS tickets The following components of the library have LEDs Library Control Blade LCB FC I O Blade FC I O Fan Blade Tape drives Power supplies Some of these c...

Страница 356: ...esents Blade Status Green Library Application Code status Solid on solid off Library application code not operating Solid on for 3 seconds then blinks twice Blade firmware is downloading 1 blink per s...

Страница 357: ...I O blade shows the current state of an FC link and indicates whether or not the link is ready to transmit commands The link LED for an FC I O blade fibre port is located either below or above the por...

Страница 358: ...time they turn off until the port transmitter is enabled and link is acquired FC I O Fan Blade LED 8 RAS tickets typically report problems related to fan blades Use table 14 to interpret fan blade ac...

Страница 359: ...error codes and TapeAlerts By observing the blinking pattern of LEDs on tape drives however you can discern which operation the tape drive is currently performing Figure 32 shows where the tape drive...

Страница 360: ...ity Solid on solid off Tape drive s main processor is not operating 1 blink per second Normal operation 2 quick blinks within 1 25 seconds then on solid for 1 25 seconds repeat Tape drive sled firmwar...

Страница 361: ...e Table 17 to interpret power supply activity LED Color Represents Fibre Port Link Status Green LIP and activity Solid on Loop initialization protocol LIP has occurred Blinks at regular intervals Host...

Страница 362: ...itive number For example expansion module 2 is the second expansion module beneath the control module while expansion module 2 is the second expansion module above the control module Each module can h...

Страница 363: ...complete for a maximum configured library that includes five modules five I E stations and 18 drives The Robot test evaluates the basic functionality of the library robotics assembly including the pi...

Страница 364: ...station slot When you close the I E station the Assign IE screen appears if the Manual Cartridge Assignment setting is enabled on the operator panel System Settings screen Tools System Settings Assign...

Страница 365: ...on of a log following an IVT run The paths to open the appropriate screens are as follows From the web client select Reports Log Viewer Installation Verification Test Summary Log From the web client s...

Страница 366: ...moves during the demonstration When you close the I E station the Assign IE screen appears if the Manual Cartridge Assignment setting is enabled on the operator panel System Settings screen Tools Sys...

Страница 367: ...on the screen The screen is only accessible from the operator panel The path to open the appropriate screen is From the operator panel select Tools Internal Network Library Diagnostics The Diagnostic...

Страница 368: ...Tools Diagnostics Q EKM Path Diagnostics The Q EKM Path Diagnostics consists of a series of tests between a selected tape drive and the primary and secondary Q EKM servers It is a good idea to test e...

Страница 369: ...the selected partition will be taken offline 3 Click OK to start the diagnostics The Progress Window appears The Progress Window contains information on the action elapsed time and status of the requ...

Страница 370: ...tegories Drive Tests Tests any tape drive and does not require you to use a scratch tape Media Tests Tests only IBM tape drives and requires you to insert a scratch tape in the top I E station slot to...

Страница 371: ...that drive hardware is working properly Read Write Test 8 Reads and writes 96 wraps worth of data in each of the scratch tape s four data sections During the test the drive overwrites the data on the...

Страница 372: ...een is as follows From the web client select Tools Diagnostics Drives Media Tests Robotics Diagnostics The Robotics diagnostics currently include only one test the Get Put Test Get Put Test 8 The Get...

Страница 373: ...is section discusses these types of items in general terms See Library Specifications on page 363 for information on what type of tape cartridges are supported for each drive type Handling Cartridges...

Страница 374: ...ridges at room temperature for the same amount of time they were exposed to extreme temperatures or 24 hours whichever is less Do not place cartridges near sources of electromagnetic energy or strong...

Страница 375: ...9 3 of 9 type barcodes The supported tape cartridge barcode formats are as follows Standard Six Six character barcode number with or without a one or two character media ID for example XXXXXXL4 or XXX...

Страница 376: ...XXXXXXXXXXXL3 If a media ID is not included the label must have a five to 16 character barcode for example XXXXXXXXXXXXXXXX Quantum supplied barcode labels provide the best results Barcode labels from...

Страница 377: ...ou can attach All barcode labels must be applied to the front of a cartridge Peel off the label and place it on the cartridge Verify that the label is oriented so that the numbers appear above the bar...

Страница 378: ...y in LTO 3 drives LTO 2 read write in LTO 2 and LTO 3 drives read only in LTO 4 drives LTO 3 read write in LTO 3 and LTO 4 drives supports write once read many WORM functionality LTO 4 read write in L...

Страница 379: ...pports the following browsers Firefox version 1 0 6 and above Microsoft Internet Explorer version 6 0 and above Library Robot Control Logical Unit Number LUN Connectivity Native drive interface Power...

Страница 380: ...any library configuration For more information about these slots see Unused Slots on page 131 5U 14U 23U 32U 41U Maximum Available Storage Slots Including I E Station Slots 41 133 225 317 409 I E Sta...

Страница 381: ...emperatures not necessarily to ambient room temperatures Airflow restrictions or other heat generating equipment within the rack enclosure may cause a rise over ambient room temperatures Operating Non...

Страница 382: ...y are listed below in inches in Library Configuration Rack Height Maximum Physical Height in 5U control module 5U 8 61 5U control module 1 9U expansion module 14U 24 36 5U control module 2 9U expansio...

Страница 383: ...put BTU hr is listed below Figure 33 on page 370 on page 281 shows the typical and maximum library power consumption Watts and heat output BTU hr and Figure 34 on page 371 shows the library typical an...

Страница 384: ...um 3 Drive Sled Module SCSI 27 92 UDS3 IBM Ultrium 3 Drive Sled Module Fibre Channel 29 97 UDS3 IBM Ultrium 4 Drive Sled Module SCSI 40 135 UDS3 IBM Ultrium 4 Drive Sled Module Fibre Channel 42 143 UD...

Страница 385: ...cifications Library Power Consumption and Heat Output Scalar i500 User s Guide 370 Figure 33 Library Power Consumption and Heat Output Heat Output BTU hr Power Consumption Watts Number of Drives Maxim...

Страница 386: ...Library Specifications Library Power Consumption and Heat Output Scalar i500 User s Guide 371 Figure 34 Library Current Draw Current 220V Amps Current 110V Amps Number of Drives Maximum Current Typic...

Страница 387: ...ir descriptions Support for specific TapeAlert flags may vary based on tape drive type and firmware revision Not all tape drives support every TapeAlert Consult your tape drive SCSI manual for more in...

Страница 388: ...d error W The operation has stopped because an error has occurred while reading or writing data which the drive cannot correct The drive had a hard read or write error 4 Media C Your data is at risk 1...

Страница 389: ...emoval prevented I You cannot eject the cartridge because the tape drive is in use Wait until the operation is complete before ejecting the cartridge Manual or software unload attempted when prevent m...

Страница 390: ...ading Manual or forced eject while drive actively writing or reading 17 Read only format W You have loaded a cartridge of a type that is read only in this drive The cartridge will appear as write prot...

Страница 391: ...se a cleaning cartridge Check the tape drive user s manual for device specific cleaning instructions The drive is ready for a periodic cleaning 22 Expired cleaning media C The last cleaning cartridge...

Страница 392: ...ck the enclosure user s manual for instructions on replacing the failed power supply Redundant power supply unit failure inside the tape drive enclosure or rack subsystem 28 Power consumption W The ta...

Страница 393: ...start the operation Error recovery action 34 Microcode update fail W The microcode update has failed because you have tried to use the incorrect microcode for this tape drive Obtain the correct microc...

Страница 394: ...rrupted File search performance will be degraded The tape directory can be rebuilt by reading all the data Error prevented the tape directory being updated on unload 52 Tape system area write failure...

Страница 395: ...plier help line The drive is unable to unload the medium 57 Automation interface failure C The tape drive has a problem with the automation interface 1 Check the power to the automation system 2 Check...

Страница 396: ...d to store data i e audio video grade media should not be used 60 WORM medium overwrite attempted W An attempt had been made to overwrite user data on a WORM medium 1 If a WORM medium was used inadver...

Страница 397: ...multiple communicating ports in a loop Two or more ports can interconnect but only two ports can communicate simultaneously Arbitration The submission of a request to gain access to an arbitrated loo...

Страница 398: ...Interface A method of interfacing with a file system in which the user types commands using a specific command syntax from a command line COD Capacity on Demand A library feature that allows users to...

Страница 399: ...y component The address is specified in programming logic rather than on the physical location of a component within a library When a logical library is used the logical element ID masks the physical...

Страница 400: ...rary storage context fiducials may be fiducial labels or fiducial tabs allowing reliable identification of cartridge magazines and drive sleds including both location and media domain information In t...

Страница 401: ...point of reference for the position of other library components Home position is used as a basis for calibration Host In general a host is a computer or program that contains data and provides service...

Страница 402: ...ry Control Module See Control module License key An absolute value that can only increase a licensed feature For example a license key can be applied to the library to enable unlicensed slots Logical...

Страница 403: ...he point to point or fabric topology It is identified by a world wide name NL_Port Node Loop Port It has the capability to communicate over both FC AL hubs and through F_Ports O Online A status for a...

Страница 404: ...addressed to support detection of hardware configuration compatibility issues and persistence across FRUs RAS ticket A ticket that alerts service personnel and customers of an issue with the library...

Страница 405: ...s environment Snapshot A rapid point in time image of a volume created initially on the same disk as the original by duplicating metadata rather than copying the full data set Snapshots are often used...

Страница 406: ...lications Topology The logical and or physical arrangement of stations on a network Trap An SNMP alert that is sent when predefined conditions are met For example an error trap tests for an error cond...

Страница 407: ...integral to Fibre Channel operations WWPN World Wide Port Name The WWPN is a 64 bit hard coded address for each port on an FC connected device It is used to identify available SAN devices at end point...

Отзывы: