


152
6-1-4 Set the laser marker communication settings
1.
Establish an online connection between your PC and the laser marking system.
2.
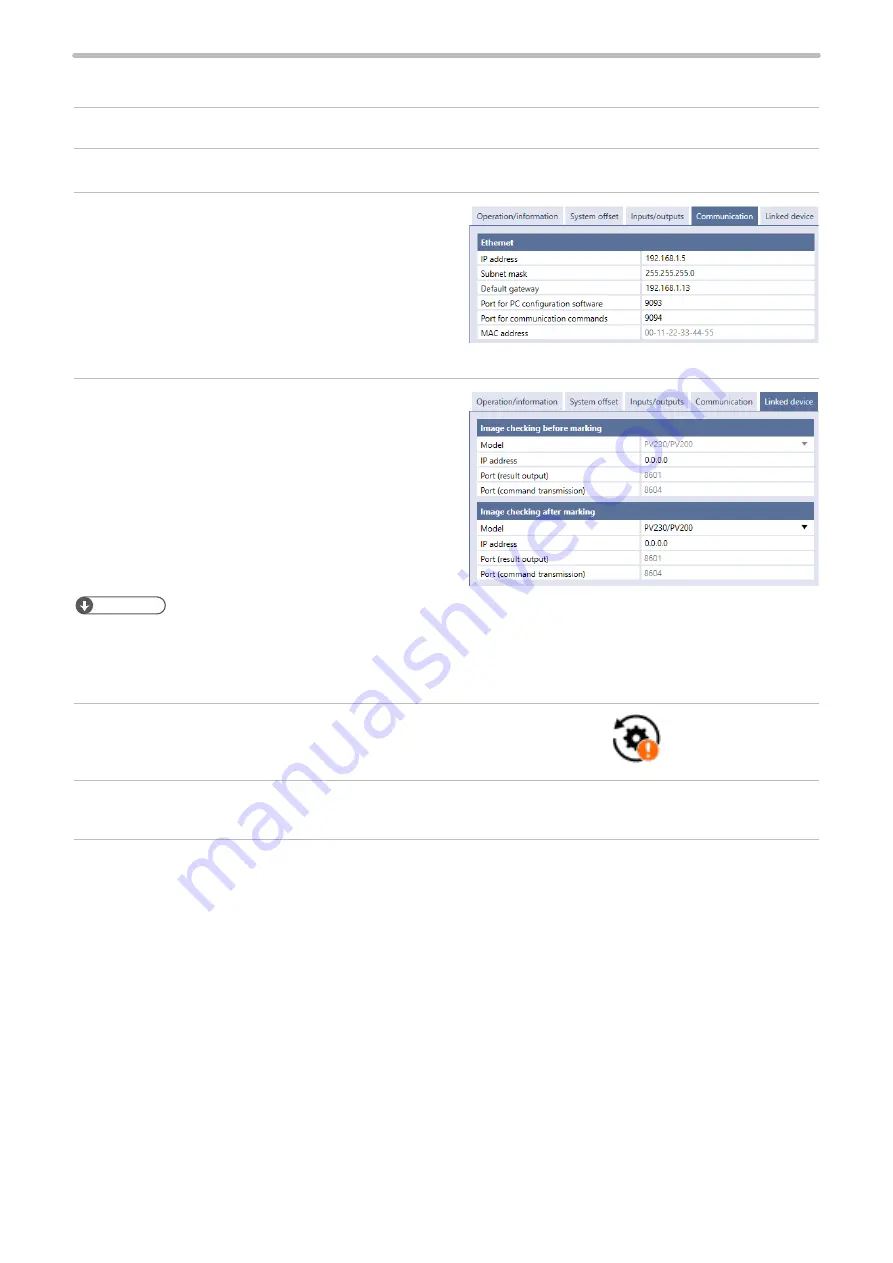
Go to the “System settings” screen and select “Communication” tab.
3.
Set the Ethernet communication configuration of the
laser marker.
4.
Open the “Linked device” tab and configure the
communication settings of the imagechecker according
to the functions to use.
For image checking before marking:
• IP Address
For image checking after marking:
• Model of image checker: PV230/PV200, DataMan
• IP Address
• Port (for DataMan)
ンㄆㄇㄆㄓㄆㄏㄆ
• Specify these values according to communication settings of the image checker to connect.
• The Port number for PV230/PV200 is a fixed value.
• Specify Telnet Port for DataMan port number.
5.
Select “Apply to laser marking system” on the left side of the ribbon.
6.
Disconnect the online connection with the laser marker.
7.
Turn off the power of the laser marking system, wait five seconds and then restart the system.
The configured items will be reflected to the laser marker.
“Apply to laser marking
system” tool
ME-LPRH-SM-3
Содержание LP-RH Series
Страница 19: ...1 Product Overview ME LPRH SM 3...
Страница 42: ...2 Laser Marker Installation ME LPRH SM 3...
Страница 68: ...3 Operation Method ME LPRH SM 3...
Страница 90: ...4 External Control Using I O ME LPRH SM 3...
Страница 138: ...5 External Control by Communication Commands ME LPRH SM 3...
Страница 147: ...6 Link Control with External Devices ME LPRH SM 3...
Страница 172: ...7 Maintenance ME LPRH SM 3...
Страница 201: ...Troubleshooting ME LPRH SM 3...
Страница 236: ...Index ME LPRH SM 3...
Страница 238: ...238 Test marking 69 82 TIMING IN 155 U Unit power cable 32 USB 38 39 64 W Warning 225 ME LPRH SM 3...
Страница 239: ......