Section 7
Advanced Operations
273
MikroScan 7600PRO
Operator’s Manual
Catalog 11180-94
V15.4F 050406
4) Attach the Lens Cap
5) Press the
jOyStICK [e]
button to begin a
ReF CAL
The instrument will go into the
FReeze
mode and
PROCeSSInG
will be displayed on the task bar for about 5 or
6 seconds, while a
ReF CAL
is being completed. After the
ReF
CAL
has been completed, the task bar will display
HIGH teMP
PLeASe
.
6) Remove the Lens Cap
7) Point the instrument at a blackbody source or uniform hot plate.
8) Press the
jOyStICK [e]
button to begin an
eRSP CAL.
The instrument will go into the
FReeze
mode and
PROCeSSInG
will be displayed on the task bar for about 5 or 6
seconds, while the
eRSP CAL
is being completed.
9) Press the
jOyStICK [e]
button to return to normal operation.
7.5 Returning all Settings to Default Values
1) Press and hold the
Run/FReeze [R]
button
and the
AutO [A]
button
simultaneously while moving the power switch to the on position.
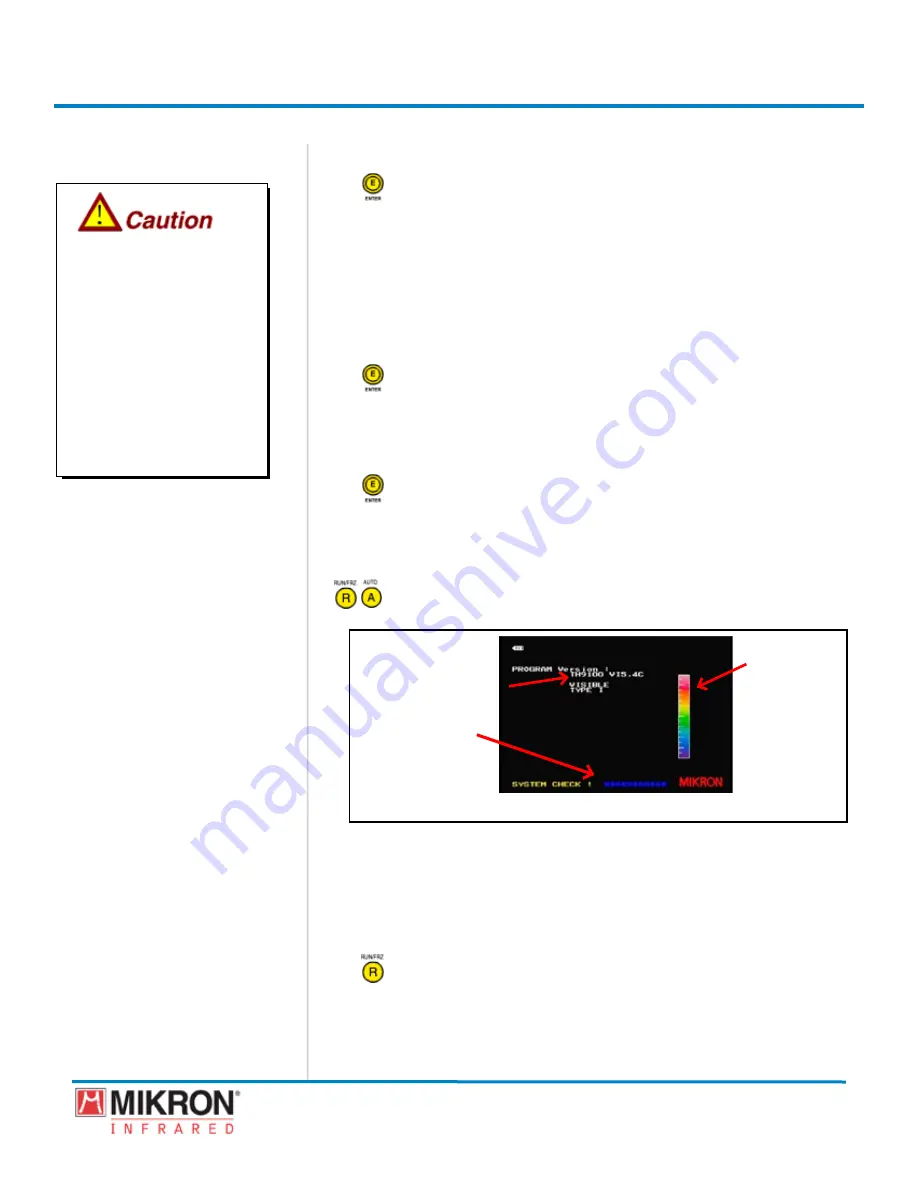
Initialization in Progress
Camera Software Version
Palette bar
System Check
Once the power switch has been turned on, the camera will
enter an initialization mode. As this process begins, a
[COndI-
tIOn InItIAL]
message will appear on the display offering you
the choice of returning the instrument to its default values or to
have the instrument retain its former settings.
2) Press the
Run/FReeze [R]
button to select OK:enter
Once the
Run/FReeze
button has been selected, the camera
will continue through the initialization process. Once the initial-
ization process has been completed, the camera enters the run
mode and all settings will have been returned to the instruments
default values.
The blackbody or hot plate
must be higher than 70°C
if Range 1 is being used
and higher than 150°C if
Range 2 is being used. The
diameter of the source must
be greater than the Field of
View of the instrument at
any given distance. A typical
source diameter for cali-
bration is 100cm at 10 cm
distance.
Содержание 7600PRO
Страница 2: ......


