Appendix E
User’s Manual Probot
D960R3
E-3
Video Input (yellow)
BNC Cable
BNC to Video
Adapter
FIGURE E-1
Connection of the Probot Camera
After connecting, switch on the Probot and start µCarrier to check if the camera
image is displayed.
Note: The camera is powered by the Probot. The Probot must be powered on to
use the camera and to see any image.
a)
Start
µ
Carrier 2.0, select the
View
menu from the tool bar and choose
Show
video camera window
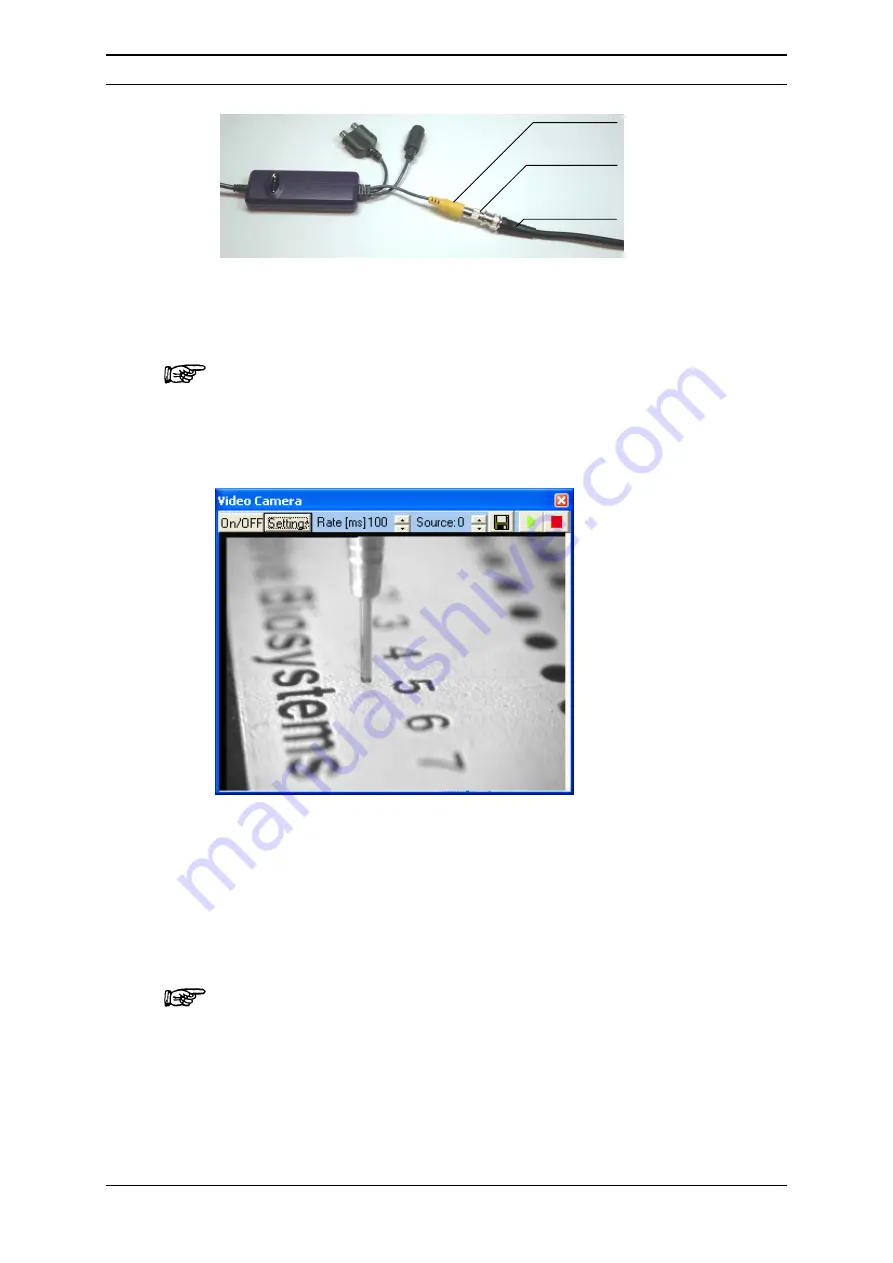
to open the video window (FIGURE E-2).
FIGURE E-2
The Video Camera Window of µCarrier
b)
The video image should be visible. If no image is visible, refer to Section
E.2.4 for troubleshooting information. Refer to Section E.2.3 to optimize the
video settings.
The
Rate [ms]
setting defines the frame rate of the image. ‘100 ms’ is the
default value that should be used. To update the image at a higher frequency,
choose a lower number.
Note: To avoid the system from slowing down, it is recommended to set the
frame rate to at least 100 ms if you are using the video device in conjunction
with laptops and older PCs (where the graphic card memory is shared with the
system memory).
Содержание Probot 161403
Страница 1: ...D960R3 Probot TM Micro Fraction Collector User s Manual P N 161403 www lcpackings com ...
Страница 6: ...Table of Contents vi D960R3 User s Manual Probot This page intentionally left blank ...
Страница 10: ...Instructions for Returning Instruments x D960R3 User s Manual Probot This page intentionally left blank ...
Страница 14: ...CE Declaration xiv D960R3 User s Manual Probot This page intentionally left blank ...
Страница 68: ...Installation and Getting Started 2 48 D960R3 User s Manual Probot This page intentionally left blank ...
Страница 102: ...Appendix C C 6 D960R3 User s Manual Probot This page intentionally left blank ...
Страница 112: ...Appendix D D 10 D960R3 User s Manual Probot This page intentionally left blank ...


