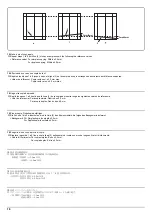
4
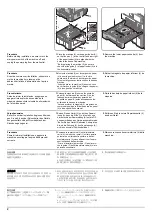
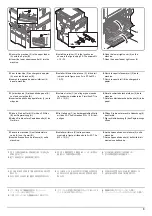
G(M4x20)
F
E
G(M4x20)
5
5
7.
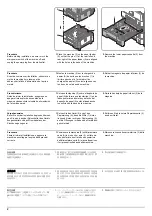
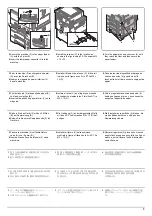
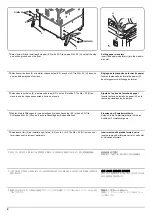
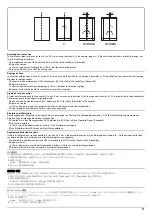
Select holes (5) and install each stopper (E,F) with 2 S Tite screws M4 × 20 (G) so that the stop-
pers will be grounded on the floor.
Setting paper size plate
Insert the paper size plate (H) into the size dis-
play slot.
7.
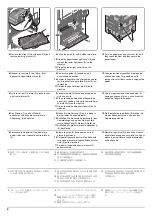
Sélectionner les trous (5) et installer chaque butée (E,F) avec 2 vis S Tite M4 × 20 (G) de sorte
que les butées reposent sur le sol.
Réglage de la plaquette du format de papier
Insérez la plaquette de format de papier (H)
dans le logement d'affichage du format.
7.
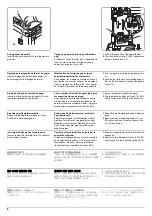
Seleccione los orificios (5) e instale cada tope (E,F) con los 2 tornillos S Tite M4 × 20 (G) de
manera que los topes se conecten a tierra en el suelo.
Ajuste de la placa de tamaño de papel
Inserte la placa de tamaño de papel (H) en la
ranura de visualización de tamaño.
7.
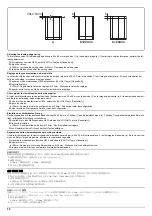
Wählen Sie die Öffnungen (5) und befestigen Sie jeden Anschlag (E,F) mit den 2 S-Tite-
Schrauben M4 × 20 (G) so an, dass die Anschläge am Boden aufsitzen.
Einsetzen der Papierformatkarte
Setzen Sie die Papierformatkarte (H) in den
Schlitz der Formatanzeige ein.
7.
Selezionare i fori (5) ed installare ogni fermo (E,F) con le 2 viti S Tite M4 × 20 (G) in modo che i
fermi siano posti a terra sul pavimento.
Inserimento della piastra formato carta
Inserire la piastra di formato carta (H) nello slot
di indicazione formato.
7.
転倒防止金具 (E,F) が床面に接地するように、
穴(5)を選択してビス M4×20 S タイト (G) 各 2 本
で取り付ける。
用紙サイズプレートのセット
用紙サイズプレート (H) を、サイズ表示スロッ
トに挿入する。
7.
在孔 (5) 处各用 2 颗 M4×20 紧固型 S 螺丝 (G) 安装防止倾斜工具 (E,F),使之和地板接触。
设定纸张尺寸插片
将纸张尺寸插片 (H) 插入到尺寸表示插槽内。
7.
구멍 (5) 을 선택해 스토퍼 (E,F) 가 바닥면에 닿도록 나사 M4×20 S 타이트 (G) 2 개를 사용하여
설치합니다 .
용지 사이즈 플레이트 장착하기
용지 크기 플레이트 (H) 를 해당 사이즈 디스플
레이 슬롯에 삽입합니다 .
H
Содержание TASKalfa 3010i
Страница 1: ...SERVICE MANUAL Published in September 2016 842NL11B 2NLSM06B Rev B TASKalfa 3010i TASKalfa 3510i ...
Страница 10: ...This page is intentionally left blank ...
Страница 100: ...2NL 2P8 1 2 76 This page is intentionally left blank ...
Страница 286: ...2NL 2P8 1 3 186 This page is intentionally left blank ...
Страница 443: ...2NL 2P8 1 5 59 This page is intentionally left blank ...
Страница 463: ...2NL 2P8 2 1 18 Figure 2 1 23 Duplex conveying section block diagram EPWB DU_SENS DU_CL_REM YC14 5 YC8 1 DUCL DUS ...
Страница 471: ...2NL 2P8 2 2 8 This page is intentionally left blank ...
Страница 532: ...Installation Guide DP 770 B Document processor DP 772 Document processor Installation Guide ...
Страница 568: ...DP 773 Document processor Installation Guide ...
Страница 594: ...PF 791 500 x 2 Paper feeder Installation Guide ...
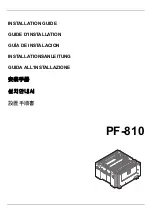
Страница 602: ...PF 810 3000 sheet deck Installation Guide ...
Страница 615: ...DF 791 3000 sheet finisher Installation Guide ...
Страница 630: ...DF 770 D 1000 sheet finisher Installation Guide ...
Страница 648: ...AK 740 Bridge unit Installation Guide ...
Страница 650: ...MT 730 B Mailbox Installation Guide ...
Страница 665: ...PH 7A C D Punch unit Installation Guide ...
Страница 686: ...DT 730 B Document tray Installation Guide ...
Страница 731: ...5 2013 5 302LC56750 01 H F G D D 6 4 3 7 E C D D M4 8 M4 8 M4 8 M4 8 ...
Страница 732: ...FAX System W B Installation Guide ...

