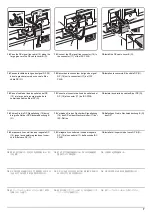
21
3
G
C (C*)
C
G
G
C (C*)
2.
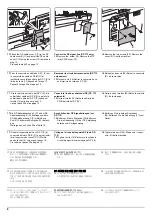
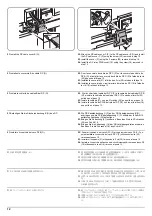
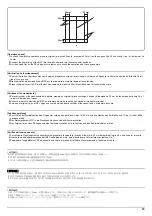
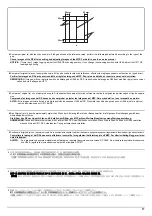
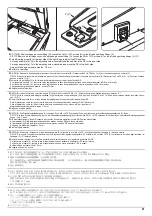
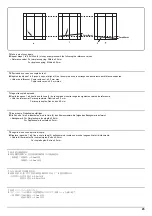
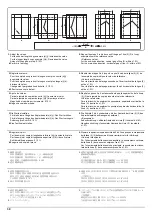
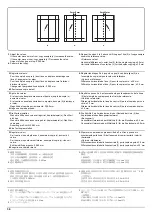
DP-770(B): Remove the angle control fitting (D). Loosen the 2 M4 × 14TP screws (G) on the left and right fixing fittings (C).
DP-772: Remove the left hinge cover (H) and the angle control fitting (D). Loosen the 2 M4 × 14TP screws (G) on the left and right fixing fittings (C)(C*)
3.
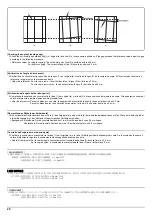
Turn adjusting screw (3) at the rear side of the right hinge to adjust the DP position.
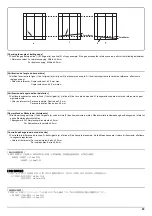
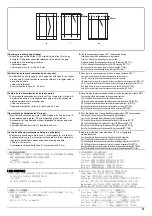
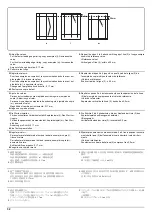
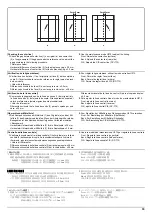
For copy example (d): Turn the adjusting screw counterclockwise and move the DP to the inner side.
For copy example (e): Turn the adjusting screw clockwise and move the DP to the front side.
Amount of change per scale: Approx. 1.0 mm
4.
Perform a test copy.
2.
DP-770(B): Déposer la fixation d'angle (assurant le contrôle de l'ouverture) (D). Desserrer les 2 vis TP M4 × 14 (G) sur les fixations gauche et droite (C).
DP-772: Déposer le couvercle de la charnière gauche (H) et la fixation d'angle (assurant le contrôle de l'ouverture) (D). Desserrer les 2 vis TP M4 × 14 (G) sur les fixations
gauche et droite (C)(C*).
3.
Tourner la vis de réglage (3) à l’arrière de la charnière droite pour régler la position du DP.
Pour l’exemple de copie (d) : tourner la vis de réglage dans le sens inverse des aiguilles d’une montre et déplacer le DP vers l’intérieur.
Pour l’exemple de copie (e) : tourner la vis de réglage dans le sens des aiguilles d’une montre et déplacer le DP vers l’avant.
Changement par graduation d’échelle : environ 1,0 mm
4.
Effectuer une copie de test.
2.
DP-770(B): quite el herraje de control de ángulo (D). Afloje los 2 tornillos TP M4 × 14 (G) de los herrajes de fijación izquierdo y derecho (C).
DP-772: quite la cubierta de la bisagra izquierda (H) y el herraje de control de ángulo (D). Afloje los 2 tornillos TP M4 × 14 (G) de los herrajes de fijación izquierdo y dere-
cho (C)(C*).
3.
Gire el tornillo de ajuste (3) en el lado trasero de la bisagra derecha para ajustar la posición del DP.
Para el ejemplo de copia (d): gire el tornillo de ajuste en sentido antihorario y mueva el DP al lado interno.
Para el ejemplo de copia (e): gire el tornillo de ajuste en sentido horario y mueva el DP al lado frontal.
Magnitud del cambio por escala: aprox. 1,0 mm
4.
Haga una copia de prueba.
2.
DP-770(B): Die Winkeleinstellbefestigung (D) entfernen. Die 2 M4 × 14TP Schrauben (G) an den linken und rechten Befestigungshalterung (C) lösen.
DP-772: Die linke Scharnierabdeckung (H) und die Winkeleinstellbefestigung (D) entfernen. Die 2 M4 × 14TP Schrauben (G) an den linken und rechten Befestigungshalter-
ungen (C)(C*) lösen.
3.
Die Einstellschraube (3) an der Rückseite des rechten Scharniers einstellen, um die DP-Position einzustellen.
Kopierbeispiel (d): Die Einstellschraube nach links drehen und den DP nach innen schieben.
Kopierbeispiel (e): Die Einstellschraube nach rechts drehen und den DP nach vorne schieben.
Änderung pro Maßstab: Ungefähr 1,0 mm
4.
Eine Testkopie erstellen.
2.
DP-770(B): Rimuovere l'accessorio di regolazione angolare (D). Allentare le 2 viti M4 × 14TP (G) sugli accessori di fissaggio (C) destro e sinistro.
DP-772: Rimuovere il coperchio cerniera sinistra (H) e l'accessorio di regolazione angolare (D). Allentare le 2 viti M4 × 14TP (G) sui lati destro e sinistro degli accessori di
fissaggio (C)(C*) destro e sinistro.
3.
Ruotare la vite di regolazione (3) sul lato posteriore della cerniera destra per regolare la posizione del DP.
Per l’esempio di copia (d): ruotare la vite di regolazione in senso antiorario e spostare il DP verso l’interno.
Per l’esempio di copia (e): ruotare la vite di regolazione in senso orario e spostare il DP in avanti.
Entità modifica per scala: circa 1,0 mm
4.
Eseguire una copia di prova.
2.
DP-770(B) の場合:角度規制金具 (D) を取り外す。左右の固定金具 (C) のビス M4x14TP(G)2 本を緩める
DP-772 の場合:左ヒンジカバー(H) および角度規制金具 (D) を取り外す。
左右の固定金具 (C)(C*) のビス M4x14TP(G)2 本を緩める。
3.
右ヒンジ後側の調整ビス (3) を回し、DP の位置を調整する。
コピーサンプル (d) の場合:調整ビスを左に回し、
DP を奥へ動かす。
コピーサンプル (e) の場合:調整ビスを右に回し、
DP を手前へ動かす。
1 目盛り当たりの変化量:約 1.0mm
4.
テストコピーを行う。
2.
DP-770(B) 时 :拆下角度限制工具 (D)。拧松左右固定工具 (C) 的 2 颗 M4x14TP(G) 螺丝。
DP-772 时 :拆下左部铰链盖板 (H) 以及角度限制工具 (D)。拧松左右固定工具 (C)(C*) 的 2 颗 M4x14TP(G) 螺丝。
3.
旋转右部铰链的后部的调整螺钉(3)以调整 DP 位置。
对于复印样本 (d) :逆时针旋转调整螺钉并将 DP 移动到内侧。
对于复印样本 (e) :顺时针旋转调整螺钉并将 DP 移动到正面。
按比例尺的更改量 :约 1.0mm
4.
进行测试复印。
2.
DP-770(B) 의 경우:각도 고정쇠 (D) 를 제거합니다 . 좌우의 고정쇠 (C) 나사 M4x14TP(G) 2 개를 느슨하게 합니다 .
DP-772 의 경우:좌 힌지커버 (H) 및 각도 고정쇠 (D) 를 제거합니다 . 좌우의 고정쇠 (C)(C*) 의 나사 M4x14TP(G) 2 개를 느슨하게 합니다 .
3.
우 힌지 뒷측 조정나사 (3) 를 돌려 DP 의 위치를 조정합니다 .
샘플 카피 (d) 의 경우:조정나사를 좌로 돌려 DP 를 안으로 넣습니다 . 샘플 카피 (e) 의 경우 : 조정나사를 오른쪽으로 돌려 DP 를 앞으로 뺍니다 .
1 개 변화량:약 1.0mm
4.
테스트 카피를 합니다 .
Содержание TASKalfa 3010i
Страница 1: ...SERVICE MANUAL Published in September 2016 842NL11B 2NLSM06B Rev B TASKalfa 3010i TASKalfa 3510i ...
Страница 10: ...This page is intentionally left blank ...
Страница 100: ...2NL 2P8 1 2 76 This page is intentionally left blank ...
Страница 286: ...2NL 2P8 1 3 186 This page is intentionally left blank ...
Страница 443: ...2NL 2P8 1 5 59 This page is intentionally left blank ...
Страница 463: ...2NL 2P8 2 1 18 Figure 2 1 23 Duplex conveying section block diagram EPWB DU_SENS DU_CL_REM YC14 5 YC8 1 DUCL DUS ...
Страница 471: ...2NL 2P8 2 2 8 This page is intentionally left blank ...
Страница 532: ...Installation Guide DP 770 B Document processor DP 772 Document processor Installation Guide ...
Страница 568: ...DP 773 Document processor Installation Guide ...
Страница 594: ...PF 791 500 x 2 Paper feeder Installation Guide ...
Страница 602: ...PF 810 3000 sheet deck Installation Guide ...
Страница 615: ...DF 791 3000 sheet finisher Installation Guide ...
Страница 630: ...DF 770 D 1000 sheet finisher Installation Guide ...
Страница 648: ...AK 740 Bridge unit Installation Guide ...
Страница 650: ...MT 730 B Mailbox Installation Guide ...
Страница 665: ...PH 7A C D Punch unit Installation Guide ...
Страница 686: ...DT 730 B Document tray Installation Guide ...
Страница 731: ...5 2013 5 302LC56750 01 H F G D D 6 4 3 7 E C D D M4 8 M4 8 M4 8 M4 8 ...
Страница 732: ...FAX System W B Installation Guide ...

