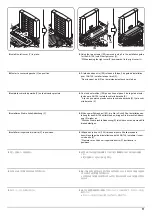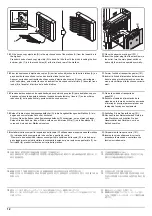
9
1.
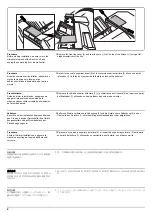
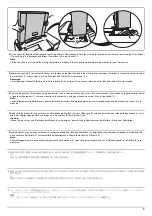
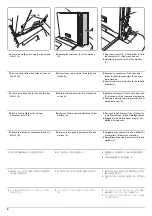
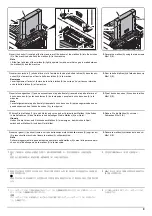
Insert the hooks (1) located at the front and rear of the bottom of the mailbox (A) into the notches
(2) of the machine and attach the mailbox (A) to the machine.
Note
Lift the front and rear of the mailbox (A) lightly upward to make sure that no gap is made between
the mailbox (A) and the machine.
2.
Secure the mailbox (A) using the two screws
M4x12 (E).
1.
Insérer les crochets (1) situés à l'avant et à l'arrière du fond de la boîte à lettres (A) dans les enc-
oches (2) de la machine et fixer la boîte aux lettres (A) à la machine.
Remarque
Lever légèrement l'avant et l'arrière de la boîte à lettres (A) de sorte qu'il n'y ait aucun interstice
entre la boîte à lettres (A) et la machine.
2.
Fixer la boîte à lettres (A) à l'aide de deux vis
M4x12 (E).
1.
Inserte los enganches (1) que se encuentran en la parte frontal y trasera de la parte inferior del
buzón de correo (A) en las hendiduras (2) de la máquina y acople el buzón de correo (A) a la
máquina.
Nota
Levante ligeramente la parte frontal y trasera del buzón de correo (A) para asegurarse de que no
queda espacio entre el buzón de correo (A) y la máquina.
2.
Fije el buzón de correo (A) con dos tornillos
M4x12 (E).
1.
Führen Sie die Haken (1), die sich hinten und vorne an der Unterseite der Mailbox (A) befinden,
in die Aufnahmen (2) des Geräts ein und befestigen Sie die Mailbox (A) am Gerät.
Hinweis
Heben Sie die Vorder- und Rückseite der Mailbox (A) ein wenig an, damit sich kein Spalt
zwischen der Mailbox (A) und dem Gerät bildet.
2.
Sichern Sie die Mailbox (A) mit zwei
Schrauben M4x12 (E).
1.
Inserire i ganci (1) posti sul fronte e sul retro della sezione inferiore della mailbox (A) negli incavi
(2) presenti sulla macchina e fissare la mailbox (A) sulla macchina.
Nota
Sollevare leggermente la parte anteriore e posteriore della mailbox (A) verso l’alto per accertarsi
che non vi sia dello spazio tra la mailbox (A) e la macchina.
2.
Fissare la mailbox(A) utilizzando le due viti
M4x12 (E).
1.
メールボックス (A) 下部の前後にあるフック (1) を機械本体の切り欠き (2) に挿入し、メール
ボックス (A) を機械本体に取り付ける。
注意
メールボックス (A) の前後をそれぞれ上方向に軽く持ち上げ、メールボックス (A) が浮かない
ことを確認する。
2.
ビス M4×12(E)2 本で、
メールボックス (A)
を固定する。
1.
将位于邮箱(A)底部前、后侧的挂钩(1)插入机器的凹槽(2),然后将邮箱(A)安装至机器。
注
轻轻向上提升邮箱 (A) 的前后侧,确保邮箱 (A) 未处于悬浮状态。
2.
使用两个螺丝 M4x12(E)固定邮箱(A)。
1.
메일박스 (A) 의 전후면 하단에 있는 후크 (1) 를 본체의 노치 (2) 에 삽입하여 메일박스 (A) 를 본
체에 부착합니다 .
주
메일박스 (A) 의 앞뒤를 각각 상방향으로 가볍게 들어 메일박스 (A) 가 떠 있지 않은 것을 확인합
니다 .
2.
M4x12 나사 (E) 두 개를 사용하여 메일박스
(A) 를 고정합니다 .
E(M4x12)
A
E(M4x12)
A
1
2
2
1
Содержание TASKalfa 3010i
Страница 1: ...SERVICE MANUAL Published in September 2016 842NL11B 2NLSM06B Rev B TASKalfa 3010i TASKalfa 3510i ...
Страница 10: ...This page is intentionally left blank ...
Страница 100: ...2NL 2P8 1 2 76 This page is intentionally left blank ...
Страница 286: ...2NL 2P8 1 3 186 This page is intentionally left blank ...
Страница 443: ...2NL 2P8 1 5 59 This page is intentionally left blank ...
Страница 463: ...2NL 2P8 2 1 18 Figure 2 1 23 Duplex conveying section block diagram EPWB DU_SENS DU_CL_REM YC14 5 YC8 1 DUCL DUS ...
Страница 471: ...2NL 2P8 2 2 8 This page is intentionally left blank ...
Страница 532: ...Installation Guide DP 770 B Document processor DP 772 Document processor Installation Guide ...
Страница 568: ...DP 773 Document processor Installation Guide ...
Страница 594: ...PF 791 500 x 2 Paper feeder Installation Guide ...
Страница 602: ...PF 810 3000 sheet deck Installation Guide ...
Страница 615: ...DF 791 3000 sheet finisher Installation Guide ...
Страница 630: ...DF 770 D 1000 sheet finisher Installation Guide ...
Страница 648: ...AK 740 Bridge unit Installation Guide ...
Страница 650: ...MT 730 B Mailbox Installation Guide ...
Страница 665: ...PH 7A C D Punch unit Installation Guide ...
Страница 686: ...DT 730 B Document tray Installation Guide ...
Страница 731: ...5 2013 5 302LC56750 01 H F G D D 6 4 3 7 E C D D M4 8 M4 8 M4 8 M4 8 ...
Страница 732: ...FAX System W B Installation Guide ...

