4
A
6
8
7
A
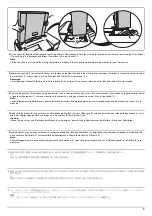
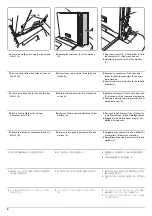
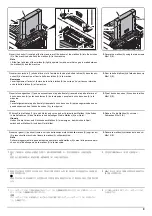
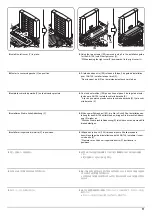
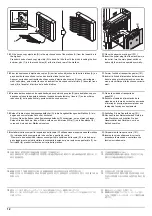
3.
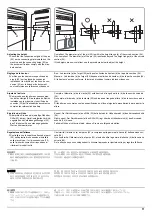
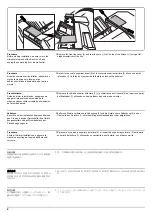
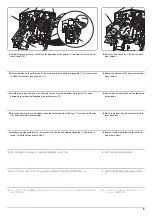
Secure the mailbox (A) using the two screws
M4x12 (E).
4.
Remove the rear cover (6) of the mailbox
(A).
5.
Plug the connector (7) of the mailbox (A) into
the connector (8) of the machine body.
6.
Reinstall the rear cover (6) of the mailbox
(A).
3.
Fixer la boîte à lettres (A) à l'aide de deux vis
M4x12 (E).
4.
Retirer le couvercle arrière (6) de la boîte à
lettres (A).
5.
Brancher le connecteur (7) de la boîte à
lettres (A) dans le connecteur (8) du corps
de la machine.
6.
Remonter le couvercle arrière (6) de la boîte
à lettres (A).
3.
Fije el buzón de correo (A) con dos tornillos
M4x12 (E).
4.
Quite la cubierta posterior (6) del buzón de
correo (A).
5.
Enchufe el conector (7) del buzón de correo
(A) al conector (8) del cuerpo de la máquina.
6.
Vuelva a instalar la cubierta posterior (6) del
buzón de correo (A).
3.
Sichern Sie die Mailbox (A) mit zwei
Schrauben M4x12 (E).
4.
Entfernen Sie die hintere Abdeckung (6) der
Mailbox (A).
5.
Stecken Sie den Stecker (7) der Mailbox (A)
in die Steckbuchse (8) des Gerätegehäuses.
6.
Bringen Sie die hintere Abdeckung (6) der
Mailbox (A) wieder an.
3.
Fissare la mailbox (A) utilizzando le due viti
M4x12 (E).
4.
Rimuovere il coperchio posteriore (6) della
mailbox (A).
5.
Collegare il connettore (7) della mailbox (A)
al connettore (8) del corpo macchina.
6.
Reinstallare il coperchio posteriore (6) della
mailbox (A).
3.
ビス M4×12(E)2 本で、
メールボックス (A)
を固定する。
4.
メールボックス (A) の後カバー(6) を取り
外す。
5.
メールボックス (A) のコネクター(7) を機
械本体のコネクター (8) に接続する。
6.
メールボックス (A) の後カバー(6) を元通
りに取り付ける。
3.
使用两个螺丝 M4x12(E)固定邮箱(A)。
4.
拆下邮箱 (A) 的后部盖板 (6)。
5.
将邮箱(A)的接插件(7)插入机器的接插件
(8)。
6.
重新安装邮箱(A)的后盖板(6)。
3.
M4x12 나사 (E) 두 개를 사용하여 메일박스
(A) 를 고정합니다 .
4.
메일박스 (A) 의 뒤커버 (6) 를 떼어냅니다 .
5.
메일박스 (A) 의 커넥터 (7) 를 본체의 커넥터
(8) 에 연결합니다
6.
메일박스 (A) 의 뒤커버 (6) 를 다시 장착합니
다 .
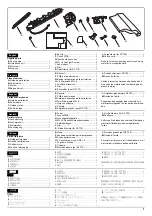
E(M4x12)
A
Содержание TASKalfa 3010i
Страница 1: ...SERVICE MANUAL Published in September 2016 842NL11B 2NLSM06B Rev B TASKalfa 3010i TASKalfa 3510i ...
Страница 10: ...This page is intentionally left blank ...
Страница 100: ...2NL 2P8 1 2 76 This page is intentionally left blank ...
Страница 286: ...2NL 2P8 1 3 186 This page is intentionally left blank ...
Страница 443: ...2NL 2P8 1 5 59 This page is intentionally left blank ...
Страница 463: ...2NL 2P8 2 1 18 Figure 2 1 23 Duplex conveying section block diagram EPWB DU_SENS DU_CL_REM YC14 5 YC8 1 DUCL DUS ...
Страница 471: ...2NL 2P8 2 2 8 This page is intentionally left blank ...
Страница 532: ...Installation Guide DP 770 B Document processor DP 772 Document processor Installation Guide ...
Страница 568: ...DP 773 Document processor Installation Guide ...
Страница 594: ...PF 791 500 x 2 Paper feeder Installation Guide ...
Страница 602: ...PF 810 3000 sheet deck Installation Guide ...
Страница 615: ...DF 791 3000 sheet finisher Installation Guide ...
Страница 630: ...DF 770 D 1000 sheet finisher Installation Guide ...
Страница 648: ...AK 740 Bridge unit Installation Guide ...
Страница 650: ...MT 730 B Mailbox Installation Guide ...
Страница 665: ...PH 7A C D Punch unit Installation Guide ...
Страница 686: ...DT 730 B Document tray Installation Guide ...
Страница 731: ...5 2013 5 302LC56750 01 H F G D D 6 4 3 7 E C D D M4 8 M4 8 M4 8 M4 8 ...
Страница 732: ...FAX System W B Installation Guide ...

