2NL/2P8
1-5-42
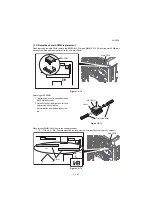
If the main PWB was replaced with a service supplied part, perform the following.
1. Insert the USB flash device in which an upgrade pack of the latest firmware or the Main/MMI/Browser
and Dictionary Jpn (excluding Language) were copied, into the slot on the machine and turn power on.
(see page 1-6-1).
2. After the main-circuit PWB has been replaced, perform U026 to restore backed-up data.
*: Do not replace the main-circuit PWB and the HDD at the same time.
(Otherwise, the settings retained by U026 in the HDD will not become restorable.)
*: Referring to the U000 maintenance report printed previously, enter the following values.
U278 Setting the delivery date
U402 Adjusting margins of image printing
U952 Maintenance mode workflow
*:Since the U952 settings are not printed on the maintenance report, perform U952 to register settings
again.
3. Reset machine settings.( Resets system menu settings modified at setup to their defaults.)
Main items for settings
[Date/Timer] - Date/Time settings
[Date/Timer] - Timer settings (Sleep timer)
[Edit Destination] - One-touch presetting
[User/Job accounting] - Defaults for user authentication and job accounting only.
Resettings are not required as the data are stored in harddisk.
*: If the IP address has been changed to a printer name in printer settings, set the IP address again.
Procedures to be followed after the EEPROM on the main PWB has been replaced
1. Run U004 – model number entry.
The C0130 (mismatching model number) is displayed when the device is powered up after its EEPROM
has been replaced. Restore the counter values and serial number that are stored in the engine
EEPROM.
2. Referring to the maintenance report that was printed using U000 at setup, set the following maintenance
modes:
1) U252 - Setting the destination
2) U265 - Setting OEM purchaser code
3. Run the following maintenance mode for image adjustment:
1) U410 – Adjusting the halftone automatically
Содержание TASKalfa 3010i
Страница 1: ...SERVICE MANUAL Published in September 2016 842NL11B 2NLSM06B Rev B TASKalfa 3010i TASKalfa 3510i ...
Страница 10: ...This page is intentionally left blank ...
Страница 100: ...2NL 2P8 1 2 76 This page is intentionally left blank ...
Страница 286: ...2NL 2P8 1 3 186 This page is intentionally left blank ...
Страница 443: ...2NL 2P8 1 5 59 This page is intentionally left blank ...
Страница 463: ...2NL 2P8 2 1 18 Figure 2 1 23 Duplex conveying section block diagram EPWB DU_SENS DU_CL_REM YC14 5 YC8 1 DUCL DUS ...
Страница 471: ...2NL 2P8 2 2 8 This page is intentionally left blank ...
Страница 532: ...Installation Guide DP 770 B Document processor DP 772 Document processor Installation Guide ...
Страница 568: ...DP 773 Document processor Installation Guide ...
Страница 594: ...PF 791 500 x 2 Paper feeder Installation Guide ...
Страница 602: ...PF 810 3000 sheet deck Installation Guide ...
Страница 615: ...DF 791 3000 sheet finisher Installation Guide ...
Страница 630: ...DF 770 D 1000 sheet finisher Installation Guide ...
Страница 648: ...AK 740 Bridge unit Installation Guide ...
Страница 650: ...MT 730 B Mailbox Installation Guide ...
Страница 665: ...PH 7A C D Punch unit Installation Guide ...
Страница 686: ...DT 730 B Document tray Installation Guide ...
Страница 731: ...5 2013 5 302LC56750 01 H F G D D 6 4 3 7 E C D D M4 8 M4 8 M4 8 M4 8 ...
Страница 732: ...FAX System W B Installation Guide ...

