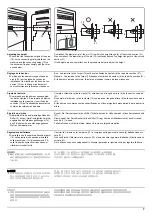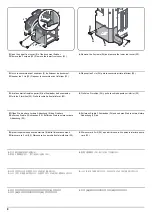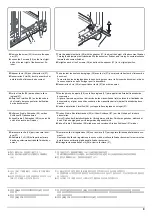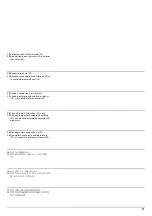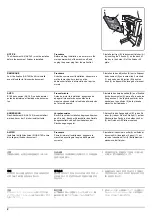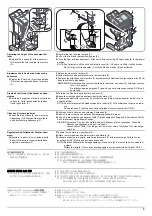
6
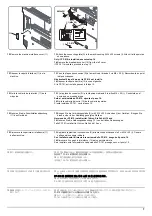
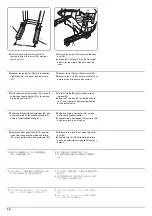
AA
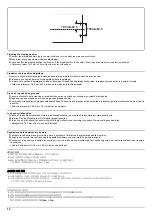
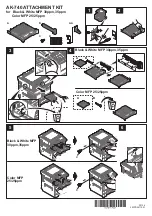
H(M4x8)
PF-791
AA
PF-810
H(M4x8)
If PF-810 is installed
11.
Install earth plate (AA) to the bottom center of document finisher using
an M4 × 8 screw (H).Secure the plate at the location marked "PF-810".
Earth plate (AA) is supplied with AK-740.
Proceed to step 12.If PF-791 is installed, see the next.
If PF-791 is installed
11.
Install earth plate (AA) to the bottom center of document finisher using
an M4 × 8 screw (H).Secure the plate at the location marked "PF-791".
Earth plate (AA) is supplied with AK-740.
Falls der PF-810 installiert ist
11.
Installieren Sie die Grundplatte (AA) mit der Schraube M4 × 8 (H)
unten in die Mitte des Finishers.Sichern Sie die Platte an der Stelle, die
mit "PF-810" markiert ist.
Die Grundplatte (AA) wird mit dem AK-740 geliefert.
Führen Sie Schritt 12 aus.Falls der PF-791 installiert ist, folgen Sie den
weiteren Schritten.
Falls der PF-791 installiert ist
11.
Installieren Sie die Grundplatte (AA) mit der Schraube M4 × 8 (H)
unten in die Mitte des Finishers.Sichern Sie die Platte an der Stelle, die
mit "PF-791" markiert ist.
Die Grundplatte (AA) wird mit dem AK-740 geliefert.
Quando è installato l'alimentatore carta modello PF-810
11.
Installare la piastra di messa a terra (AA) al centro della base del fin-
isher documenti utilizzando una vite M4 × 8 (H).Fissare la piastra nella
posizione contrassegnata con "PF-810".
La piastra di mesa a terra (AA) viene fornita con AK-740.
Proseguire con il punto 12.Se invece è installato l'alimentatore carta
modello PF-791, vedere più avanti.
Quando è installato l'alimentatore carta modello PF-791
11.
Installare la piastra di messa a terra (AA) al centro della base del fin-
isher documenti utilizzando una vite M4 × 8 (H).Fissare la piastra nella
posizione contrassegnata con "PF-791".
La piastra di mesa a terra (AA) viene fornita con AK-740.
PF-810 が装着されている場合
11.
アース板 (AA) をドキュメントフィニッシャー下部センターにビス
M4×8(H) で取り付ける。
PF-810 の刻印のある位置で固定する。
アース板 (AA) は AK-740 の同梱品。
手順 12 に進む。
PF-791 が装着されている場合は次に記載しています。
PF-791 が装着されている場合
11.
アース板 (AA) をドキュメントフィニッシャー下部センターにビス
M4×8(H) で取り付ける。PF-791 の刻印のある位置で固定する。
アース板 (AA) は AK-740 の同梱品。
Si le PF-810 est installé
11.
Installez la plaque de terre (AA) en bas au centre du finisseur de docu-
ment à l'aide d'une vis M4 × 8 (H).Fixez la plaque à l'emplacement
marqué "PF-810".
La plaque de terre (AA) est fournie avec l'AK-740.
Passez à l'étape 12.Si le PF-791 est installé, voir ci-après.
Si le PF-791 est installé
11.
Installez la plaque de terre (AA) en bas au centre du finisseur de docu-
ment à l'aide d'une vis M4 × 8 (H).Fixez la plaque à l'emplacement
marqué " PF-791 ".
La plaque de terre (AA) est fournie avec l'AK-740.
当安装了 PF-810 的情况时
11.
使用 M4×8(H) 螺丝,将接地板(AA)安装至装订器下部中央位置。将接
地板固定在刻有 “PF-810” 印记的位置。
接地板(AA)是随附在 AK-740 内的。
进入步骤 12。当安装了 PF-791 的情况时。参考如下内容。
当安装了 PF-791 的情况时
11.
使用 M4×8(H) 螺丝,将接地板(AA)安装至装订器下部中央位置。将接
地板固定在刻有 “PF-791” 印记的位置。
接地板(AA)是随附在 AK-740 内的。
PF-810 이 설치되어 있는 경우
11.
나사 M4 × 8(H) 을 이용하여 도큐먼트 피니셔 하부 중앙에 접지판
(AA) 을 설치합니다 . "PF-810" 으로 표시된 곳에 플레이트를 고정하
십시오 .
접지판 (AA) 은 AK-740 과 함께 제공됩니다 .
스텝 12 을 진행합니다 .PF-791 이 설치되어 있는 경우 다음을 참조
하십시오 .
PF-791 이 설치되어 있는 경우
11.
M4 × 8 나사 (H) 를 사용하여 접지판 (AA) 을 도큐먼트 피니셔의 하부
중앙에 부착합니다 ."PF-791" 이 표시된 지점에 플레이트를 고정합니
다 .
접지판 (AA) 은 AK-740 과 함께 제공됩니다 .
Si está instalado PF-810
11.
Instale la placa de conexión a tierra (AA) a la parte central inferior del
finalizador de documentos con un tornillo M4 × 8 (H).Fije la placa a la
ubicación con la marca "PF-810".
Con AK-740 se proporciona la placa de conexión a tierra (AA).
Vaya al paso 12.Si está instalado PF-791, consulte lo siguiente.
Si está instalado PF-791
11.
Instale la placa de conexión a tierra (AA) a la parte central inferior del
finalizador de documentos con un tornillo M4 × 8 (H).Fije la placa a la
ubicación con la marca "PF-791".
Con AK-740 se proporciona la placa de conexión a tierra (AA).
Содержание TASKalfa 3010i
Страница 1: ...SERVICE MANUAL Published in September 2016 842NL11B 2NLSM06B Rev B TASKalfa 3010i TASKalfa 3510i ...
Страница 10: ...This page is intentionally left blank ...
Страница 100: ...2NL 2P8 1 2 76 This page is intentionally left blank ...
Страница 286: ...2NL 2P8 1 3 186 This page is intentionally left blank ...
Страница 443: ...2NL 2P8 1 5 59 This page is intentionally left blank ...
Страница 463: ...2NL 2P8 2 1 18 Figure 2 1 23 Duplex conveying section block diagram EPWB DU_SENS DU_CL_REM YC14 5 YC8 1 DUCL DUS ...
Страница 471: ...2NL 2P8 2 2 8 This page is intentionally left blank ...
Страница 532: ...Installation Guide DP 770 B Document processor DP 772 Document processor Installation Guide ...
Страница 568: ...DP 773 Document processor Installation Guide ...
Страница 594: ...PF 791 500 x 2 Paper feeder Installation Guide ...
Страница 602: ...PF 810 3000 sheet deck Installation Guide ...
Страница 615: ...DF 791 3000 sheet finisher Installation Guide ...
Страница 630: ...DF 770 D 1000 sheet finisher Installation Guide ...
Страница 648: ...AK 740 Bridge unit Installation Guide ...
Страница 650: ...MT 730 B Mailbox Installation Guide ...
Страница 665: ...PH 7A C D Punch unit Installation Guide ...
Страница 686: ...DT 730 B Document tray Installation Guide ...
Страница 731: ...5 2013 5 302LC56750 01 H F G D D 6 4 3 7 E C D D M4 8 M4 8 M4 8 M4 8 ...
Страница 732: ...FAX System W B Installation Guide ...

