5
5 10
9
5
5
3
3
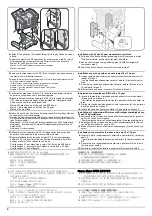
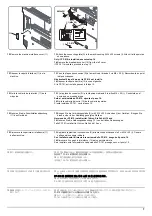
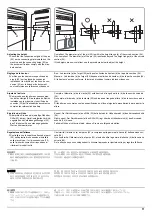
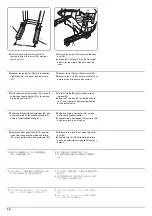
Installation with 25/25 ppm Full-color
machine
8.
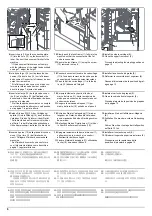
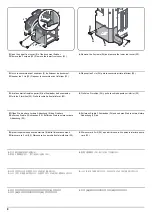
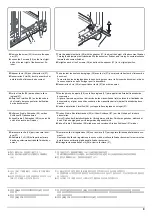
Fully insert the front and rear positioning
pins (6) removed in step 4.
*
The front and rear position pins (6) must be
visible.
9.
Secure the DF upper body (9) with the lower
frame (10) using screws (5) removed in step
3.
10.
Attach the front and rear covers (3) removed
in step 2.
Installation avec la machine couleur 25/
25 ppm
8.
Insérez complètement les broches de posi-
tionnement avant et arrière (6) retirées à
l'étape 4.
*
Les broches de positionnement avant et
arrière (6) doivent être visibles.
9.
Fixez le corps supérieur du DF (9) avec le
cadre inférieur (10) à l'aide des vis (5) reti-
rées à l'étape 3.
10.
Montez les capots avant et arrière (3) retirés
à l'étape 2.
Instalación con máquina a todo color de 25/
25 ppm
8.
Inserte totalmente las clavijas de posiciona-
miento frontal y posterior (6) que quitó en el
paso 4.
*
Las clavijas de posicionamiento frontal y
posterior (6) deben estar visibles.
9.
Fije el cuerpo superior del DF (9) a la estruc-
tura inferior (10) con los tornillos (5) que
quitó en el paso 3.
10.
Instale las cubiertas frontal y posterior (3)
que quitó en el paso 2.
Installation mit Farb-Geräten mit Druckge-
schwindigkeit von 25/25 Seiten/Minute
8.
Schieben Sie die vorderen und hinteren
Positionierungsstifte (6) ganz ein, die Sie in
Schritt 4 entfernt haben.
*
Die vorderen und hinteren Positionier-
ungsstifte (6) müssen sichtbar sein.
9.
Bringen Sie den oberen Teil (9) des Finish-
ers am unteren Rahmen (10) an. Benutzen
Sie die Schrauben (5) aus Schritt 3.
10.
Bringen Sie die vorderen und hinteren
Abdeckungen (3) aus Schritt 2 wieder an.
Installazione con macchine a colori (Full
Color) da 25/25 ppm
8.
Inserire i perni di posizionamento anteriore e
posteriore (6), rimossi al punto 4.
*
I perni di posizionamento anteriore e poste-
riore (6) devono essere visibili.
9.
Fissare il corpo superiore del DF (9) sul
telaio inferiore (10) utilizzando le viti (5),
rimosse al punto 3.
10.
Rimontare i coperchi anteriore e posteriore
(3) rimossi al punto 2.
カラー機の 25/25ppm に設置の場合
8.
手順 4 で抜いた前後の位置決めピン (6) を
奥まで挿入する。
*
前後の位置決めピン (6) が見えていること。
9.
手順 3 で外した前後のビス (5) で DF 上部
(9) を下部フレーム (10) に固定する。
10.
手順 2 で外した前後のフットカバー(3) を
取り付ける。
安装到 25/25 张彩色机时
8.
把步骤 4 中拔下的固定前后位置的销子(6)
插到底。
※ 能够看到固定前后位置的销子(6)。
9.
使用步骤 3 中取下的前后螺丝(5),把 DF 上
部(9)固定在下部框架(10)上。
10.
重新安装步骤 2 中取下的前后侧下部盖板
(3)。
25/25ppm 컬러기 설치의 경우
8.
단계 4 에서 제거한 전면 및 후면 위치 핀 (6)
을 완전히 삽입합니다 .
※ 전면 및 후면 위치 핀 (6) 이 보여야 합니
다 .
9.
단계 3 에서 분리한 나사 (5) 를 사용하여 하
단 프레임 (10) 에 DF 상단부 (9) 를 고정합
니다 .
10.
단계 2 에서 제거한 전면 및 후면 커버 (3) 를
부착합니다 .
6
6
6
Содержание TASKalfa 3010i
Страница 1: ...SERVICE MANUAL Published in September 2016 842NL11B 2NLSM06B Rev B TASKalfa 3010i TASKalfa 3510i ...
Страница 10: ...This page is intentionally left blank ...
Страница 100: ...2NL 2P8 1 2 76 This page is intentionally left blank ...
Страница 286: ...2NL 2P8 1 3 186 This page is intentionally left blank ...
Страница 443: ...2NL 2P8 1 5 59 This page is intentionally left blank ...
Страница 463: ...2NL 2P8 2 1 18 Figure 2 1 23 Duplex conveying section block diagram EPWB DU_SENS DU_CL_REM YC14 5 YC8 1 DUCL DUS ...
Страница 471: ...2NL 2P8 2 2 8 This page is intentionally left blank ...
Страница 532: ...Installation Guide DP 770 B Document processor DP 772 Document processor Installation Guide ...
Страница 568: ...DP 773 Document processor Installation Guide ...
Страница 594: ...PF 791 500 x 2 Paper feeder Installation Guide ...
Страница 602: ...PF 810 3000 sheet deck Installation Guide ...
Страница 615: ...DF 791 3000 sheet finisher Installation Guide ...
Страница 630: ...DF 770 D 1000 sheet finisher Installation Guide ...
Страница 648: ...AK 740 Bridge unit Installation Guide ...
Страница 650: ...MT 730 B Mailbox Installation Guide ...
Страница 665: ...PH 7A C D Punch unit Installation Guide ...
Страница 686: ...DT 730 B Document tray Installation Guide ...
Страница 731: ...5 2013 5 302LC56750 01 H F G D D 6 4 3 7 E C D D M4 8 M4 8 M4 8 M4 8 ...
Страница 732: ...FAX System W B Installation Guide ...

