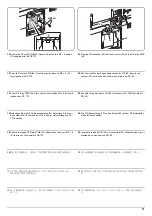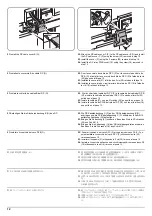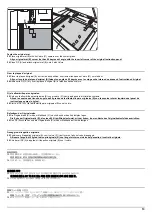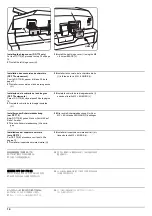
16
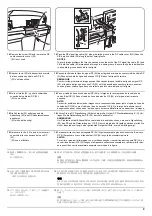
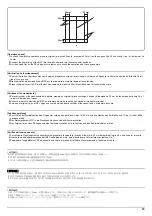
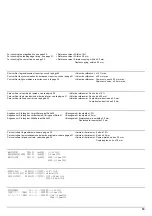
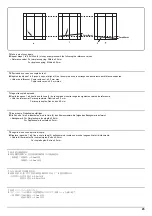
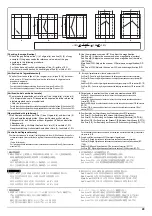
20mm
20mm
20mm
20mm
c
b
b
a
[Operation check]
1.
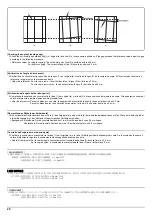
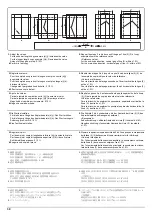
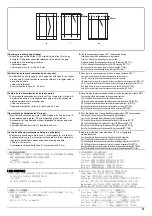
To check the machine operation, prepare original (a) where 4 lines (b) are drawn 20 mm from the edges of the A3 sheet and 1 line (c) is drawn at its
center.
2.
Connect the power plug of the MFP into the wall outlet and turn the main power switch on.
3.
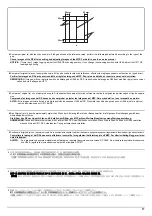
Set the original (a) on the DP and perform a test copy to check the operation and the copy example.
[Vérification du fonctionnement]
1.
Pour vérifier le bon fonctionnement de l’appareil, préparer un original (a) sur lequel sont tracées 4 lignes (b) à 20 mm des bords de la feuille A3 et 1
ligne (c) en son axe.
2.
Brancher la fiche d’alimentation du MFP sur la prise murale et mettre l’appareil sous tension.
3.
Placer l’original (a) sur le DP et effectuer une copie de test pour vérifier le fonctionnement et l’exemple de copie.
[Verifique el funcionamiento]
1.
Para comprobar el funcionamiento del aparato, prepare un original (a) que contenga 4 líneas (b) dibujadas a 20 mm de los bordes de la hoja A3 y 1
línea (c) dibujada en el centro.
2.
Conecte el enchufe eléctrico del MFP en el tomacorriente de la pared y encienda el interruptor principal.
3.
Coloque el original (a) en el DP y haga una copia de prueba para verificar el funcionamiento y el ejemplo de copia.
[Funktionsprüfung]
1.
Zum Prüfen der Gerätefunktion das Original (a) vorbereiten, auf das 4 Linien (b) 20 mm von den Kanten des A3-Blattes und 1 Linie (c) in der Mitte
gezeichnet sind.
2.
Den Netzstecker am MFP in die Steckdose stecken und den Strom einschalten.
3.
Das Original (a) auf den DP legen und eine Testkopie erstellen, um die Funktion und das Kopierbeispiel zu prüfen.
[Verifica del funzionamento]
1.
Per verificare il funzionamento della macchina, preparare l’originale (a) tirando 4 linee (b) a 20 mm dai bordi del foglio A3 e una linea (c) al centro.
2.
Inserire la spina dell’alimentazione dell’MFP nella presa a muro, quindi posizionare l’interruttore principale su On.
3.
Posizionare l’originale(a) sul DP ed eseguire una copia di prova per verificare il funzionamento e l’esempio di copia.
[ 動作確認 ]
1.
A3 サイズ用紙の端から 20mm の位置に線 (b)4 本と、
用紙の中心に線 (c)1 本を引いた、動作確認用の原稿 (a) を用意する。
2.
MFP の電源プラグをコンセントに差し込み、主電源スイッチを ON にする。
3.
原稿 (a) を DP にセットし、テストコピーを行い、動作およびコピーサンプルを確認する。
[ 动作确认 ]
1.
若要检查机器动作,准备一张 A3 原稿(a),距纸张边缘 20mm 画出 4 条线(b)并且在原稿中心画出 1 条线(c)。
2.
将 MFP 的电源插头插入墙壁插座并打开主电源。
3.
在 DP 上设定原稿(a)并进行测试复印,确认机器动作和复印样本。
[ 동작확인 ]
1.
기계 작동 확인을 위해서 , A3 용지 선단에서 20mm 떨어진 곳에 4 개의 선 (b) 과 센터에 1 개의 선 (c) 이 그려진 원고 (a) 를 준비 .
2.
콘센트에 MFP 전원플러그를 꽂고 메인 전원 스위치를 ON 으로 합니다 .
3.
DP 상에 원고 (a) 를 준비하고 테스트 카피를 확인하여 작동 상태와 카피 샘플를 확인합니다 .
Содержание TASKalfa 3010i
Страница 1: ...SERVICE MANUAL Published in September 2016 842NL11B 2NLSM06B Rev B TASKalfa 3010i TASKalfa 3510i ...
Страница 10: ...This page is intentionally left blank ...
Страница 100: ...2NL 2P8 1 2 76 This page is intentionally left blank ...
Страница 286: ...2NL 2P8 1 3 186 This page is intentionally left blank ...
Страница 443: ...2NL 2P8 1 5 59 This page is intentionally left blank ...
Страница 463: ...2NL 2P8 2 1 18 Figure 2 1 23 Duplex conveying section block diagram EPWB DU_SENS DU_CL_REM YC14 5 YC8 1 DUCL DUS ...
Страница 471: ...2NL 2P8 2 2 8 This page is intentionally left blank ...
Страница 532: ...Installation Guide DP 770 B Document processor DP 772 Document processor Installation Guide ...
Страница 568: ...DP 773 Document processor Installation Guide ...
Страница 594: ...PF 791 500 x 2 Paper feeder Installation Guide ...
Страница 602: ...PF 810 3000 sheet deck Installation Guide ...
Страница 615: ...DF 791 3000 sheet finisher Installation Guide ...
Страница 630: ...DF 770 D 1000 sheet finisher Installation Guide ...
Страница 648: ...AK 740 Bridge unit Installation Guide ...
Страница 650: ...MT 730 B Mailbox Installation Guide ...
Страница 665: ...PH 7A C D Punch unit Installation Guide ...
Страница 686: ...DT 730 B Document tray Installation Guide ...
Страница 731: ...5 2013 5 302LC56750 01 H F G D D 6 4 3 7 E C D D M4 8 M4 8 M4 8 M4 8 ...
Страница 732: ...FAX System W B Installation Guide ...


