2NL/2P8
1-2-74
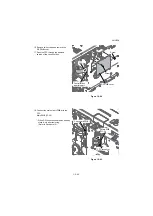
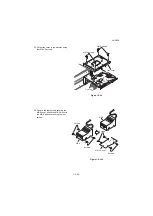
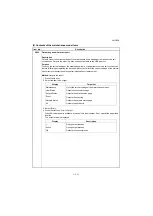
5. Remove two screws and then remove
the lid.
? 1?2?105
6. Pass the vender wire through the aper-
ture in the IF mount.
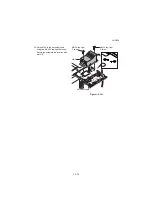
7. Secure the vender wire with two screws
removed in step 5.
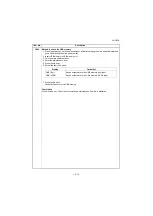
Figure 1-2-106
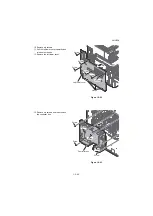
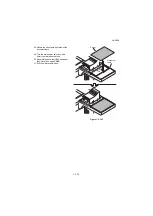
8. Secure the ground terminal of the
vender wire to IF mount with the screw.
9. Connect the connector of the vender
wire to connector of the vender signal
cable.
Figure 1-2-107
Screw
Lid
Screw
Screw
Screw
Vender wires
IF mount aperture
Vender wire connector
Screw
Grounding
terminal
Vender wire
connector
Connector of
vendr signal cable
IF mount
Содержание TASKalfa 3010i
Страница 1: ...SERVICE MANUAL Published in September 2016 842NL11B 2NLSM06B Rev B TASKalfa 3010i TASKalfa 3510i ...
Страница 10: ...This page is intentionally left blank ...
Страница 100: ...2NL 2P8 1 2 76 This page is intentionally left blank ...
Страница 286: ...2NL 2P8 1 3 186 This page is intentionally left blank ...
Страница 443: ...2NL 2P8 1 5 59 This page is intentionally left blank ...
Страница 463: ...2NL 2P8 2 1 18 Figure 2 1 23 Duplex conveying section block diagram EPWB DU_SENS DU_CL_REM YC14 5 YC8 1 DUCL DUS ...
Страница 471: ...2NL 2P8 2 2 8 This page is intentionally left blank ...
Страница 532: ...Installation Guide DP 770 B Document processor DP 772 Document processor Installation Guide ...
Страница 568: ...DP 773 Document processor Installation Guide ...
Страница 594: ...PF 791 500 x 2 Paper feeder Installation Guide ...
Страница 602: ...PF 810 3000 sheet deck Installation Guide ...
Страница 615: ...DF 791 3000 sheet finisher Installation Guide ...
Страница 630: ...DF 770 D 1000 sheet finisher Installation Guide ...
Страница 648: ...AK 740 Bridge unit Installation Guide ...
Страница 650: ...MT 730 B Mailbox Installation Guide ...
Страница 665: ...PH 7A C D Punch unit Installation Guide ...
Страница 686: ...DT 730 B Document tray Installation Guide ...
Страница 731: ...5 2013 5 302LC56750 01 H F G D D 6 4 3 7 E C D D M4 8 M4 8 M4 8 M4 8 ...
Страница 732: ...FAX System W B Installation Guide ...

