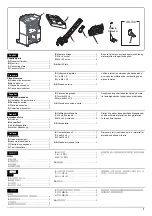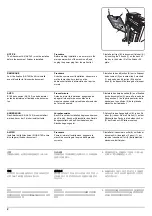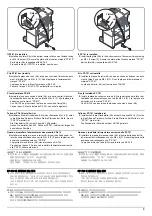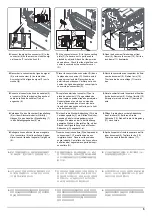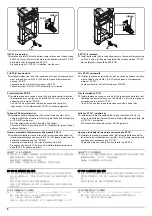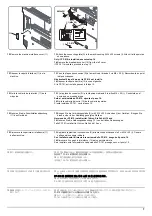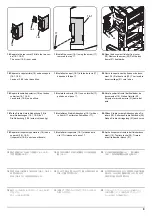
10
32
33
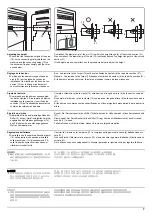
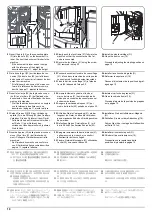
9.
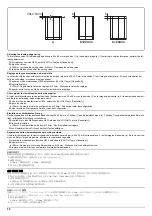
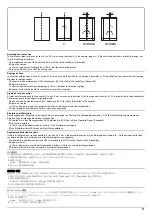
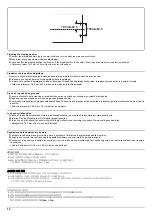
If the distances between the document fin-
isher and the machine (30, 31) are unequal,
use the procedure below to adjust the spac-
ing.
10.
Loosen the 2 screws (32) on the front left
and on the rear left of the document finisher.
11.
Turn the adjustment bolts (33) with a Philips-
head screwdriver to adjust the height of the
document finisher.
Turning the adjustment bolt clockwise lifts
the document finisher, and turning it counter-
clockwise lowers the document finisher.
9.
Si les distances entre le finisseur de docu-
ment et la machine (30, 31) sont inégales,
régler l'espacement en procédant de la
manière suivante.
10.
Desserrer les 2 vis (32) du côté avant
gauche et arrière gauche du finisseur de
document.
11.
Faire tourner les boulons de réglage (33) à
l'aide d'un tournevis cruciforme pour ajuster
la hauteur du finisseur de document.
Tourner le boulon de réglage dans le sens
horloger pour lever le finisseur de document,
et dans le sens contraire au sens horloger
pour le descendre.
9.
Si las distancias entre el finalizador de docu-
mentos y la máquina (30, 31) no son
iguales, utilice el siguiente procedimiento
para ajustar la separación.
10.
Afloje los 2 tornillos (32) en los lados izqui-
erdo frontal e izquierdo posterior del finaliza-
dor de documentos.
11.
Gire los pernos de ajuste (33) con un destornilla-
dor de cabeza Philips para ajustar la altura del
finalizador de documentos.
Al girar el perno de ajuste en la dirección de las
manecillas del reloj se levanta el finalizador de
documentos y al girar en sentido contrario a las
manecillas del reloj baja el finalizador de docu-
mentos.
9.
Falls die Abstände zwischen dem Finisher
und dem Gerät (30, 31) ungleich sind, führen
Sie die unten angegebenen Schritte aus, um
den Abstand zu korrigieren.
10.
Lösen Sie die 2 Schrauben (32) vorne links
und hinten links am Finisher.
11.
Stellen Sie die Einstellschrauben (33) mit
einem Kreuzschlitzschraubendreher ein, um
die Höhe des Finishers zu korrigieren.
Durch Drehen der Einstellschraube im
Uhrzeigersinn wird der Finisher angehoben,
während er durch Drehen entgegen dem
Uhrzeigersinn abgesenkt wird.
9.
Se le distanze tra la finisher documenti e la
macchina (30, 31) sono diverse, attenersi
alla sottostante procedura per regolare la
spaziatura.
10.
Allentare le 2 viti (32) sulla parte anteriore
sinistra e posteriore sinistra della finisher
documenti.
11.
Ruotare i bulloni di regolazione (33) con un
cacciavite con testa a croce tipo Philips per
regolare l'altezza della finisher documenti.
Ruotando il bullone di regolazione in senso
orario si solleva la finisher documenti, men-
tre ruotandolo in senso antiorario si abbassa
la finisher documenti.
9.
ドキュメントフィニッシャーと機械本体の
間隔
(30、
31)
が等しくない場合は、
以下の手
順で調整を行う。
10.
ドキュメントフィニッシャー左前と左後の
ビス (32) 各 2 本を緩める。
11.
プラスドライバーで調整ボルト (33) を回
し、
ドキュメントフィニッシャーの高さを調
整する。
調整ボルトを時計方向に回すとドキュメン
トフィニッシャーの高さが高くなり、
反時計
方向に回すと低くなる。
9.
装订器与机器的间隙 (30、31) 不等时,按以
下步骤进行调节。
10.
拧松装订器左前侧与左后侧的各 2 颗螺丝
(32)。
11.
使用十字螺丝刀旋转调节螺栓 (33),以调节
装订器的高度。
将调节螺栓向顺时针方向旋转,装订器的高
度升高,逆时针方向旋转则装订器的高度降
低。
9.
도큐먼트 피니셔와 본체의 거리 (30, 31) 가
동일하지 않는 경우 아래의 절차에 따라 간
격을 조정합니다 .
10.
도큐먼트 피니셔 좌측 프론트와 리어의 나사
(32) 각 2 개를 느슨하게 합니다 .
11.
플러스 드라이버로 조정 볼트 (33) 를 돌려
도큐먼트 피니셔 높이를 조정합니다 .
조정 볼트를 시계방향으로 돌리면 도큐먼트
피니셔의 높이가 높아지고 , 반 시계방향으
로 돌리면 낮아 집니다 .
30
31
Содержание TASKalfa 3010i
Страница 1: ...SERVICE MANUAL Published in September 2016 842NL11B 2NLSM06B Rev B TASKalfa 3010i TASKalfa 3510i ...
Страница 10: ...This page is intentionally left blank ...
Страница 100: ...2NL 2P8 1 2 76 This page is intentionally left blank ...
Страница 286: ...2NL 2P8 1 3 186 This page is intentionally left blank ...
Страница 443: ...2NL 2P8 1 5 59 This page is intentionally left blank ...
Страница 463: ...2NL 2P8 2 1 18 Figure 2 1 23 Duplex conveying section block diagram EPWB DU_SENS DU_CL_REM YC14 5 YC8 1 DUCL DUS ...
Страница 471: ...2NL 2P8 2 2 8 This page is intentionally left blank ...
Страница 532: ...Installation Guide DP 770 B Document processor DP 772 Document processor Installation Guide ...
Страница 568: ...DP 773 Document processor Installation Guide ...
Страница 594: ...PF 791 500 x 2 Paper feeder Installation Guide ...
Страница 602: ...PF 810 3000 sheet deck Installation Guide ...
Страница 615: ...DF 791 3000 sheet finisher Installation Guide ...
Страница 630: ...DF 770 D 1000 sheet finisher Installation Guide ...
Страница 648: ...AK 740 Bridge unit Installation Guide ...
Страница 650: ...MT 730 B Mailbox Installation Guide ...
Страница 665: ...PH 7A C D Punch unit Installation Guide ...
Страница 686: ...DT 730 B Document tray Installation Guide ...
Страница 731: ...5 2013 5 302LC56750 01 H F G D D 6 4 3 7 E C D D M4 8 M4 8 M4 8 M4 8 ...
Страница 732: ...FAX System W B Installation Guide ...


