Startup
Setups
2-9
Setups
Setups
are
preset
combinations
of
programs.
Setups
can
have
up
to
16
zones,
each
of
which
can
be
assigned
to
any
range
of
the
keyboard
(overlapping
or
split).
Each
zone
can
have
its
own
program,
MIDI
channel,
and
MIDI
control
assignments,
as
well
as
riff
and
arpeggiator
settings.
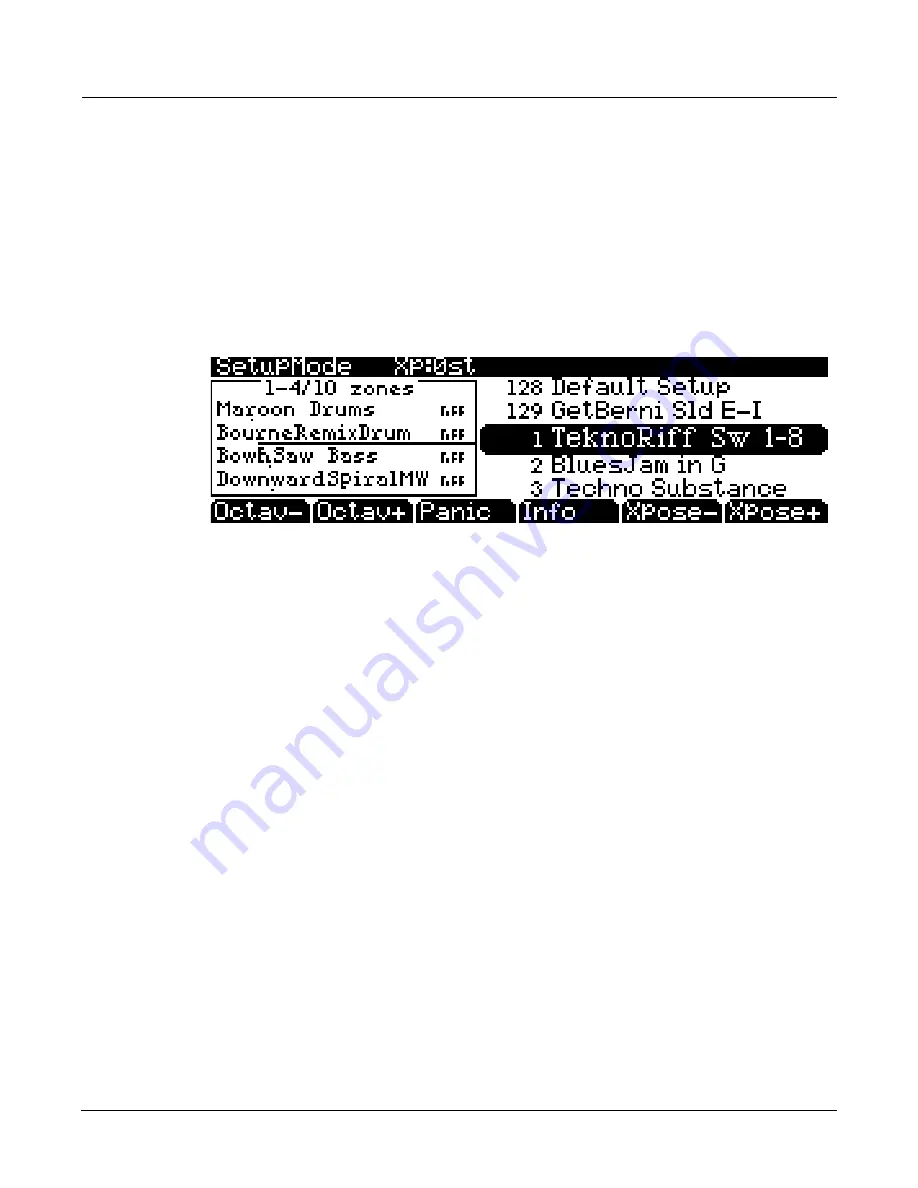
Press
the
Setup
mode
button
to
the
left
of
the
display.
Its
LED
will
light,
telling
you
that
you’re
in
Setup
mode.
Notice
that
the
Setup
mode
display
is
similar
to
the
Program
mode
display.
If
the
setup
has
four
or
fewer
zones,
the
box
at
the
left
shows
you
the
programs
assigned
to
each
of
the
setup’s
zones.
If
the
setup
is
composed
of
more
than
four
zones,
then
the
box
displays
the
first
four
zones;
at
the
top
of
the
box
will
be
text
showing
the
total
number
of
zones.
See
page 7
‐
1
for
a
more
detailed
description.
Many
setups
include
arpeggiation
and
note
‐
triggered
songs
to
create
some
pretty
amazing
grooves
that
you
can
use
as
is,
or
as
templates
for
your
own
material.
As
you
play
with
these
setups,
experiment
with
the
sliders
and
other
controllers
for
a
wide
range
of
effects.
Some
of
these
grooves
keep
playing
after
you’ve
released
the
keys
that
got
them
going.
When
you
want
to
stop
them,
select
another
setup,
or
press
the
Setup
mode
button
(or
Stop
for
riffs).
Quick Access
A
really
convenient
way
to
select
programs
and
setups
is
to
use
Quick
Access
mode,
where
you
select
a
Quick
Access
bank
from
a
list
of
factory
preset
or
user
‐
programmed
banks.
Each
bank
contains
ten
memory
slots,
or
entries,
where
you
can
store
any
combination
of
programs
or
setups.
While
you’re
in
Quick
Access
mode,
you
can
select
any
program
or
setup
in
the
bank
with
buttons
0
through
9
or
the
cursor
keys.
The
PC3K
comes
with
a
few
Quick
Access
banks
already
programmed
so
you
can
get
an
idea
of
how
they
work.
You’ll
probably
create
your
own
Quick
Access
banks
to
help
you
select
programs
and
setups
with
a
minimum
of
searching.
Press
the
Quick
Access
mode
button
to
the
left
of
the
display.
Its
LED
lights,
to
tell
you
you’re
in
Quick
Access
mode.
The
top
line
of
the
display
tells
you
which
Quick
Access
bank
is
selected.
Use
the
Chan/Layer
buttons
(to
the
left
of
the
display)
to
scroll
through
the
banks.
The
names
of
each
of
the
ten
entries
in
the
bank
are
listed
in
the
center
of
the
display.
Many
of
their
names
will
be
abbreviated.
The
currently
selected
entry’s
full
name
is
shown
near
the
bottom
of
the
display.
The
amount
of
transposition
is
displayed
to
the
left
of
the
entry
name.
If
the
current
entry
is
a
program,
you’ll
see
the
current
keyboard
(MIDI)
channel
displayed
to
the
right
of
the
entry’s
name.
If
it’s
a
setup,
you’ll
see
the
word
Setup.
The
entries
on
the
Quick
Access
page
are
arranged
to
correspond
to
the
layout
of
the
numeric
buttons
on
the
alphanumeric
pad.
When
you’re
ready
to
create
your
own
Quick
Access
banks,
turn
to
Chapter 8
to
learn
about
the
Quick
Access
Editor.
Содержание PC3K6
Страница 24: ...1 6 Introduction Options...
Страница 50: ...4 4 The Operating Modes Using the Modes...
Страница 58: ...5 8 Editing Conventions Special Button Functions...
Страница 130: ...6 72 Program Mode Programming Tips...
Страница 202: ...7 72 Setup Mode Recording A Setup To Song Mode...
Страница 206: ...8 4 Quick Access Mode The QA Editor...
Страница 232: ...9 26 Effects Mono Algorithms...
Страница 268: ...11 18 Master Mode Preview Sample PRVIEW...
Страница 302: ...12 34 Song Mode and the Song Editor Song Editor The EVENT Page...
Страница 328: ...14 14 Keymap and Sample Editing Editing Samples...
Страница 334: ...B 4...
Страница 370: ...D 32 PC3K Objects V 1 31 Effect Chains...
Страница 372: ...E 2 PC3K Legacy File Conversion Object Types and Conversion Details...


