307
10. SCAL: Output
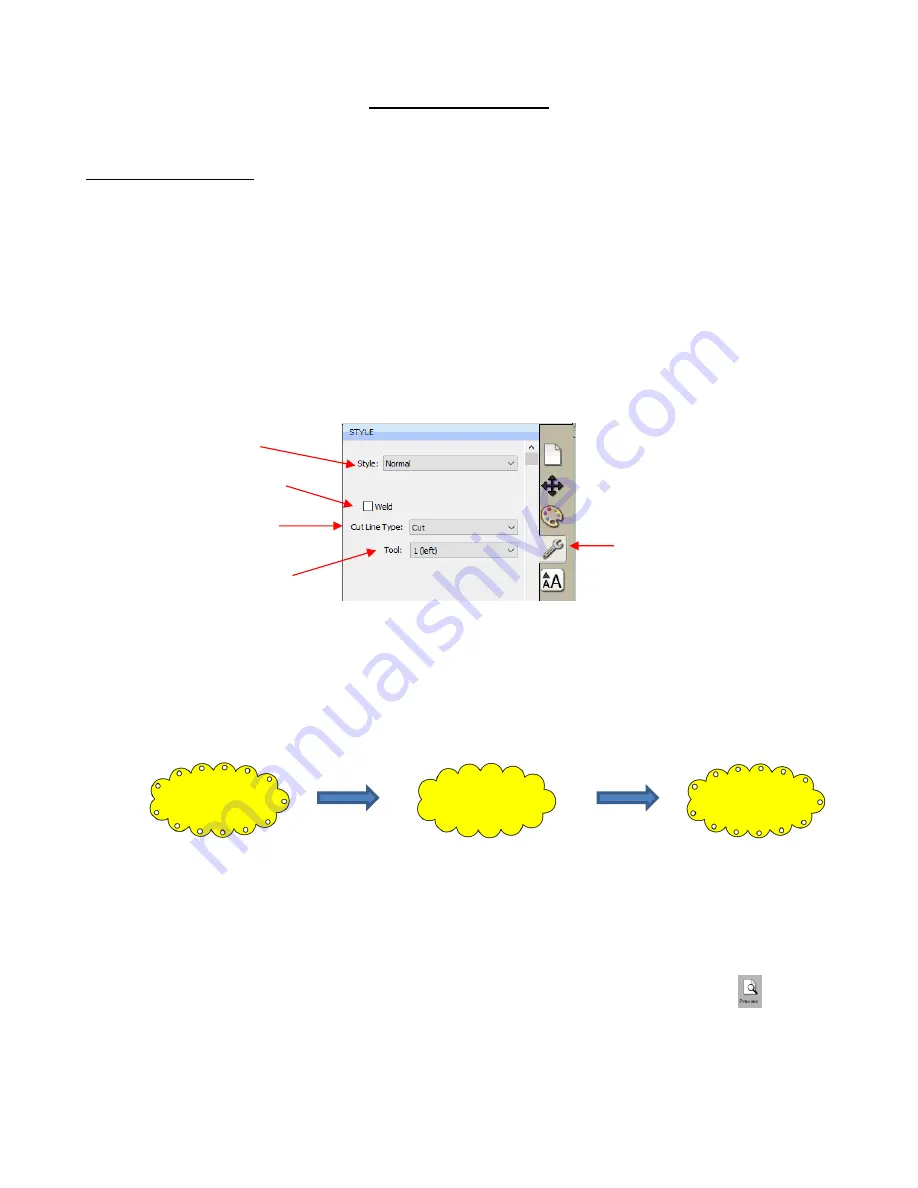
10.01 The Style Panel
•
The
Style Panel
has various settings that are typically, but not necessarily, applied for the purpose of
cutting and printing:
Set a contour cut
(Shadow)
Remove any interior shapes (
Blackout
)
Apply a weld (
Union
) on any overlapping shapes (only applied during printing and/or cutting)
Assign an intended use for the layer (called
Cut Line Type
)
Assign a layer to a particular tool (for cutters with more than one head)
•
To open this panel, click on the
Style
icon on the
Properties Panel
:
•
Style
: In this menu are various combinations of
Shadow
and
Blackout
applications. Refer to
Section 9.04
for instructions and examples
.
Note, however, that if you later change your mind and you haven’t applied
any subsequent changes (such as those in the
Path
menu), then re-selecting
Normal
from the
Style
drop-
down menu will restore the original style.
For example, let’s say you’ve applied
Blackout
to a shape and then cut it out. You can now select that
same shape and return the style to
Normal
:
•
Weld:
This option applies the
Union
function (refer to
Section 9.05.1
) to any overlapping shapes.
Note that if the shapes are on different layers, the
Weld
option needs to be marked on each layer.
As mentioned before, settings in the
Style
window do no become permanent changes to the shapes on
the
Cutting Mat
. However, you can verify the
Weld
effect by clicking on the
Preview
icon
on
the
Toolbar
(for more details on
Preview
, refer to
Section 10.02
):
Open
Style Panel
Shadow/Blackout
options
Choose
Right
or
Left
side
(on dual head cutters)
Option to remove overlap
on intersecting shapes
Options for intended
application for the layer
Change
Style
back to
Normal
Apply
Blackout
.
Cut out the design.
Original design
Содержание KNK Force
Страница 306: ...306...


