95
•
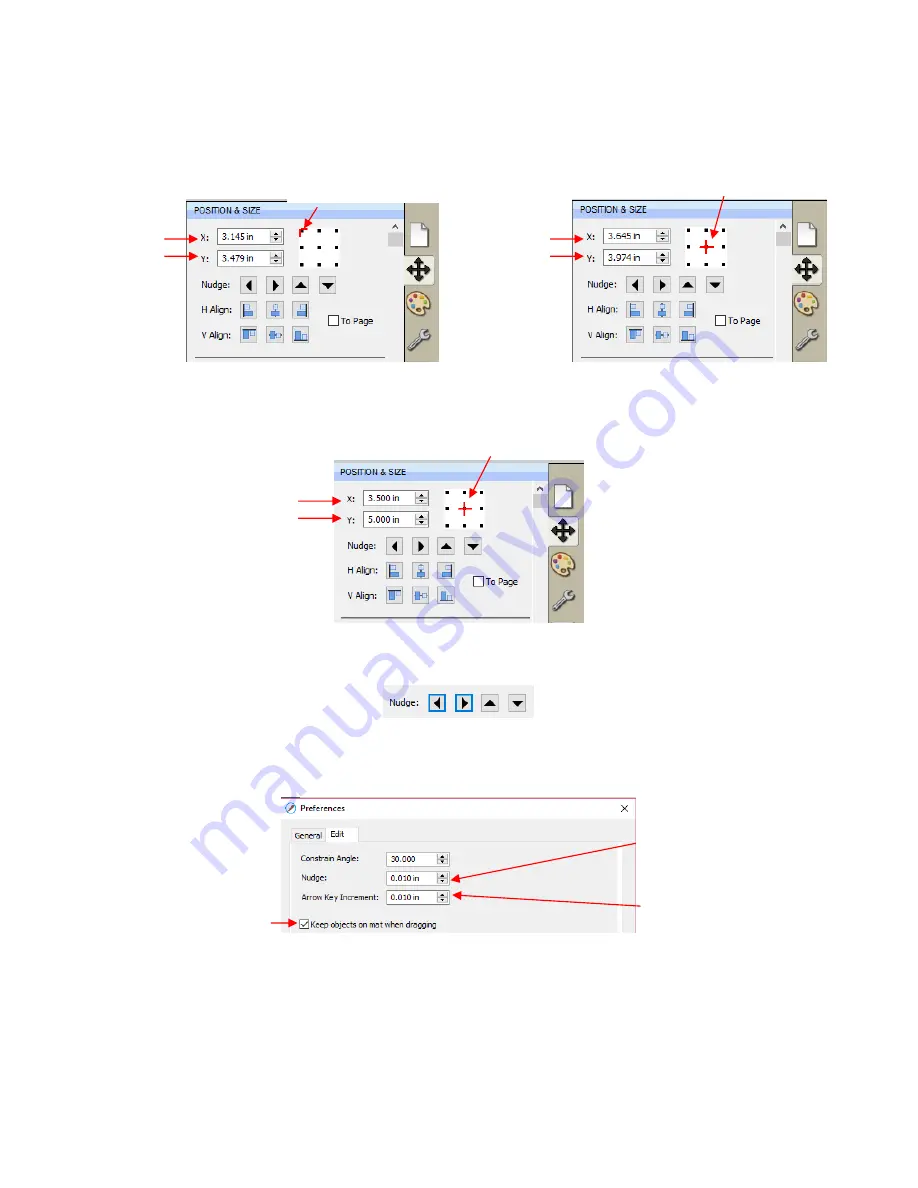
With a shape selected, the
Position & Size Settings on the Properties Panel
indicate the exact location of
the bounding box around a selected shape. Note that this location is how far the shape is from the top left
corner of the grid on the mat and the red mark indicates which part of the bounding box is being referenced.
For example:
•
You can enter new values into either or both of the
X:
and
Y:
windows to move the shape to a new location:
•
The
Nudge
icons, which are just below the
X
and
Y
entries, can also be used to move a selected shape.
These move in the same increments as the keyboard arrows:
•
The increment size for both the keyboard moves and the
Nudge
moves can be changed by going to
Edit>Preferences
and then selecting the
Edit
tab. This window also offers the option to force shapes to
remain within the boundaries of the
Cutting Mat
while being moved with the mouse:
•
There is also a
Move
function available which can be accessed these two ways:
Right-click on a selected shape and go to
Transform>Move
Go to
Object>Transform>Move
•
This
Move
windows provides two moving options:
Move the shape to a specific position on the
Cutting Mat
(called
Absolute Position
)
Move the shape a certain distance from its current location (called
Relative Position
)
X
and
Y
locations
Based on top left corner
of bounding box
X
and
Y
locations
Based on center of
bounding box
New locations for
X
and
Y
are entered
Based on center of
bounding box
Keep shapes on mat
Enter desired increment
for arrow key movement
Enter desired increment for
Nudge
movement
Содержание KNK Force
Страница 306: ...306...


