319
o
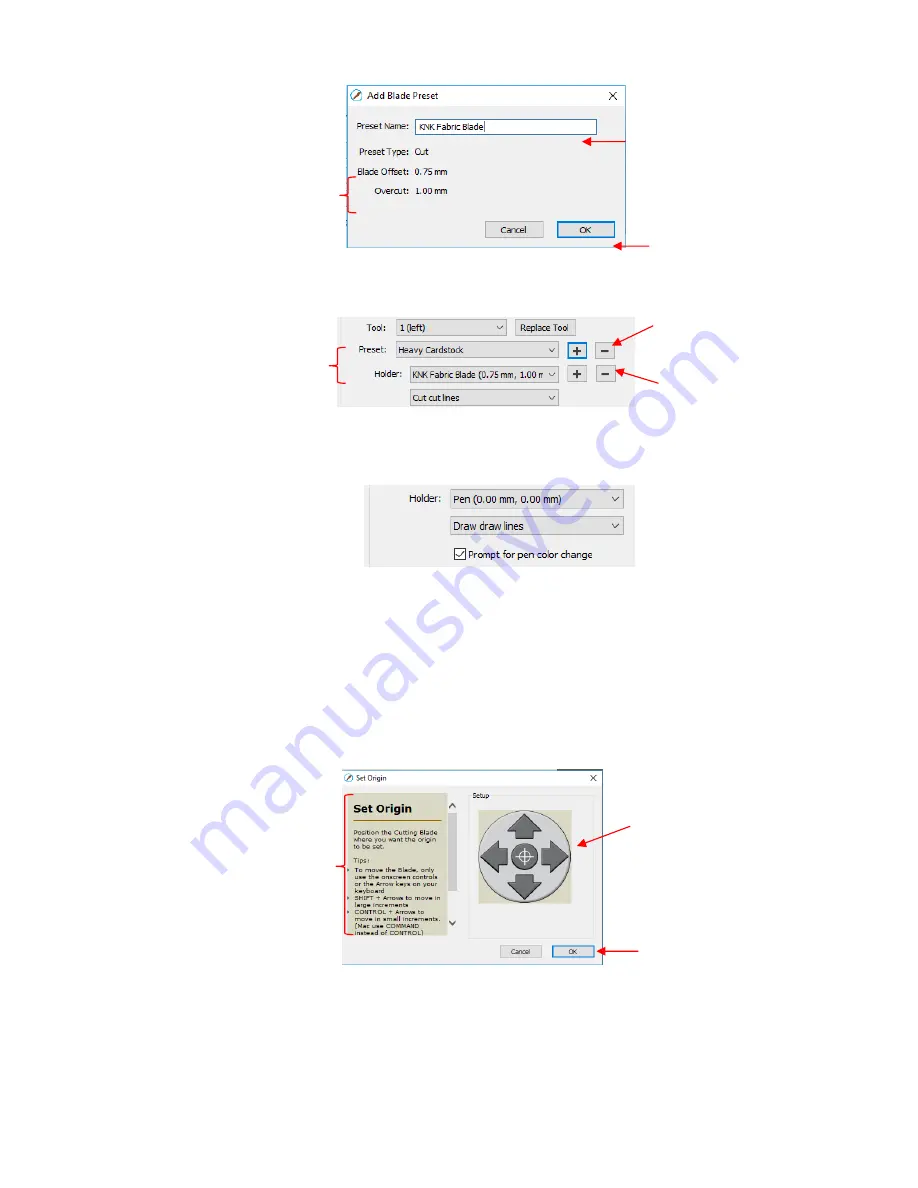
If you need to delete any of the
Presets
you added yourself, select the
Preset
from the menu and
then a delete option will be available for removing that
Preset
:
o
If you select
Pen
under
Holder
, then an additional option called
Prompt for pen color change
will
appear. Marking this setting will cause the cutter to pause between colors so that the tool can be
changed out, if desired.
o
Detailed instructions on utilizing both heads on the KNK Force are presented in
Chapter 12
.
Print+Cut:
Clicking on this button opens the
Print and Cut
window. Refer to
Chapter 11
for detailed
instructions on calibrating the camera and performing print and cut applications
.
Set Origin:
Click on this button to set the origin for cutting. The following window will open:
o
In general, you always set the origin in the lower right corner of the material as was presented in
Section 1.06
. (Note: This may not be true with other brands of cutters.)
Preview:
The preview displays the shapes that will cut and their orientation plus location based on other
settings.
o
For example, with a
Portrait
orientation and
WYSIWYG
cut mode, the
Preview
indicates the
shapes will cut exactly in the same location and orientation as you see on the
Cutting Mat:
Name the new
Preset
These are the settings
that will be saved with
this new
Preset
Click
OK
when done
Click here to delete the
Heavy Cardstock
preset
Select a
Preset
you want
to remove from the menu
Click here to delete the
KNK Fabric Blade
preset
Click these buttons or use
the arrow keys on your
keyboard to move the head
left/right and the mat in/out
Instructions
Click
OK
once the tool tip is
in the desired location for
the origin
Содержание KNK Force
Страница 306: ...306...


