3-12
Chapter 3
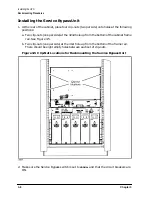
Installing the UPS
Rackmounting Procedures
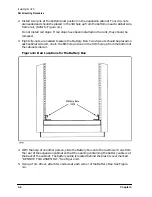
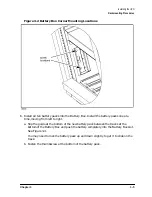
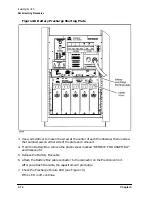
Figure 3-8 Battery Precharge Shorting Plate
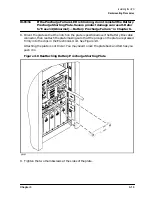
3. Use a screwdriver to loosen the screw at the center of each thumbscrew, then unscrew
the thumbscrews on either side of the plate and remove it.
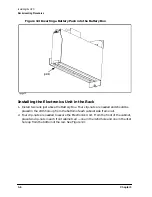
4. From the Battery Box, remove the plastic cover marked "REMOVE FOR ASSEMBLY"
and dispose of it.
5. Remove the Battery Box cable.
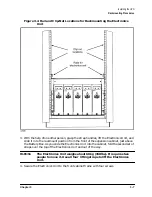
6. Attach the Battery Box cable connector to the connector on the Electronics Unit.
After you attach the cable, the capacitors will precharge.
7. Check the Precharge Failure LED (see Figure 1-3).
If the LED is off, continue.
Содержание PowerTrust A3589A
Страница 7: ...Contents Contents 5 ...
Страница 8: ...Contents 6 Contents ...
Страница 10: ...Contents 8 Figures ...
Страница 12: ...Contents 10 Tables ...
Страница 14: ...2 ...
Страница 20: ...Preface 8 ...
Страница 22: ...Preface 10 ...
Страница 52: ...1 30 Chapter1 Overview Specifications Figure 1 8 UPS Input Voltage Transfer Points ...
Страница 56: ...1 34 Chapter1 Overview UPS Modes Figure 1 10 Simplified UPS 5 5 kVA UPS Block Diagram ...
Страница 62: ...1 40 Chapter1 Overview Support Information ...
Страница 76: ...2 14 Chapter2 Unpacking and Inspecting Shipping and Storage Requirements ...
Страница 104: ...3 28 Chapter3 Installing the UPS Examples of PowerTrust Connections in a System ...
Страница 116: ...5 4 Chapter5 Verification Procedures Load Testing ...
Страница 148: ...7 6 Chapter7 Cleaning and Maintenance Exchanging Batteries Fan ...
Страница 190: ...A 42 AppendixA HP UX UPS Monitor Error Messages Log Only Messages ...
Страница 218: ...C 8 AppendixC Configuring the OS for the PowerTrust UPS Power Failing the UPS ...


