Chapter 3
3-3
Installing the UPS
Rackmounting Procedures
Rackmounting Procedures
The PowerTrust UPS is designed to be installed at the bottom of the Hewlett-Packard
A1883A, A1884A, A1896A, or A1897A expansion cabinet (19-inch rack).
Before you begin, check that the following switch settings have been made:
1. The Output On/Output Off switch on the front panel of the Electronics Unit is set to
Output Off
.
2. The UPS/BATTERY switch on the Service Bypass Unit is set to the
DISABLE
position.
3. All circuit breakers located on the Service Bypass Unit are set to OFF.
4. The Service Bypass switch on the Service Bypass Unit is set to
NORMAL
.
When installing the PowerTrust, work from the bottom up:
1. Install the Battery Box.
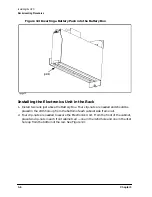
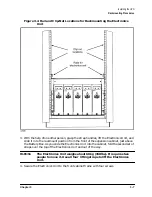
2. Install the Electronics Unit.
3. Install the Service Bypass Unit.
4. Connect the Battery Box to the Electronics Unit.
5. Install the switchless Power Distribution Unit (PDU), if it has not already been
installed by the factory. (Factory installation is optional.)
6. Connect the UPS to AC input power.
The details of these installation procedures are described in the sections that follow.
Installing the Battery Box
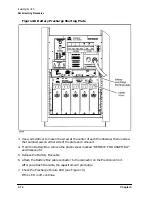
The Battery Box contains ten battery packs. For purposes of shipping, the battery packs
are included in the Battery Box. When fully loaded, a Battery Box weighs about 180 kg
(396 lb) and each battery pack weighs about 15 kg (33 lbs).
WARNING
To prevent personal injury, remove the battery packs before
installing the Battery Box into the expansion cabinet.
The battery packs should have been removed when the Battery Box was unpacked. Refer
to “Removing Battery Packs from Battery Box” in Chapter 2 for step-by-step instructions if
the battery packs are still in the Battery Box.
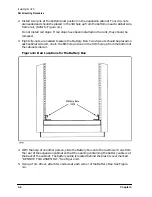
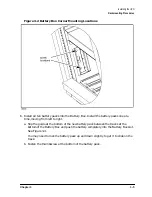
Installing the Battery Box in the Rack
NOTE
The Battery Box is installed from the rear of the expansion cabinet. In the
following procedures, the end of the Battery Box containing the access plate
should be positioned so that it will be at the rear of the expansion cabinet
(next to the access door).
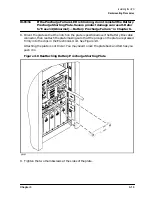
1. Open the rear door of the expansion cabinet.
Содержание PowerTrust A3589A
Страница 7: ...Contents Contents 5 ...
Страница 8: ...Contents 6 Contents ...
Страница 10: ...Contents 8 Figures ...
Страница 12: ...Contents 10 Tables ...
Страница 14: ...2 ...
Страница 20: ...Preface 8 ...
Страница 22: ...Preface 10 ...
Страница 52: ...1 30 Chapter1 Overview Specifications Figure 1 8 UPS Input Voltage Transfer Points ...
Страница 56: ...1 34 Chapter1 Overview UPS Modes Figure 1 10 Simplified UPS 5 5 kVA UPS Block Diagram ...
Страница 62: ...1 40 Chapter1 Overview Support Information ...
Страница 76: ...2 14 Chapter2 Unpacking and Inspecting Shipping and Storage Requirements ...
Страница 104: ...3 28 Chapter3 Installing the UPS Examples of PowerTrust Connections in a System ...
Страница 116: ...5 4 Chapter5 Verification Procedures Load Testing ...
Страница 148: ...7 6 Chapter7 Cleaning and Maintenance Exchanging Batteries Fan ...
Страница 190: ...A 42 AppendixA HP UX UPS Monitor Error Messages Log Only Messages ...
Страница 218: ...C 8 AppendixC Configuring the OS for the PowerTrust UPS Power Failing the UPS ...


