817
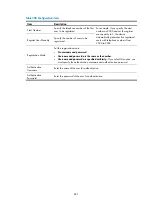
Table 304
Configuration items
Item Description
Max Interval for
Dialing the Next
Digit
Specify the maximum interval for the user to dial the next digit.
This timer will restart each time the user dials a digit and will work in this way until all
the digits of the number are dialed. If the timer expires before the dialing is completed,
the user will be prompted to hang up and the call is terminated.
Max Interval
between Off-hook
and Dialing the First
Digit
Specify the maximum interval in seconds between off-hook and dialing the first digit.
Upon the expiration of the timer, the user will be prompted to hang up and the call is
terminated.
Dial Delay Time
Configure dial delay time.
By default, the dial delay time is 1 second.
Input Gain on the
Voice Interface
When the voice signals on the line
attenuate to a relatively great extent,
increases the voice input gain value.
IMPORTANT:
Gain adjustment might lead to call failures.
You are not recommended to adjust the
gain. If necessary, do it with the guidance
of technical personnel.
Output Gain on the
Voice Interface
When a relatively small voice signal
power is needed on the output line,
increases the voice output gain value.
DTMF Detection
Sensitivity Level
Set the DTMF detection sensitivity level.
•
Low
—In this mode, the reliability is high, but DTMF tones might fail to be detected.
•
Medium
—In this mode, the reliability is medium. If you select this option, you can
specify the
Frequency Tolerance of Medium DTMF Detection Sensitivity Level
. The
greater the value, the higher the probability of false detection. Support for this
option varies with installed cards.
•
High
—In this mode, the reliability is low and detection errors might occur.
Select the Line(s)
Select the boxes of desire lines, and then click the
Apply to Selected Line(s)
button to
apply the above settings to the selected FXS lines.
FXO line configuration
Select
Voice Management
>
Advanced Configuration
>
Batch Configuration
from the navigation tree,
and then click the
FXO Line Configuration
link in the
Line Management
area to access the FXO line
configuration page, as shown in
Содержание MSR SERIES
Страница 17: ...xv Documents 835 Websites 835 Conventions 836 Index 838 ...
Страница 20: ...3 Figure 3 Initial page of the Web interface ...
Страница 42: ...25 Figure 13 Firefox Web browser setting ...
Страница 59: ...42 Figure 27 Checking the basic service configuration ...
Страница 73: ...56 Figure 35 Sample interface statistics ...
Страница 156: ...139 Figure 139 Rebooting the 3G modem ...
Страница 168: ...151 Figure 152 Configuring Web server 2 ...
Страница 174: ...157 Figure 158 Configure the URL filtering function ...
Страница 187: ...170 Upon detecting the Land or Smurf attack on Ethernet 0 2 Router outputs an alarm log and drops the attack packet ...
Страница 242: ...225 Figure 233 Enabling the DHCP client on interface Ethernet 0 1 ...
Страница 247: ...230 Figure 236 The page for configuring an advanced IPv4 ACL ...
Страница 255: ...238 Figure 241 Advanced limit setting ...
Страница 298: ...281 e Click Apply 2 Configure Router B in the same way Router A is configured ...
Страница 354: ...337 Figure 339 Configuring a login control rule so Host B cannot access Router through the Web ...
Страница 400: ...383 Figure 387 Verifying the configuration ...
Страница 405: ...388 ...
Страница 523: ...506 Figure 530 Ping configuration page ...
Страница 538: ...521 a Click Device A on the topology diagram b Click Ethernet 0 2 on the panel diagram c Click Port Guard ...
Страница 744: ...727 Verifying the configuration In the case that the IP network is unavailable calls can be made over PSTN ...
Страница 775: ...758 Figure 785 Configuring a jump node ...
Страница 791: ...774 Figure 801 Configuring a jump node ...


