88
d.
Click
Apply
.
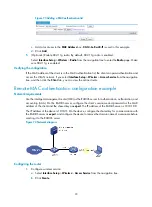
After the wireless service is created, the system is automatically navigated to the wireless
service page, where you can perform the VLAN settings (before this operation, select
Network
>
VLAN
and create VLAN 2 first).
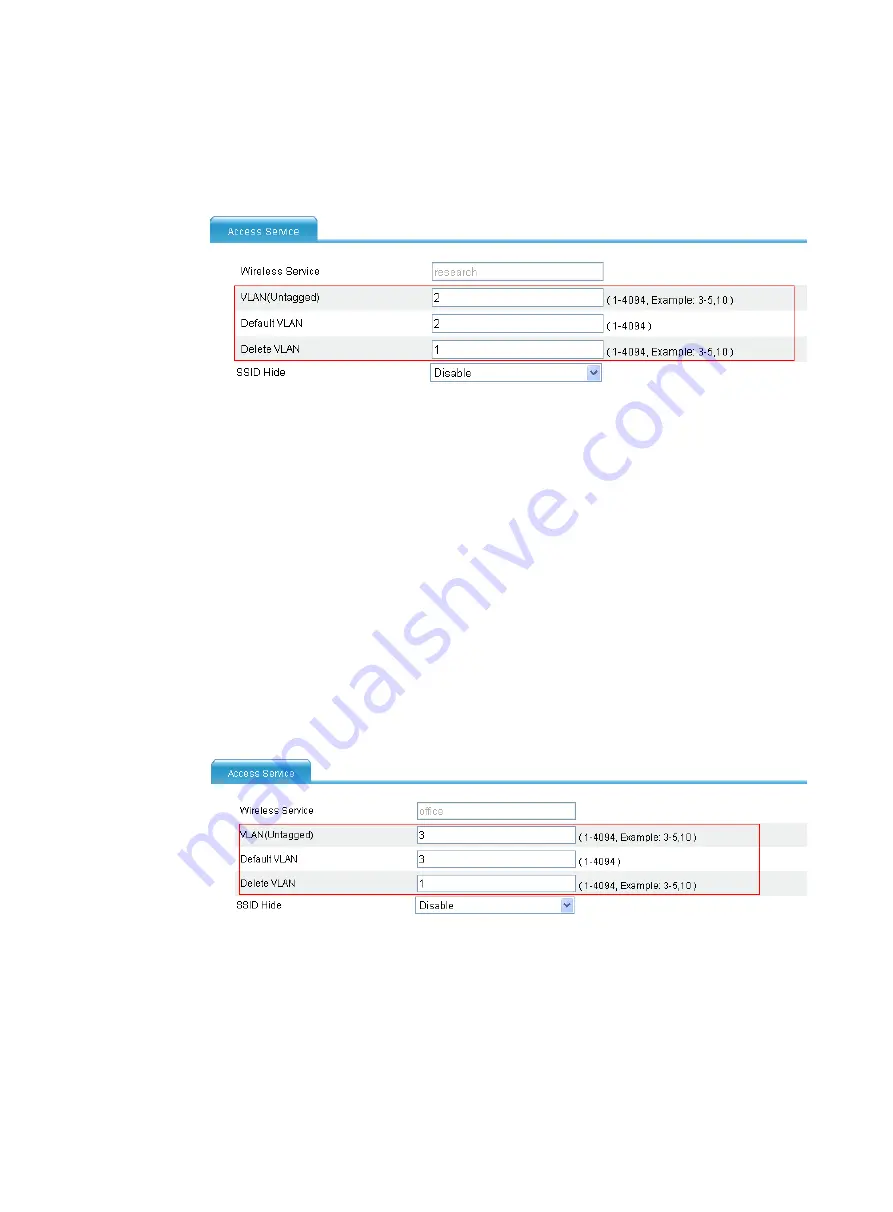
Figure 63
Setting the VLANs
e.
Type
2
in the
VLAN (Untagged)
input box.
f.
Type
2
in the
Default VLAN
input box.
g.
Type
1
in the
Delete VLAN
input box.
For PSK-related configuration, see "
PSK authentication configuration example
." You can
strictly follow the configuration example to configure the PSK configuration.
2.
Configure a wireless service named
office
.
a.
Select
Interface Setup
>
Wireless
>
Access Service
from the navigation tree.
b.
Click
Create
.
c.
Configure the wireless service name as
office
, and select the wireless service type
clear
.
d.
Click
Apply
.
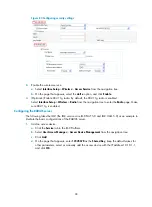
After the wireless service is created, the system is automatically navigated to the wireless
service page, where you can configure the VLANs (first select
Network
>
VLAN
from the
navigation tree, and create VLAN 3).
Figure 64
Setting the VLANs
e.
Type
3
in the
VLAN (Untagged)
field.
f.
Type
3
in the
Default VLAN
field.
g.
Type
1
in the
Delete VLAN
field.
h.
Click
Apply
.
3.
Verify the configuration
If you select
Interface Setup
>
Wireless
>
Summary
from the navigation tree, and click the
Client
tab, you can view the online clients.
Содержание MSR SERIES
Страница 17: ...xv Documents 835 Websites 835 Conventions 836 Index 838 ...
Страница 20: ...3 Figure 3 Initial page of the Web interface ...
Страница 42: ...25 Figure 13 Firefox Web browser setting ...
Страница 59: ...42 Figure 27 Checking the basic service configuration ...
Страница 73: ...56 Figure 35 Sample interface statistics ...
Страница 156: ...139 Figure 139 Rebooting the 3G modem ...
Страница 168: ...151 Figure 152 Configuring Web server 2 ...
Страница 174: ...157 Figure 158 Configure the URL filtering function ...
Страница 187: ...170 Upon detecting the Land or Smurf attack on Ethernet 0 2 Router outputs an alarm log and drops the attack packet ...
Страница 242: ...225 Figure 233 Enabling the DHCP client on interface Ethernet 0 1 ...
Страница 247: ...230 Figure 236 The page for configuring an advanced IPv4 ACL ...
Страница 255: ...238 Figure 241 Advanced limit setting ...
Страница 298: ...281 e Click Apply 2 Configure Router B in the same way Router A is configured ...
Страница 354: ...337 Figure 339 Configuring a login control rule so Host B cannot access Router through the Web ...
Страница 400: ...383 Figure 387 Verifying the configuration ...
Страница 405: ...388 ...
Страница 523: ...506 Figure 530 Ping configuration page ...
Страница 538: ...521 a Click Device A on the topology diagram b Click Ethernet 0 2 on the panel diagram c Click Port Guard ...
Страница 744: ...727 Verifying the configuration In the case that the IP network is unavailable calls can be made over PSTN ...
Страница 775: ...758 Figure 785 Configuring a jump node ...
Страница 791: ...774 Figure 801 Configuring a jump node ...


